Thanks for purchasing a ZTE MU5120 device from IQ Mobile. To get started on configuring your new device you need to go through the following steps.
Step 1
Please unbox the device, check all the parts are present and insert the SIM as per the below images.
Parts include - The router, charge cable and plug, quick start guide and USB to Ethernet Adaptor.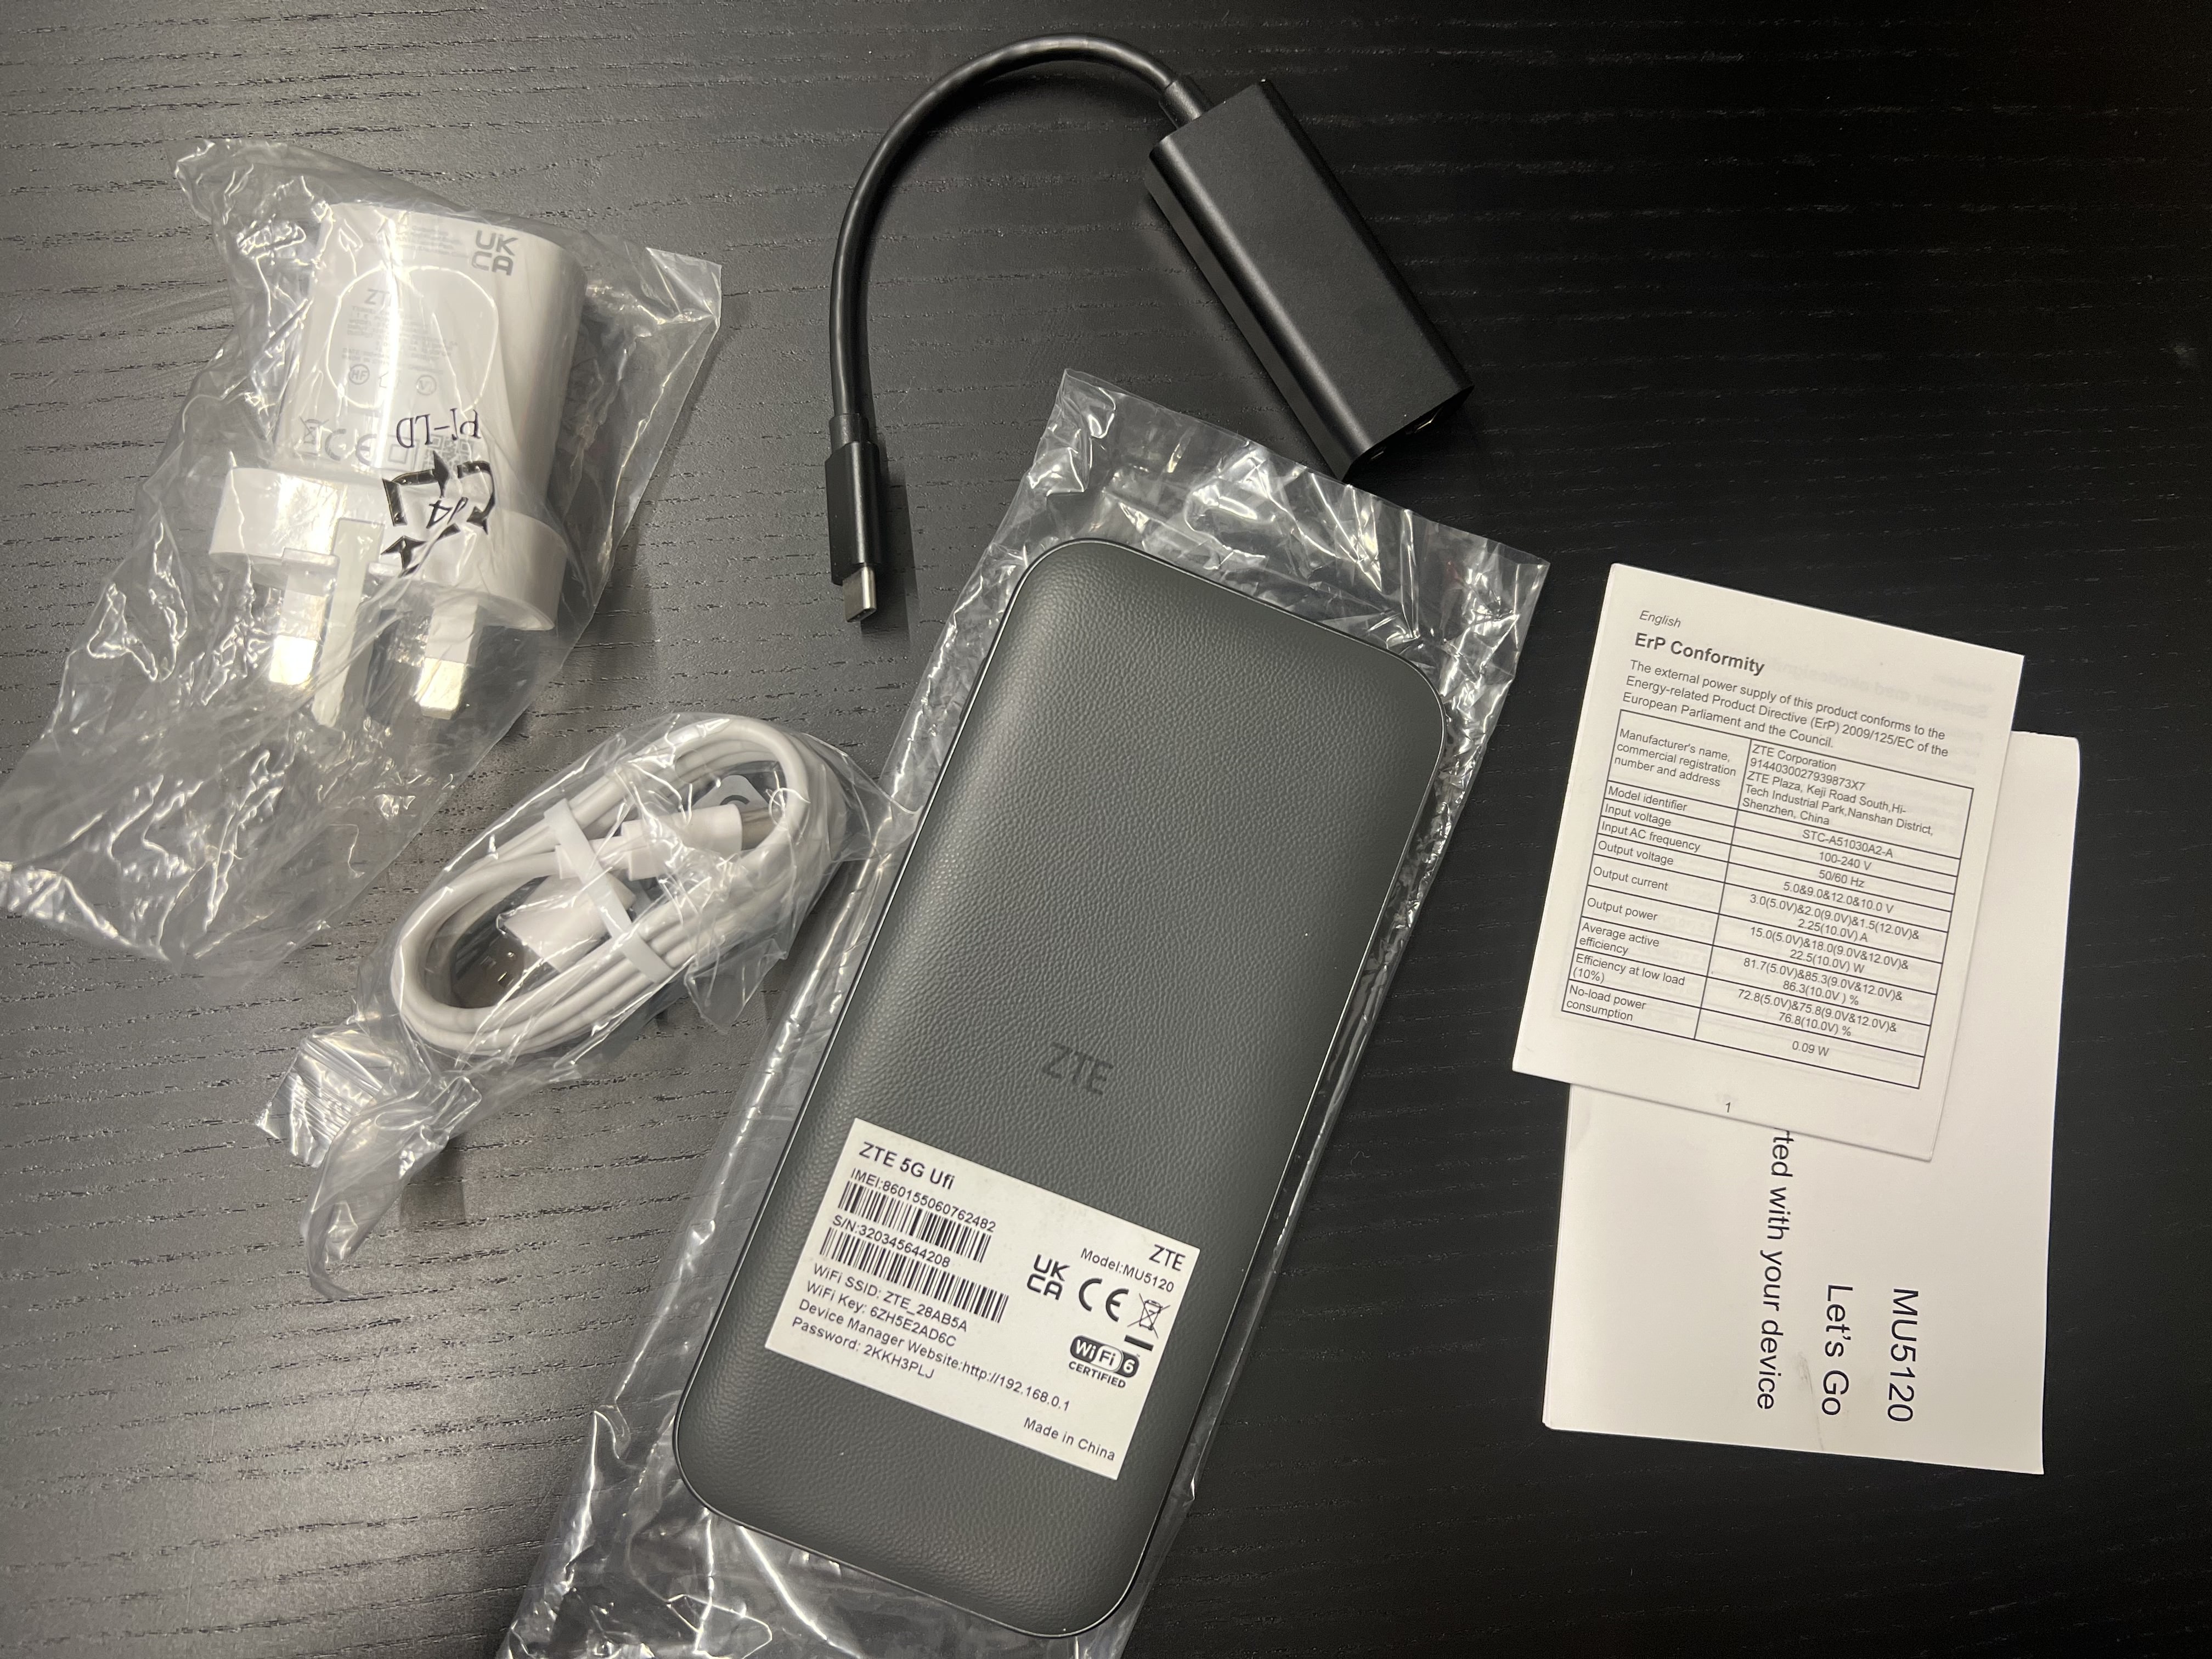
If the device is lying flat, screen face up, then on the left hand side you will notice a flap that is worded 'RESET' - This peels back.
You will notice in the image below that the SIM will only fit one way. The corner is cut off as represented by the little picture of the SIM where the yellow arrow is pointing. Take the SIM and push it into the slot once you're confident it is in the same direction as the illustration.
 | 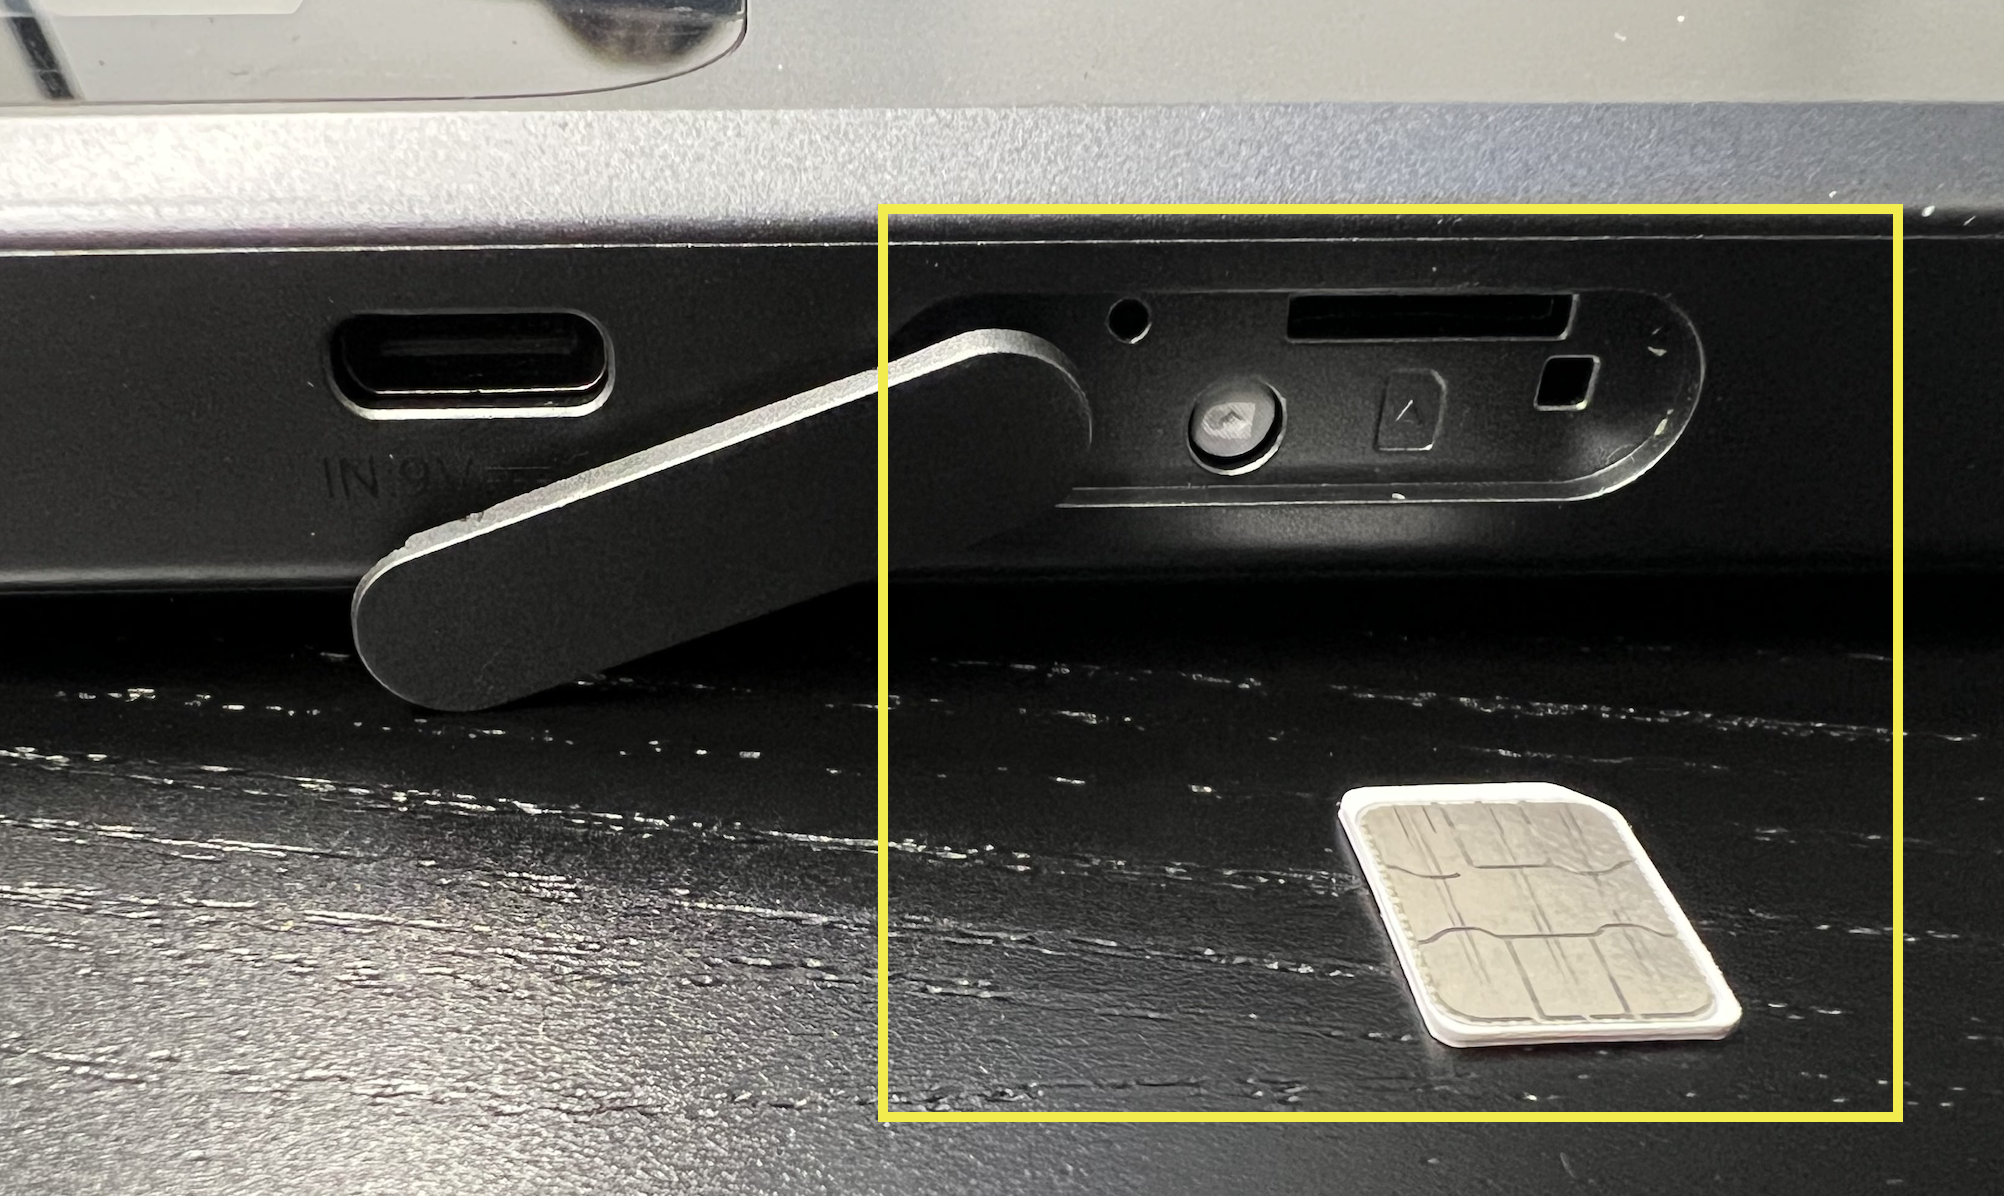 |
The SIM is a NANO SIM for this device which is the smallest cut out from the SIMs original housing. Just pop it out until it is the smallest version.
Step 2
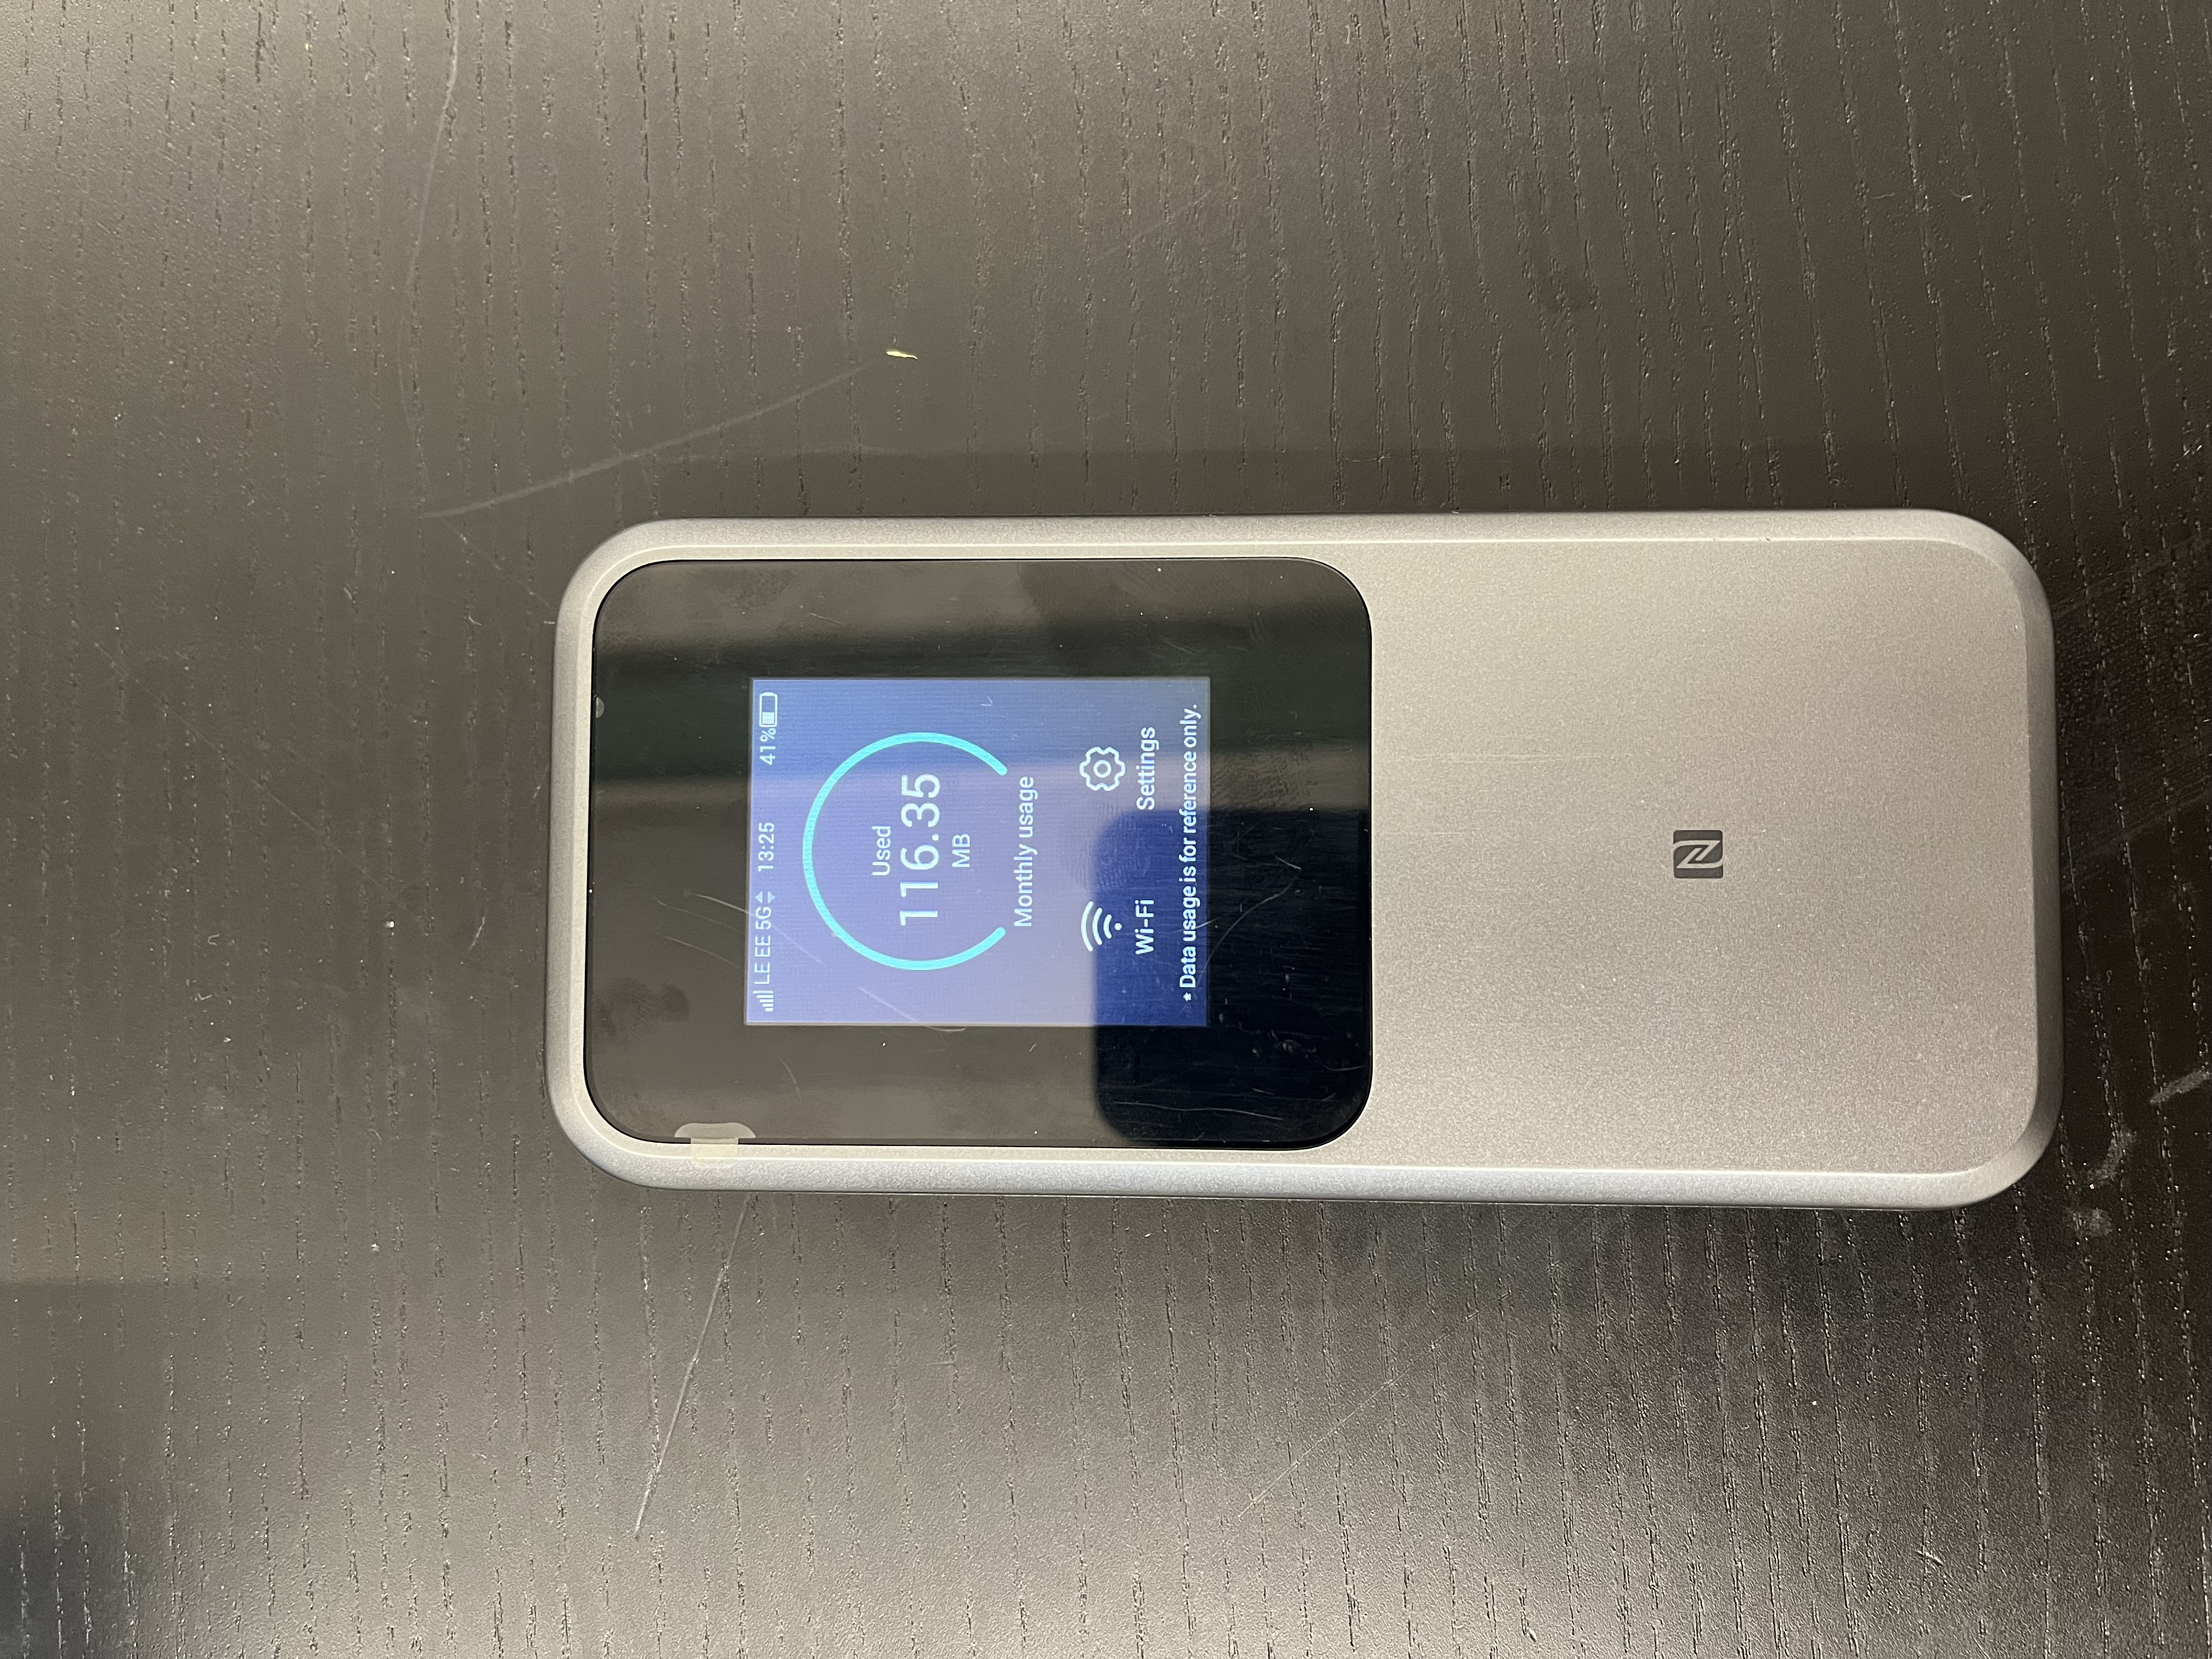
Once the SIM is inserted into the device it turn it on, the on/off button is located on the right hand side of the device.
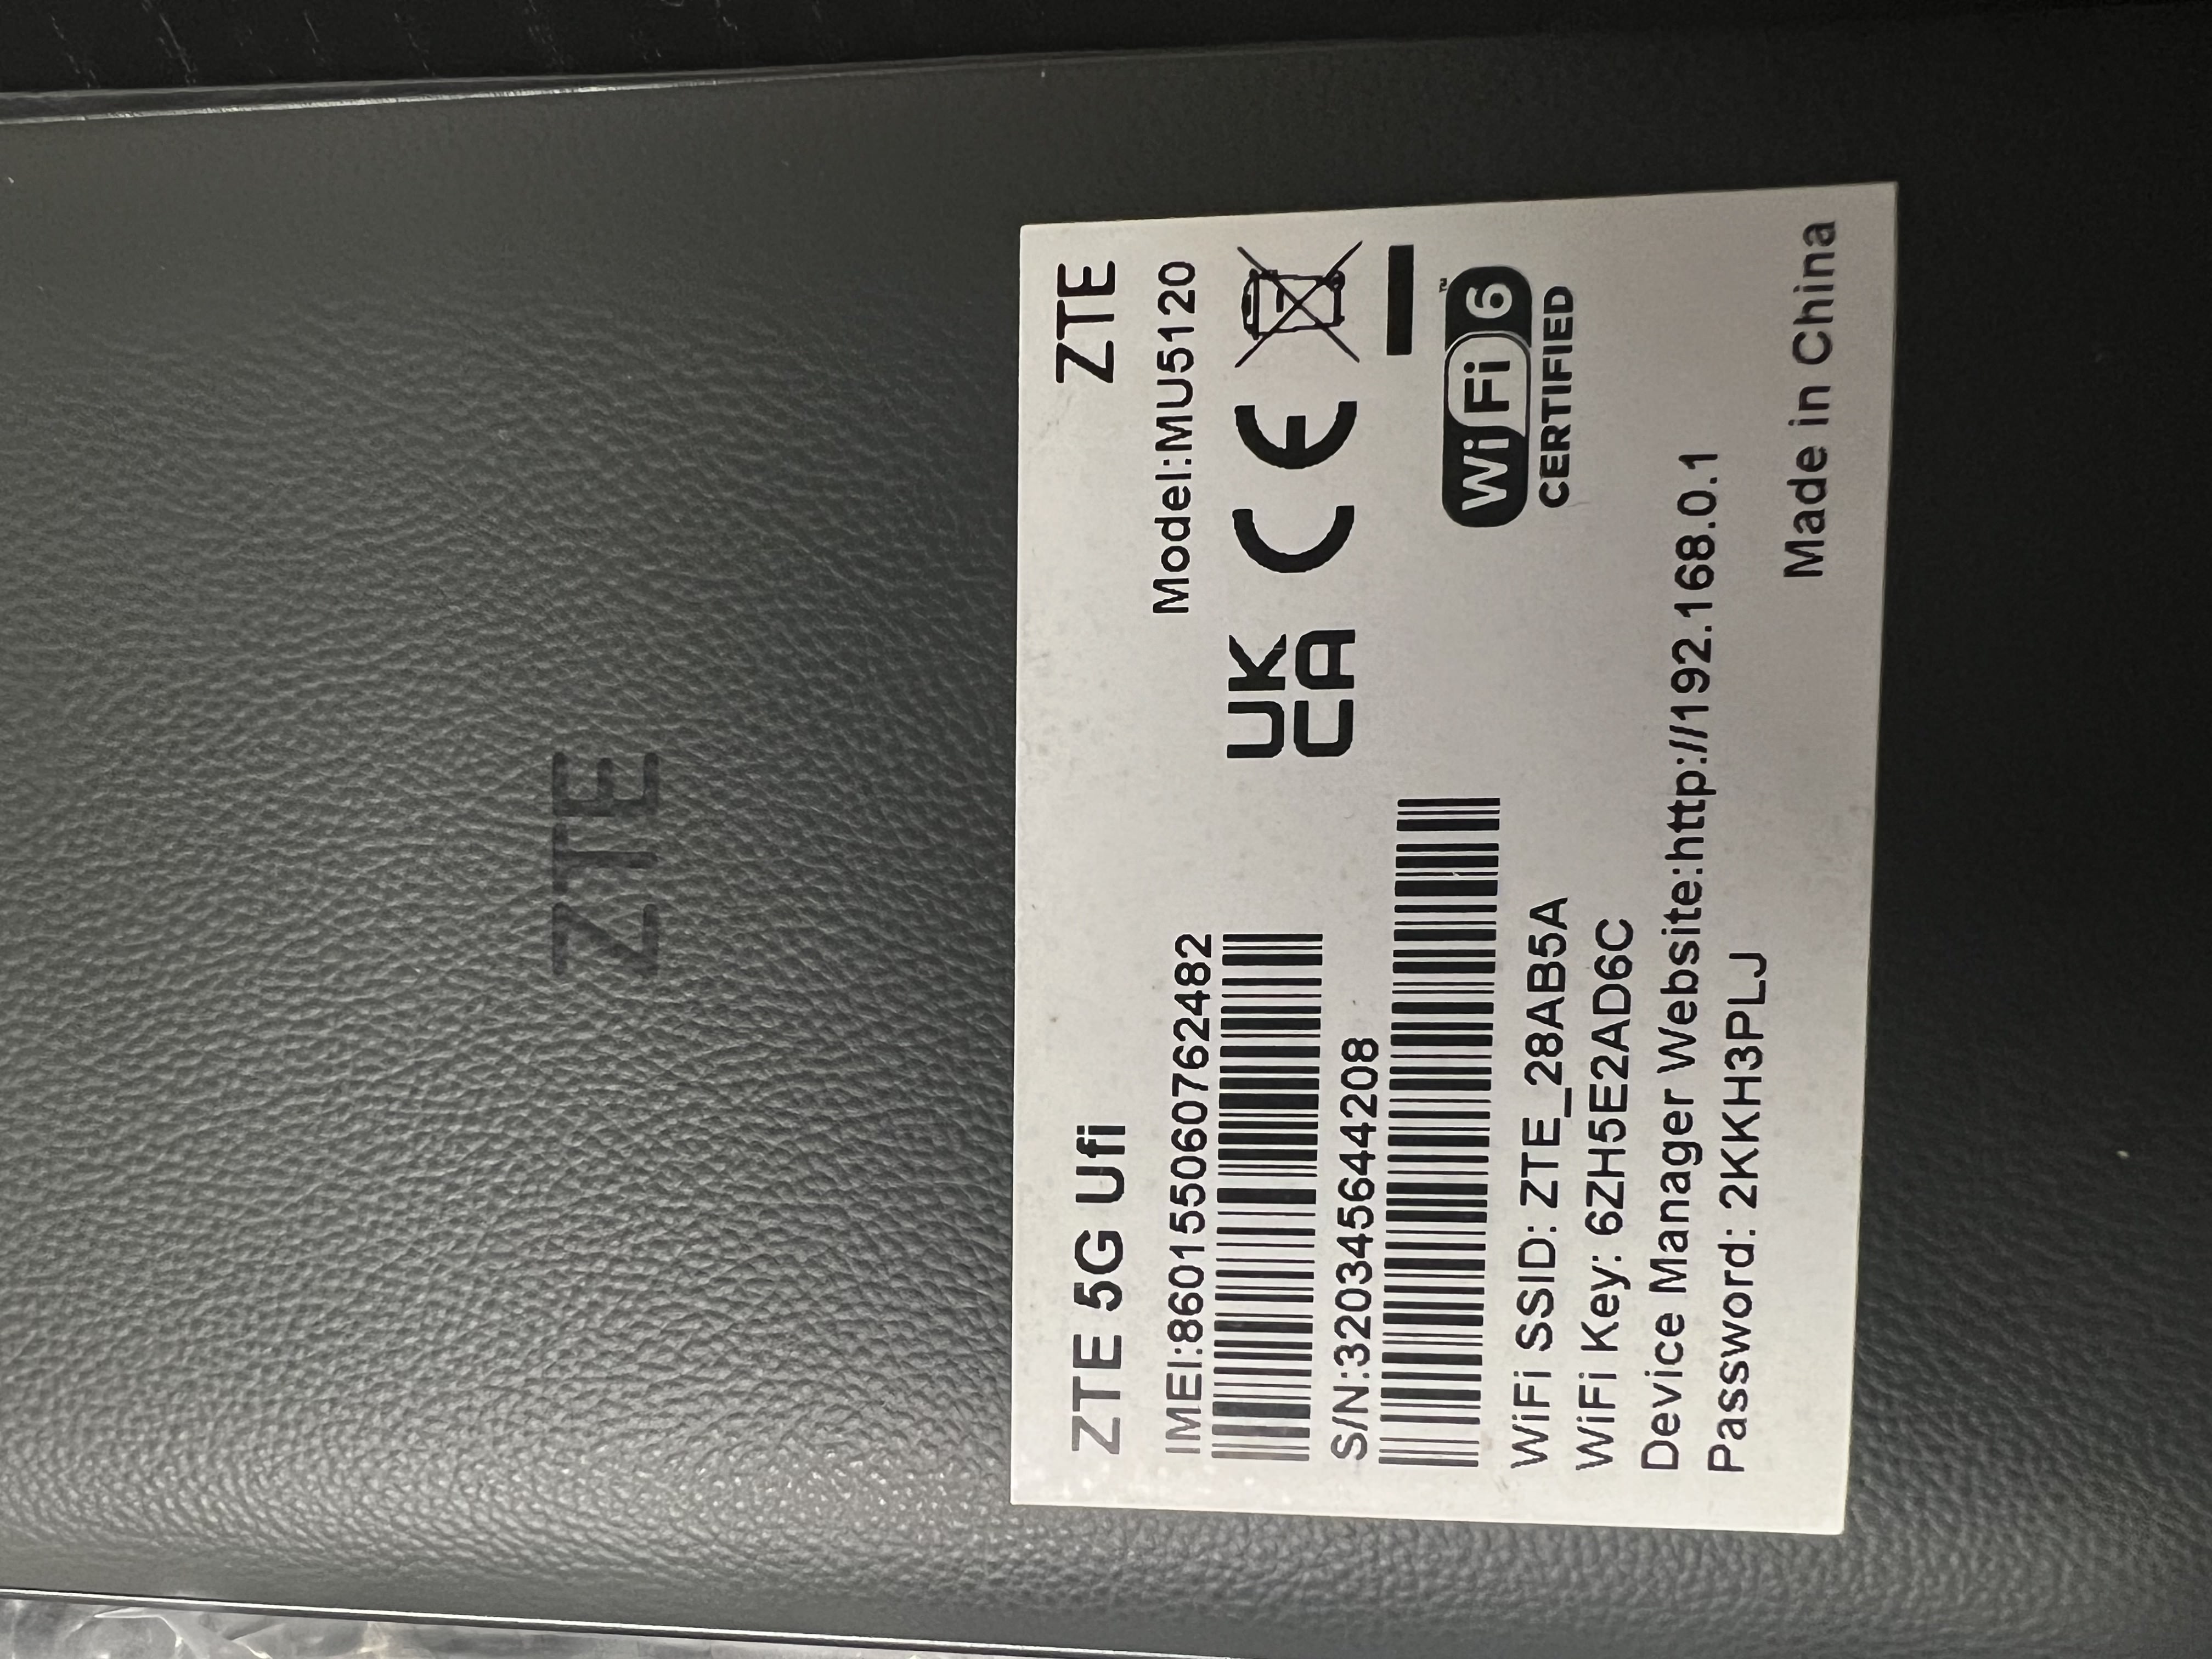 | 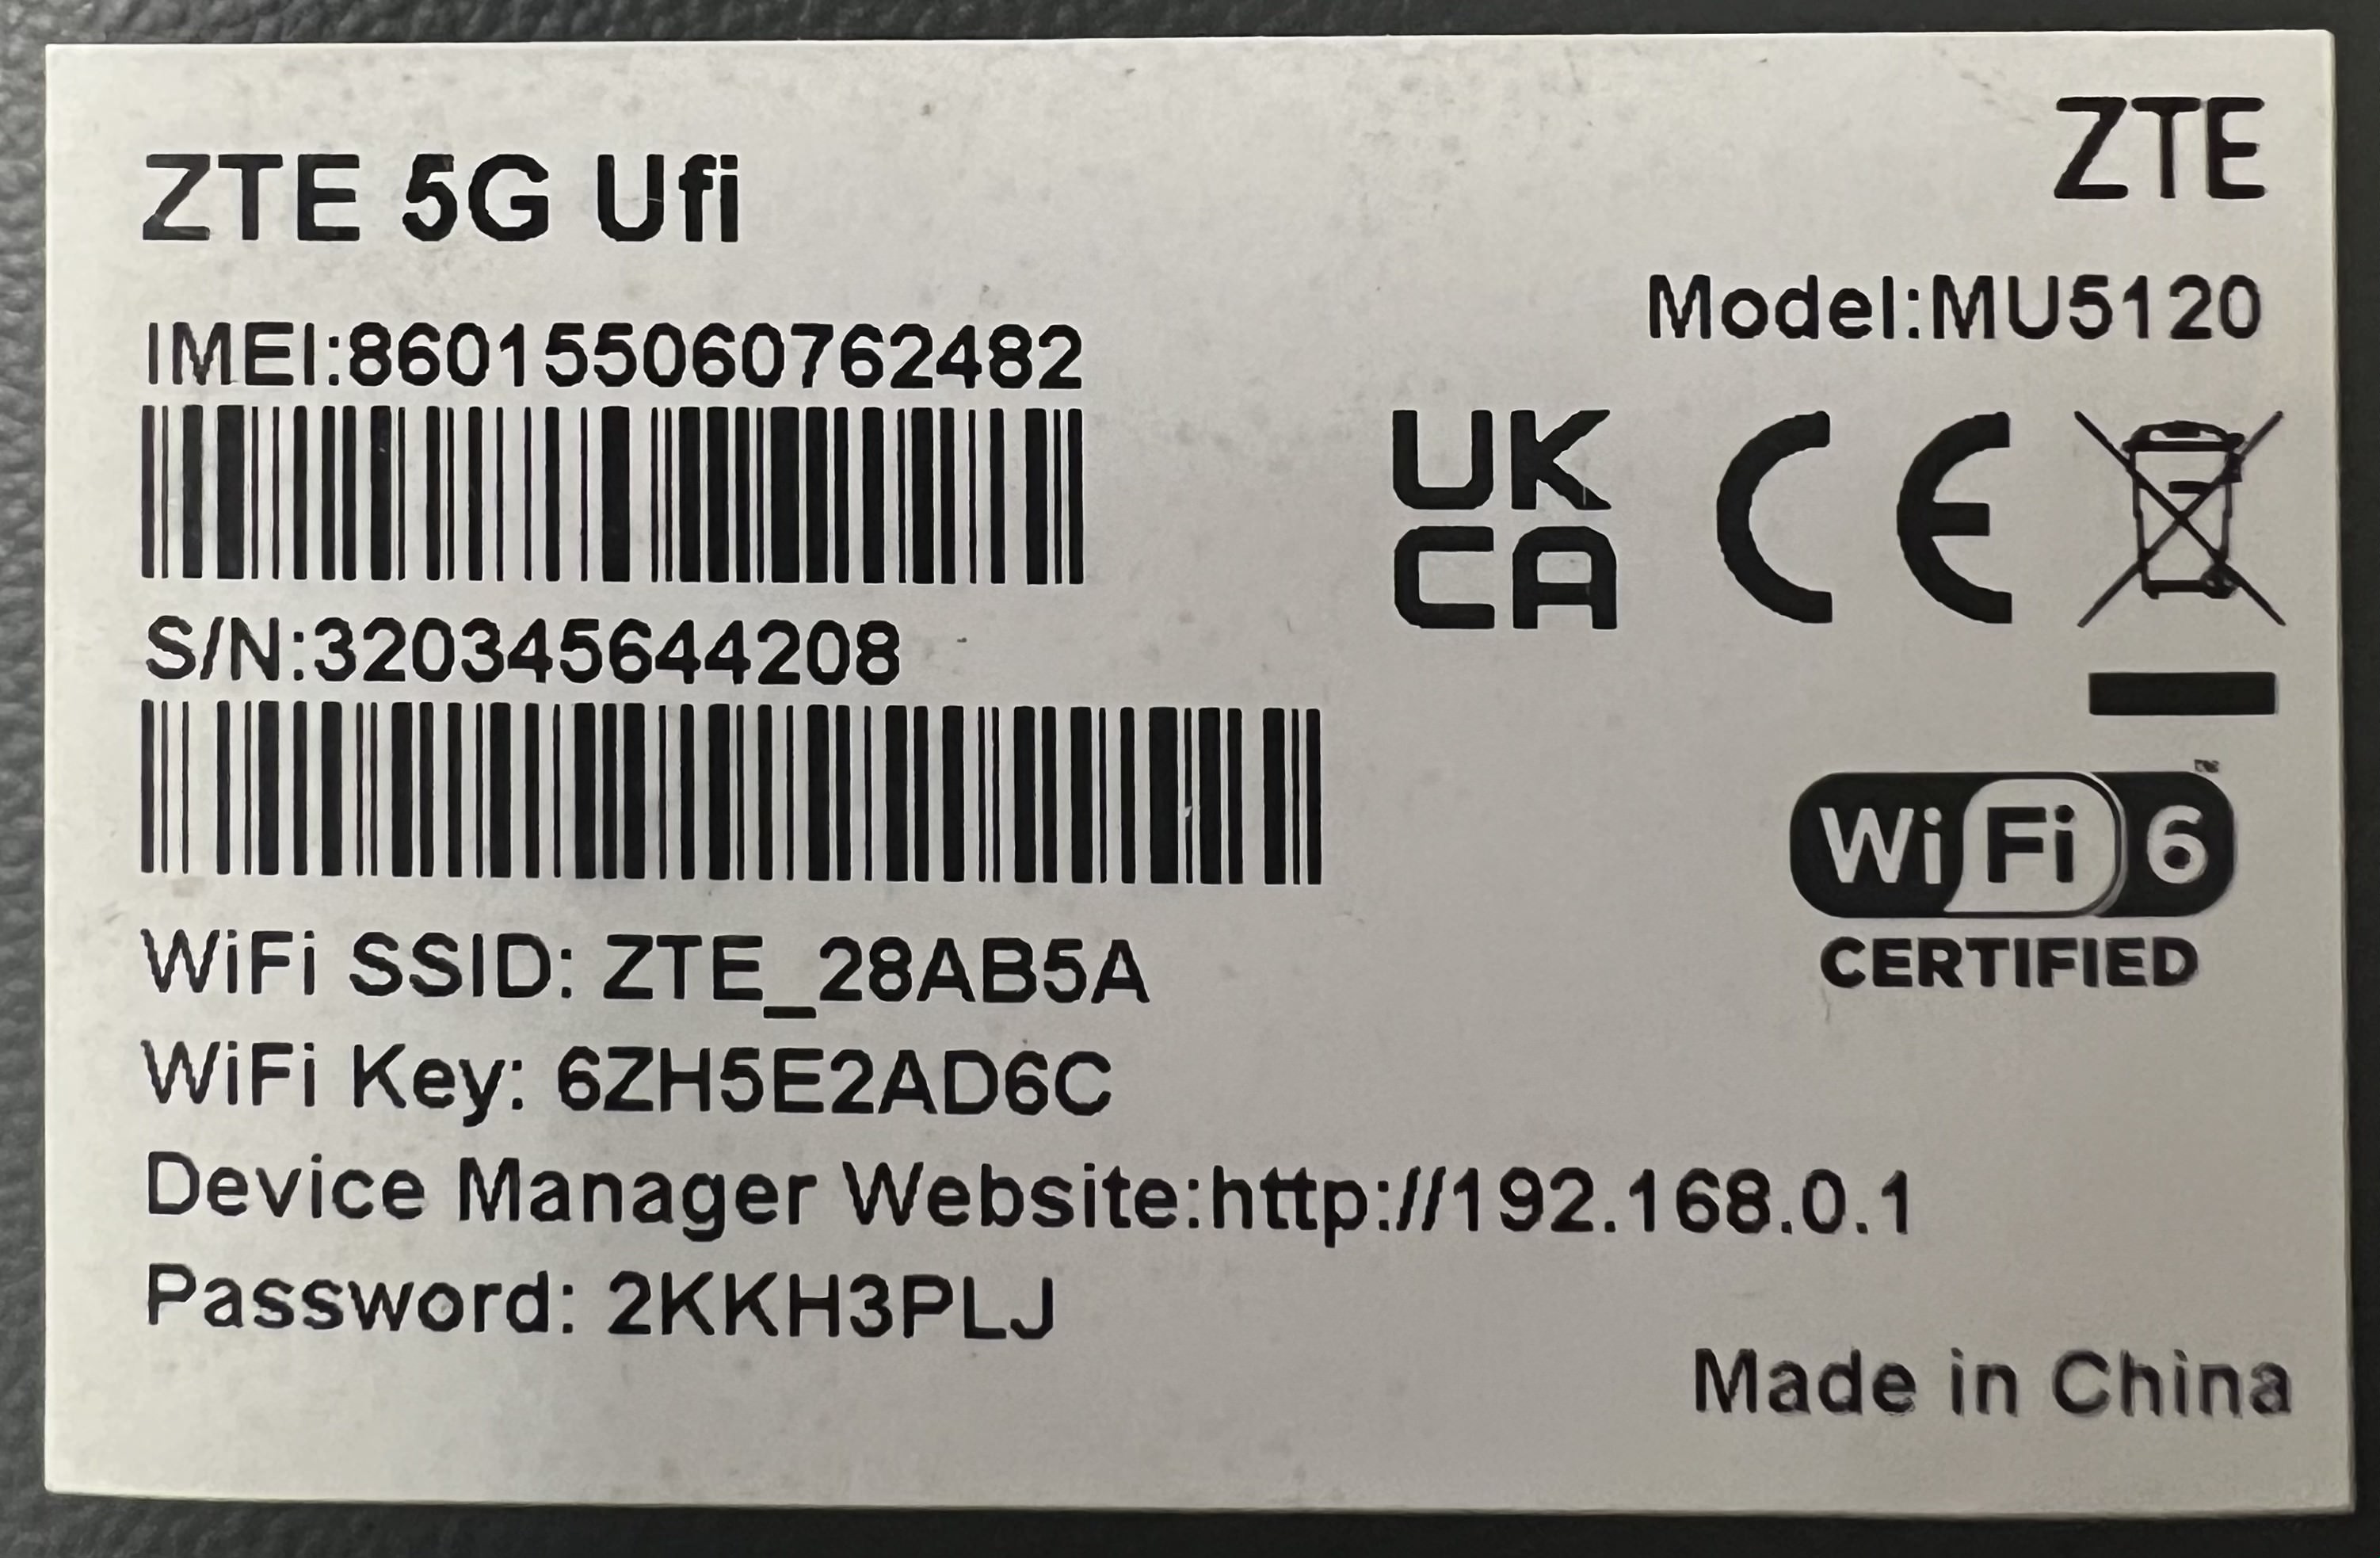 |
This sticker shows four bits of key information which you should make a note of.
WiFi SSID - This is the name of the Wi-Fi network and will be what you're looking for when connecting to the Wi-Fi from your devices such as your mobiles, tablets, laptops, smart speakers, satnavs and any device you're trying to use on the internet with this Wi-Fi device. Please note ours here is called ZTE_28AB5A yours will vary and may be a similar format but not the same name.
WiFi Key - This is essentially the WiFi password, your devices cannot connect to the WiFi without the WiFi key. So please be careful who you give this information to as you should only allow trusted devices on your WiFi to preserve your data, privacy and data allowances.
In this example, our WiFi key is 6ZH5E2AD6C on your device it will be different.
WebUI IP - http://192.168.0.1 - This is the address you will use to access the web portal for configuring the ZTE U10 device. NB: it is extremely important that when you are trying to access this page to manage the router settings that you are connected to the ZTE's WiFi network or it will not be possible.
Password - This is the password for logging into the device. Not to be confused with the WiFi password for getting onto it's WiFi signal. You will only need this password for logging into the device when making changes to the settings. Other people do not need this password and should be for the main admin user only. In this example the Password is 2KKH3PLJ and is case sensitive. Yours will be different.
Please note the WiFi Key is the WiFi password, and the Password is the admin password for the actual device when logging into it
Step 3
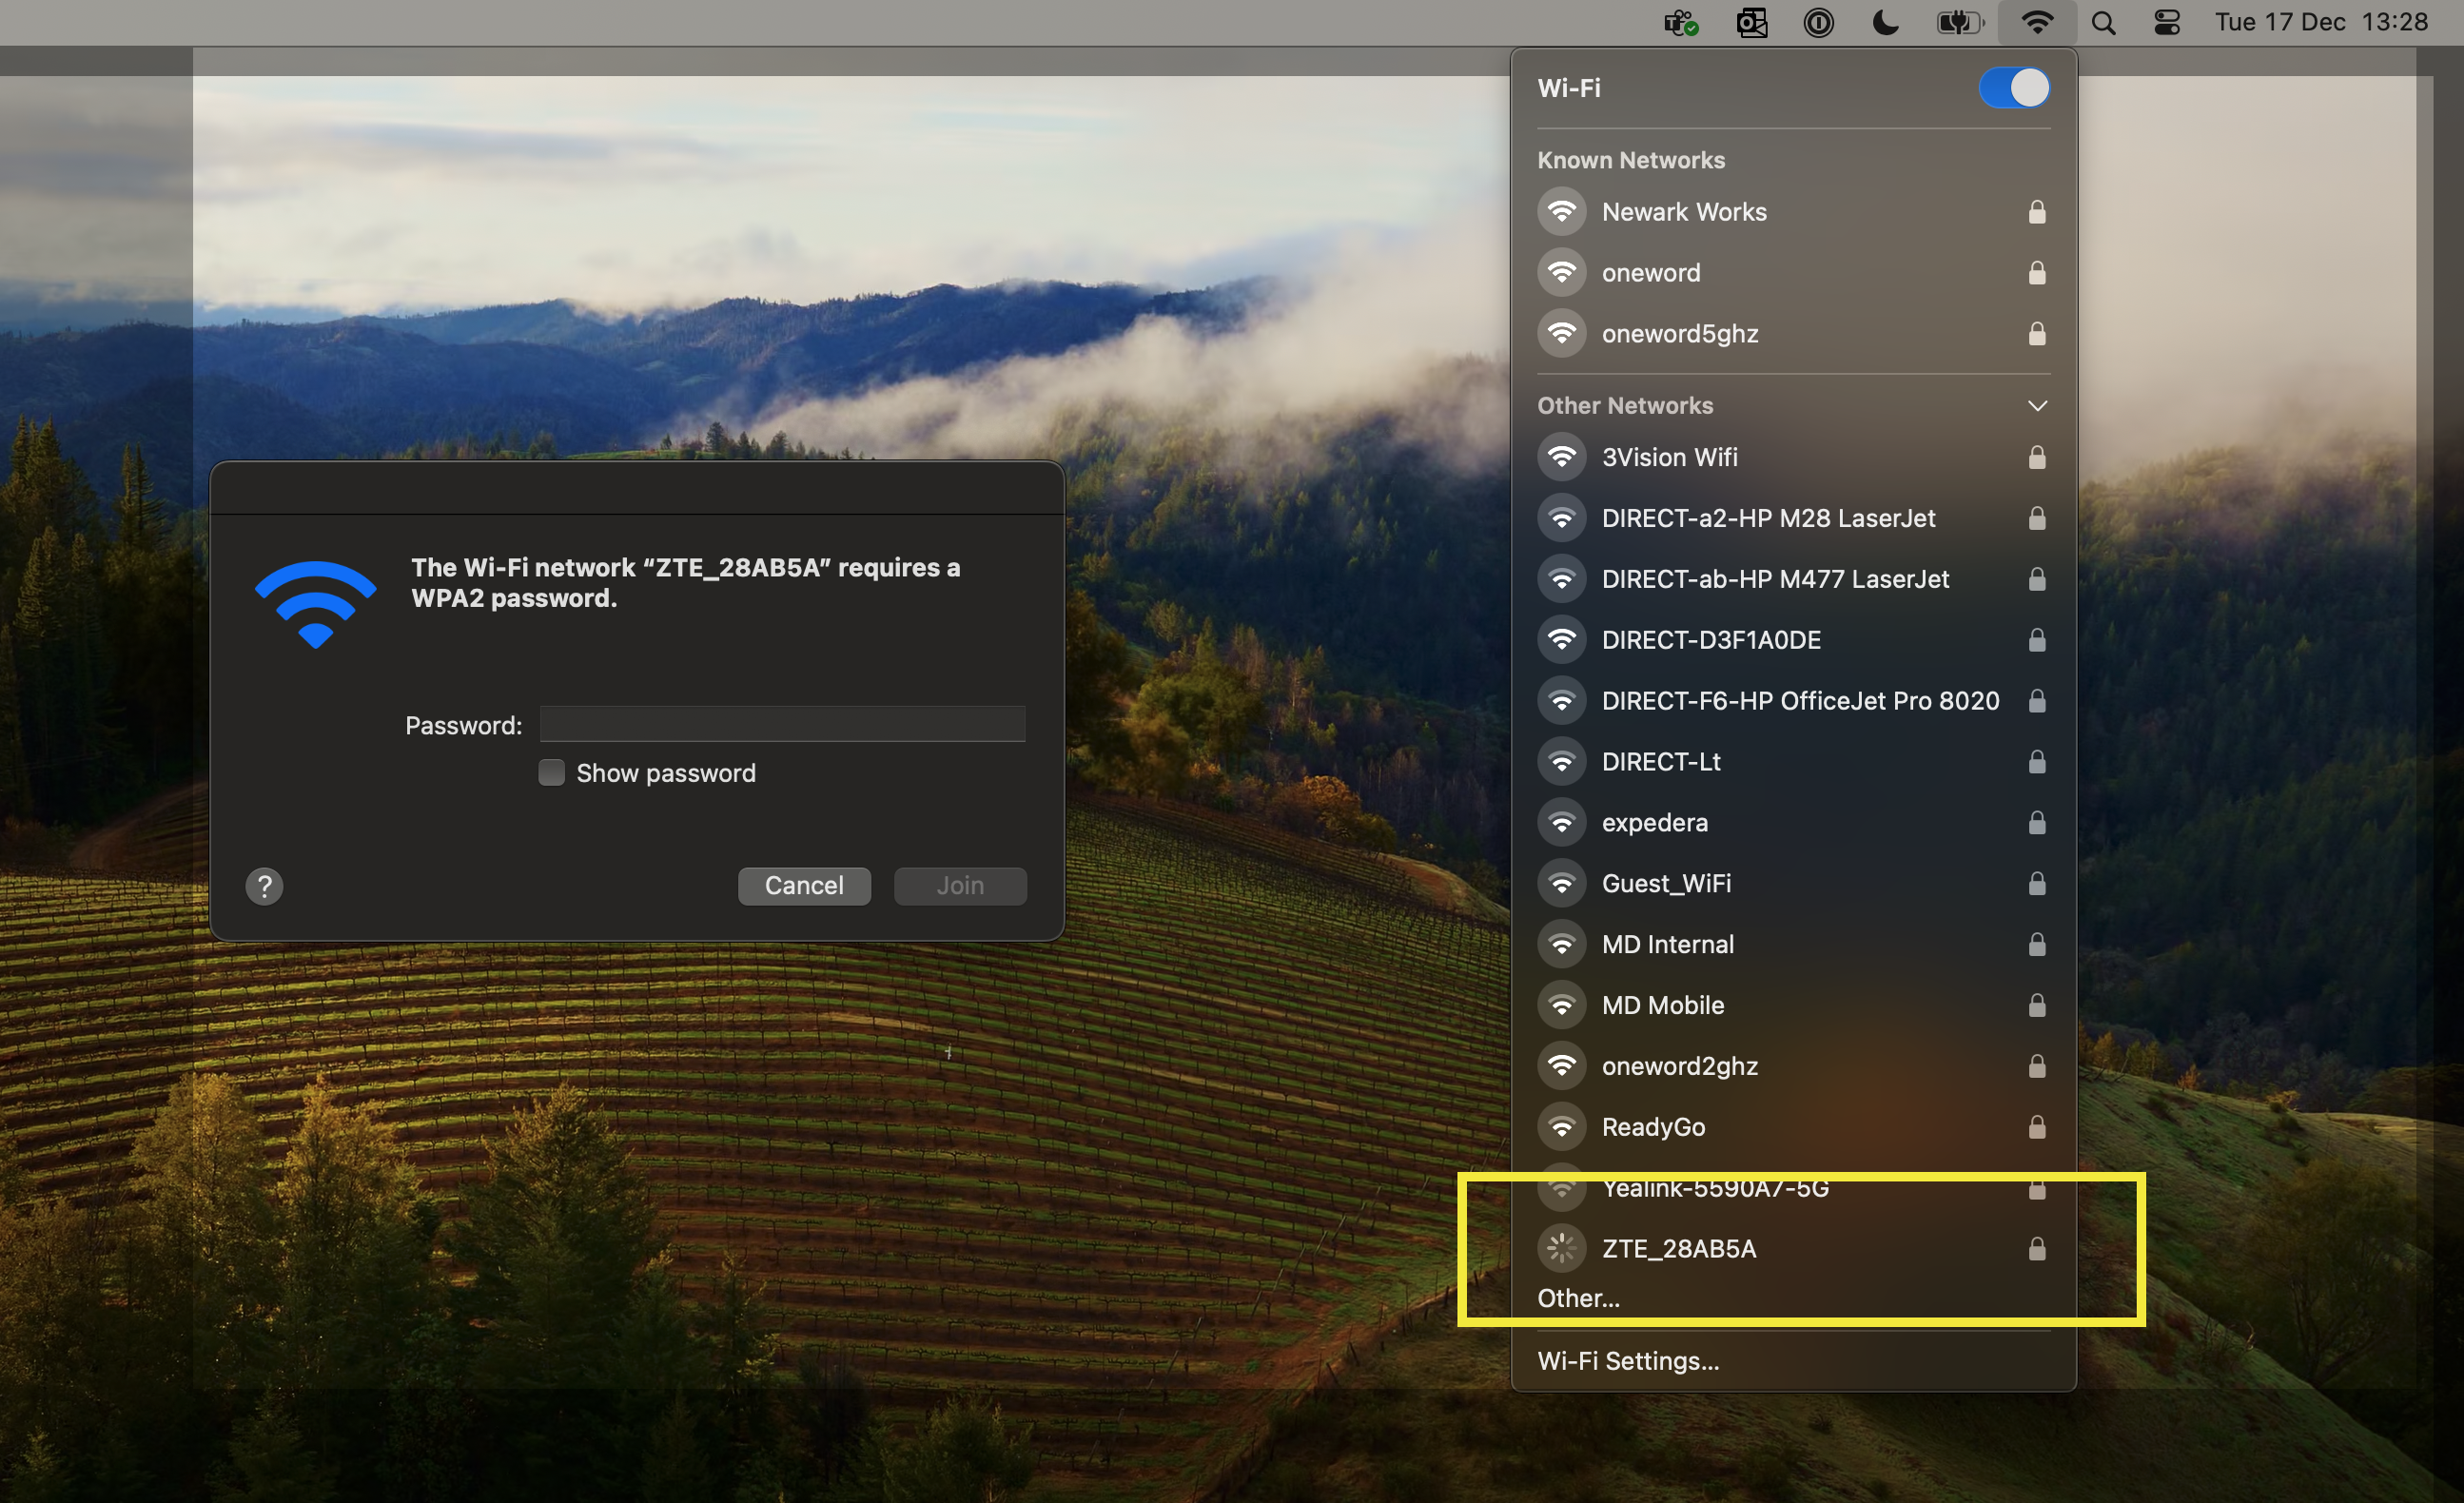
The next step is to switch it on and connect to it's WiFi, This is an important step! Many people try to configure these devices without connecting to it's Wi-Fi.
 |
In this example we have used a laptop, but the principal is the same from a phone, tablet, laptop and doesn't matter if you're Apple, Android or Windows.
- Open the Wi-Fi Menu (on your laptop, tablet or phone)
- Find the ZTE Wi-Fi name, in this case ZTE_215F6B in your case it will look similar but not the same name please refer to the information on the sticker.
- Once clicked it will ask for the WiFi password, in this case known as Wi-Fi Key - 6CD265K52B and obtained from the sticker mentioned earlier.
 |
Step 4
Accessing the interface to check or enter the settings.
- Once connected to it's WiFi, Go to a web browser, it doesn't matter if you are using Safari, Chrome, Firefox or Edge any web browser should be fine. It is imperative you are connected to it's WiFi as per the previous step as this page will not be reachable or accessible if you're on your home WiFi connection.
- Enter the address as http://192.168.0.1 when it finishes loading it should look like the below.
NOTE: When typing this address into the browser it is in the address bar, not a Google search - see the screenshot below:
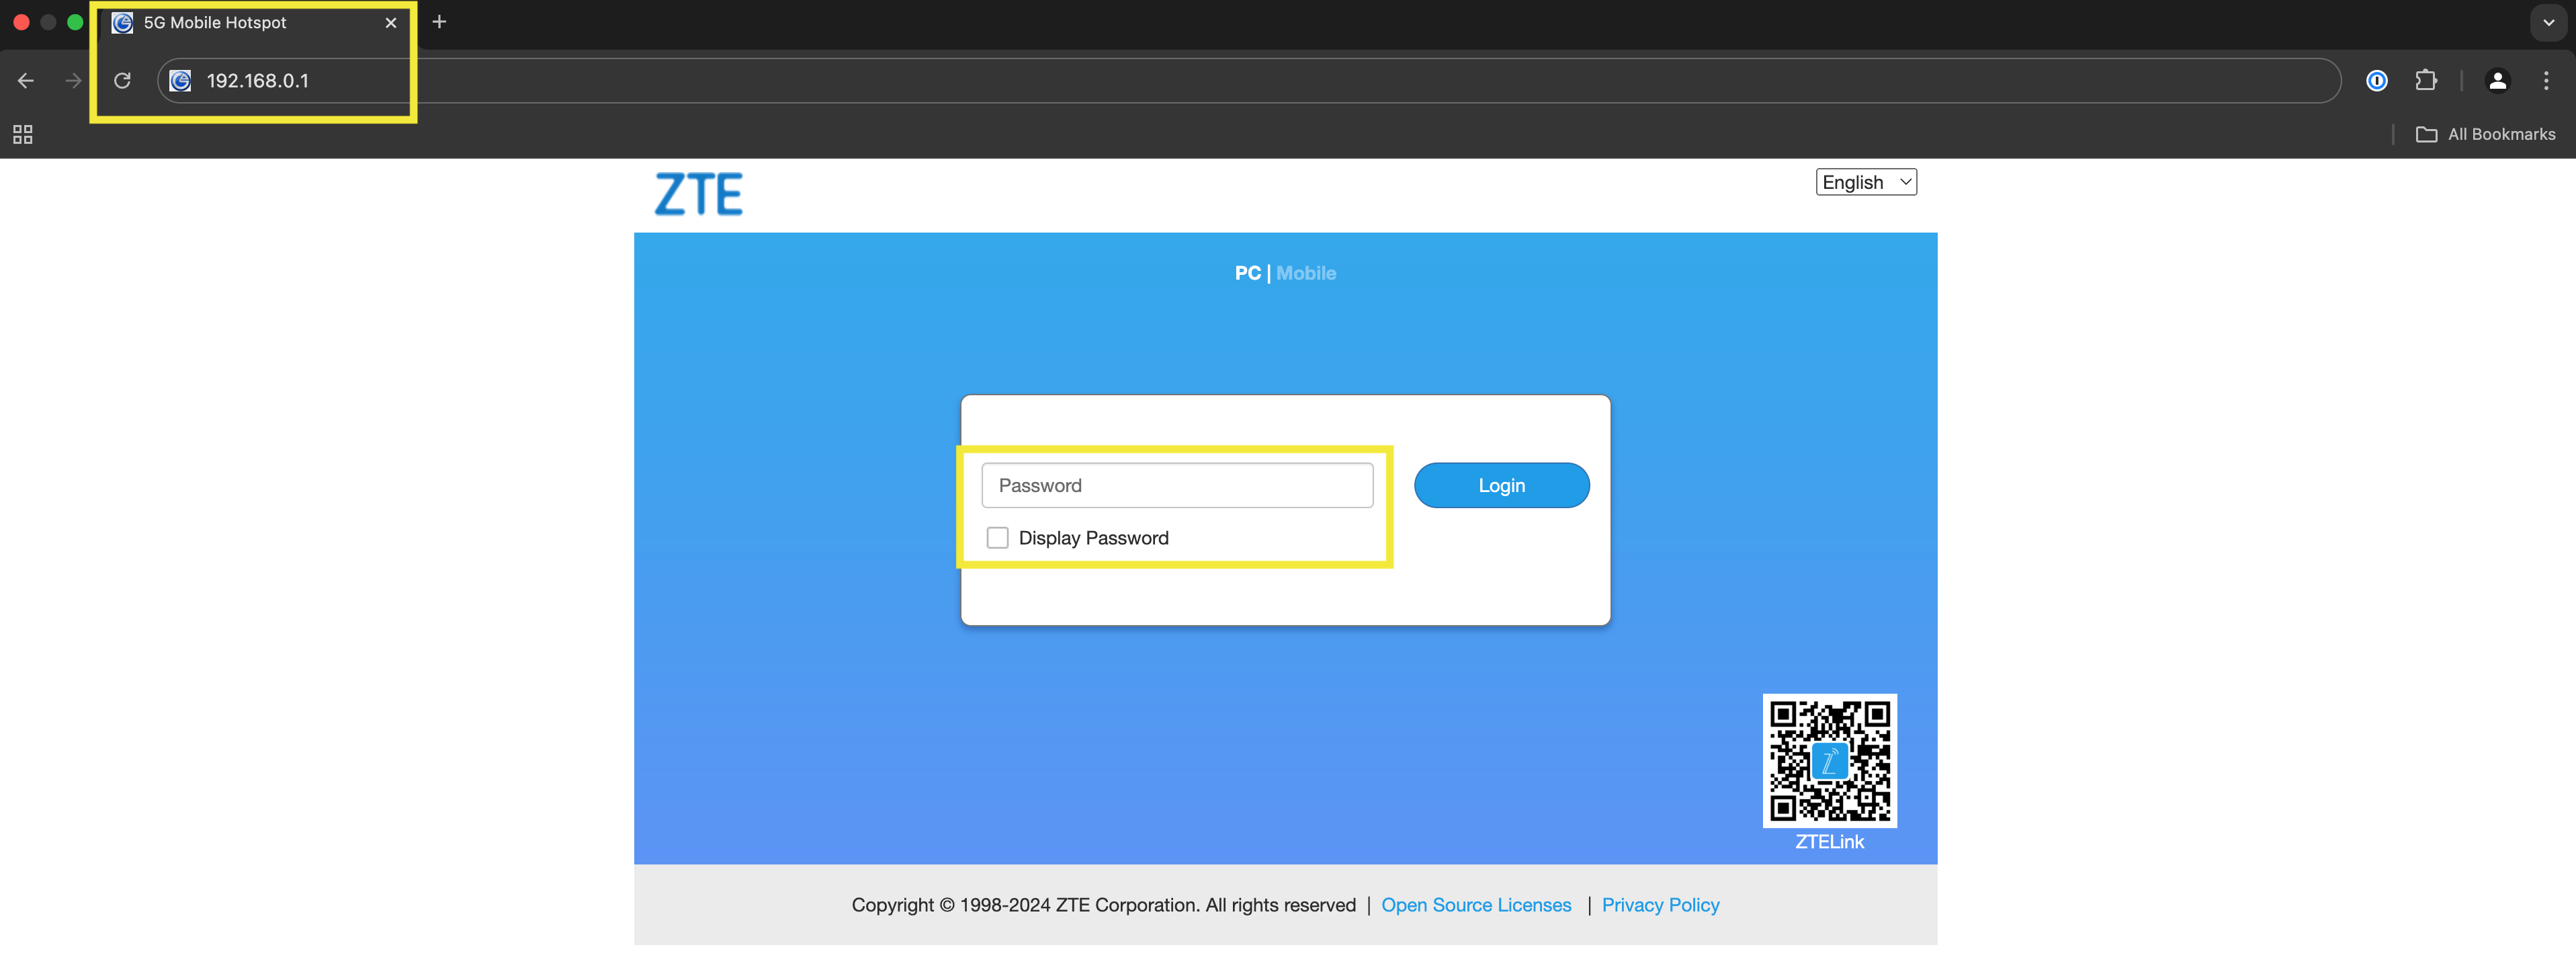 |
When you get to the right screen, you will be prompted for the ZTE password, this is also printed on the sticker as seen above.
Once you're logged in, it should look like the below dashboard.
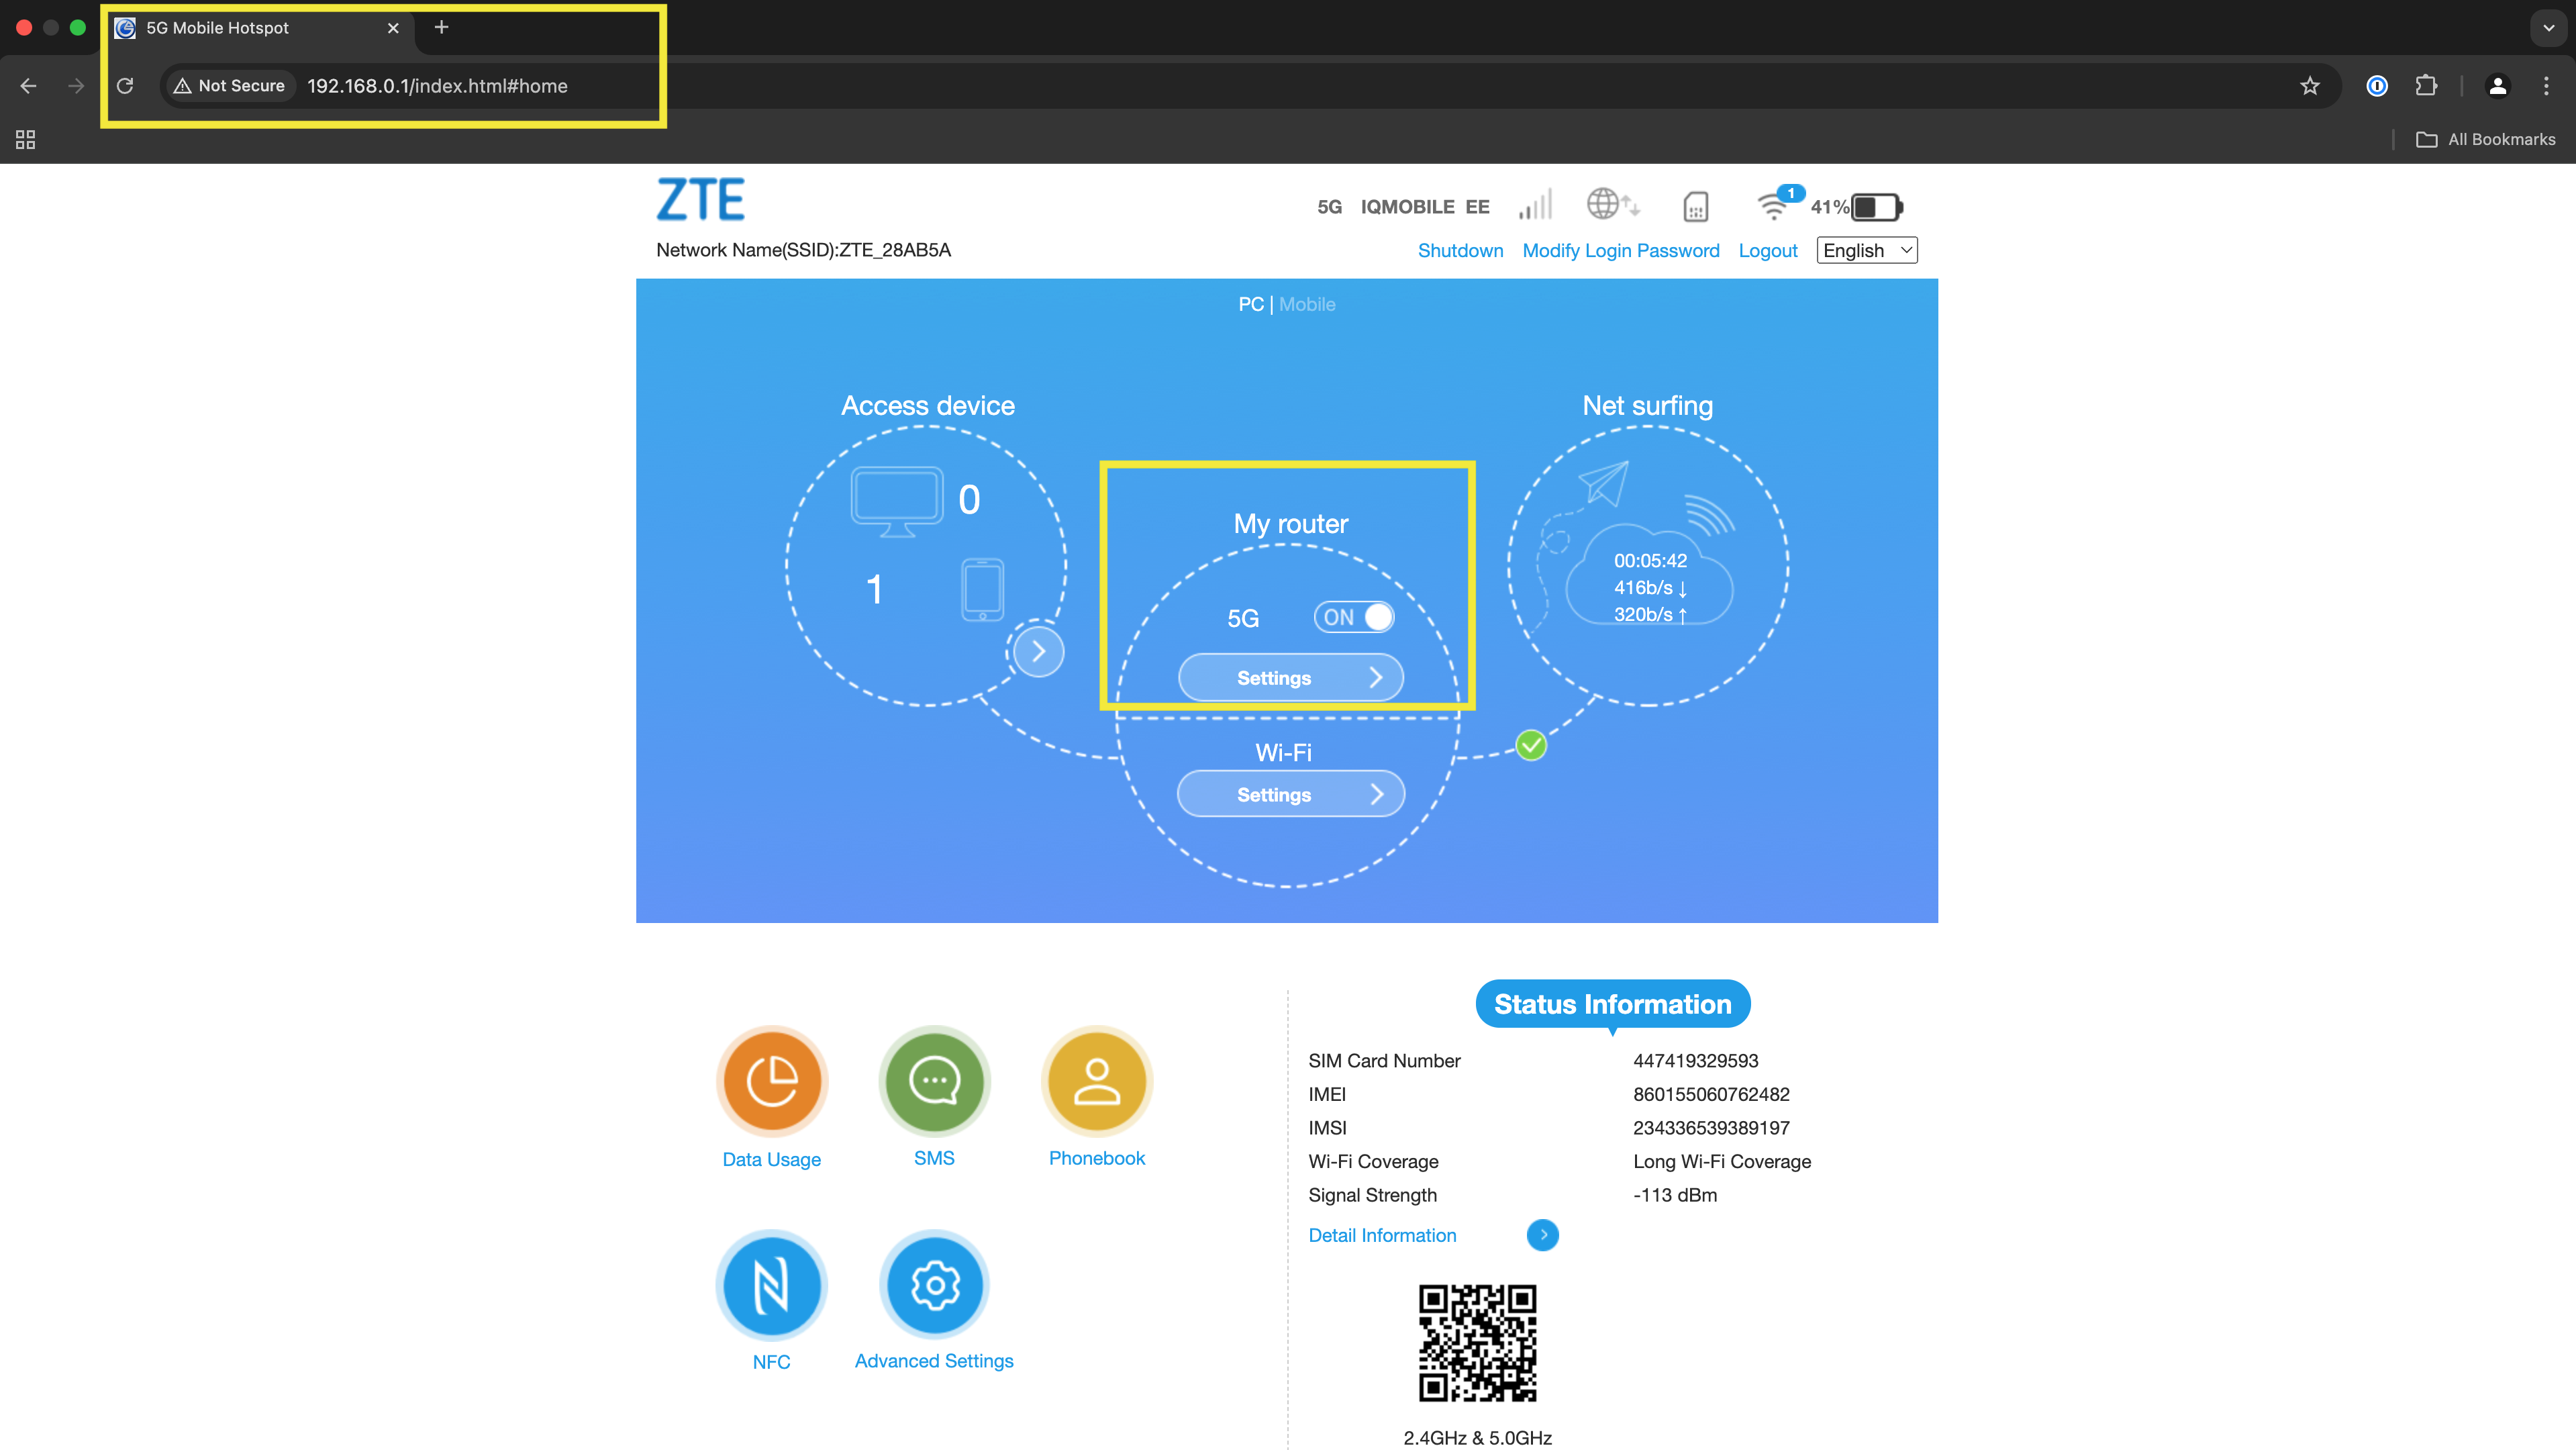
The main menu has various options, buttons and menus. The key areas of note are within the second circle labelled 'My Router' and contains 5G settings and WiFi settings. We will be spending all of our time in the 5G area. Firstly ensuring it is turned on with the toggle. Then we will head over to the 'Settings' button
NOTE: Not the one under WiFi, we are still in the 5G section shown below.
The 5G settings menu, once clicked should look like this:
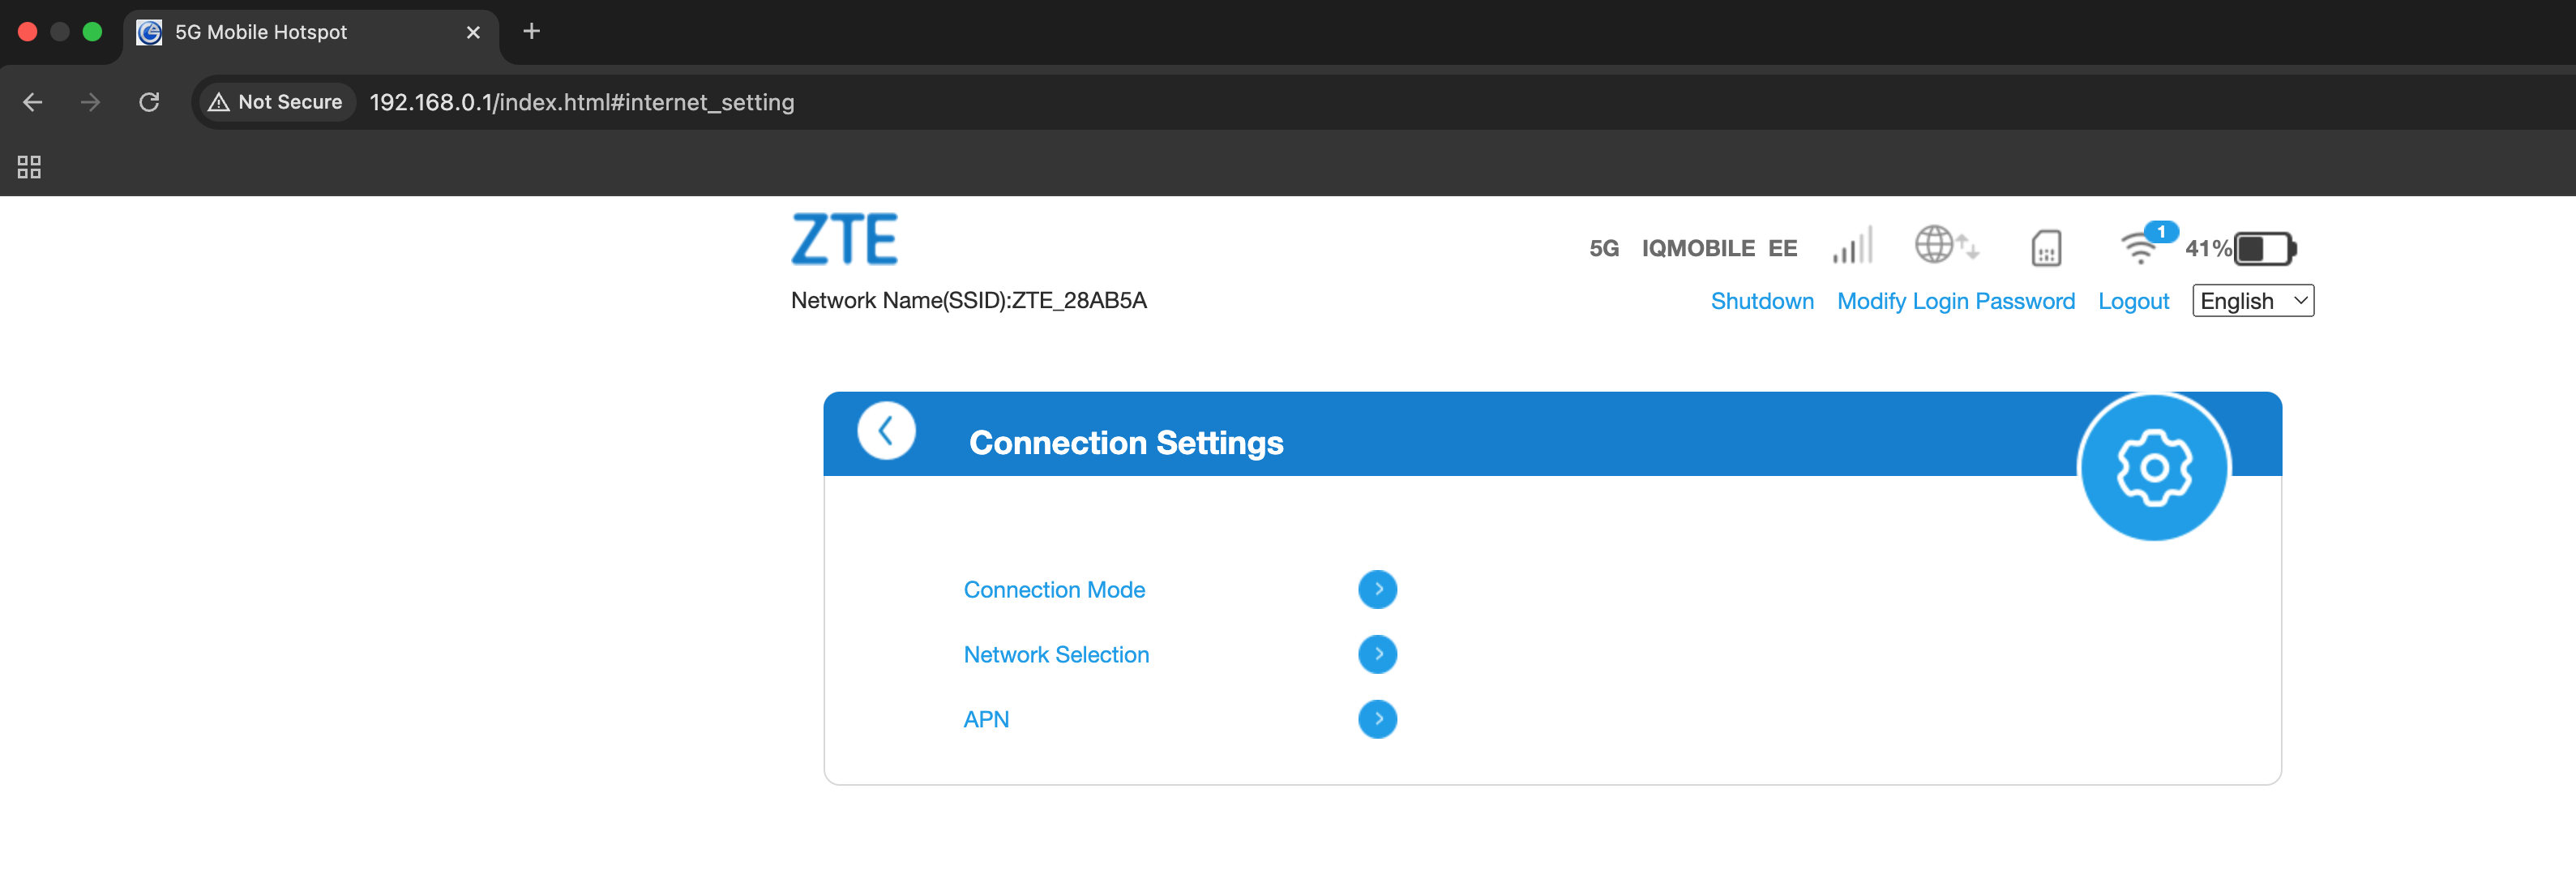 |
These three menus Connection Mode / Network Selection / APN will be detailed in the following section.
The APN is the important part for any data SIM to access the network.
Connection Mode
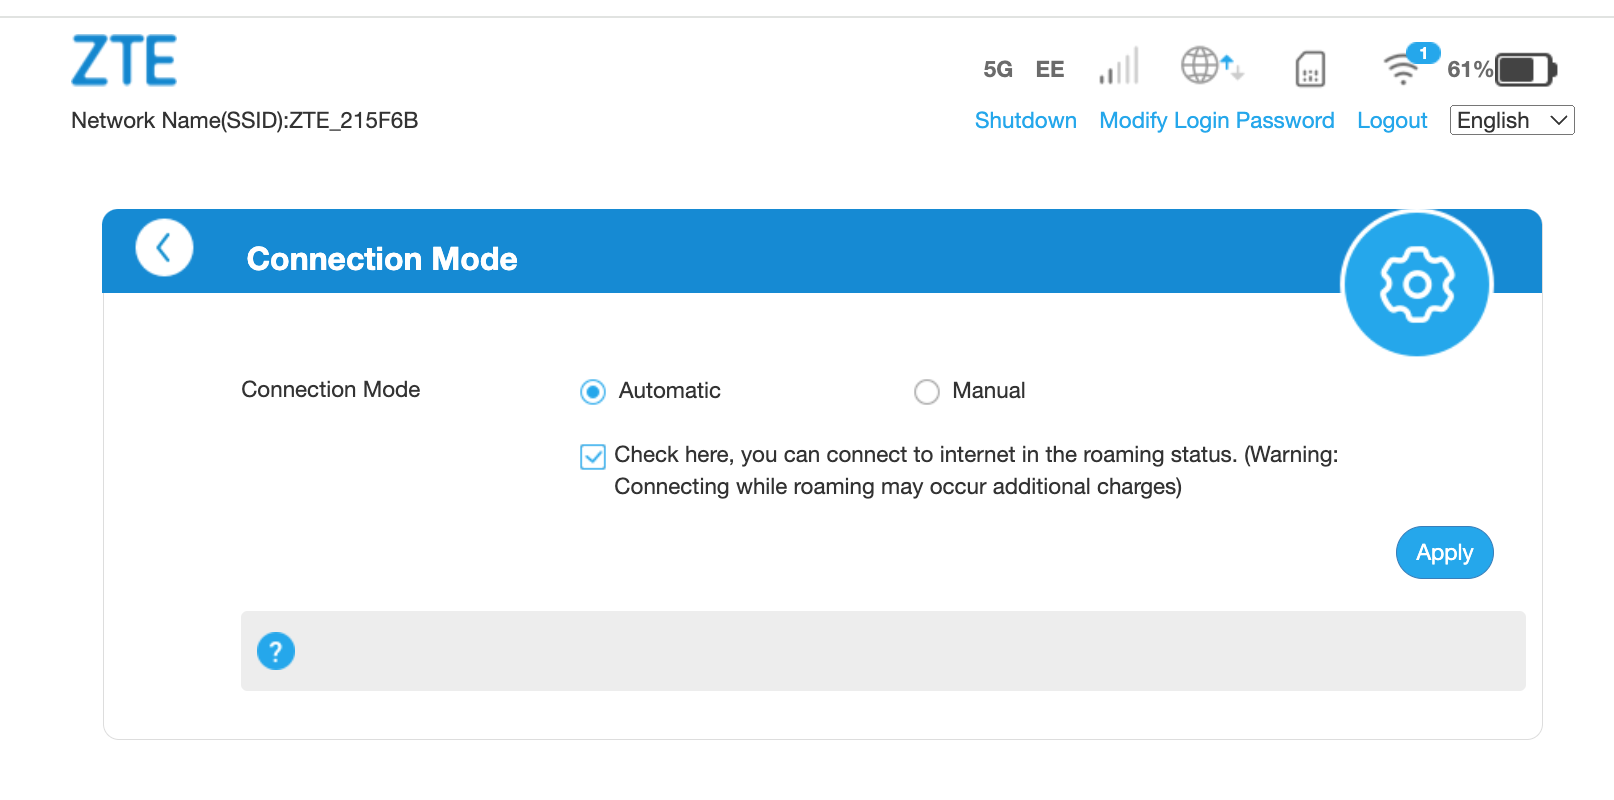 |
Check this box to enable ROAMING, it gives a warning about charges, but if you're using an IQ Mobile data SIM you won't have roaming charges when in Europe as our data is a roam like home service. For roaming charges outside of Europe please visit our other help articles.
Network Selection
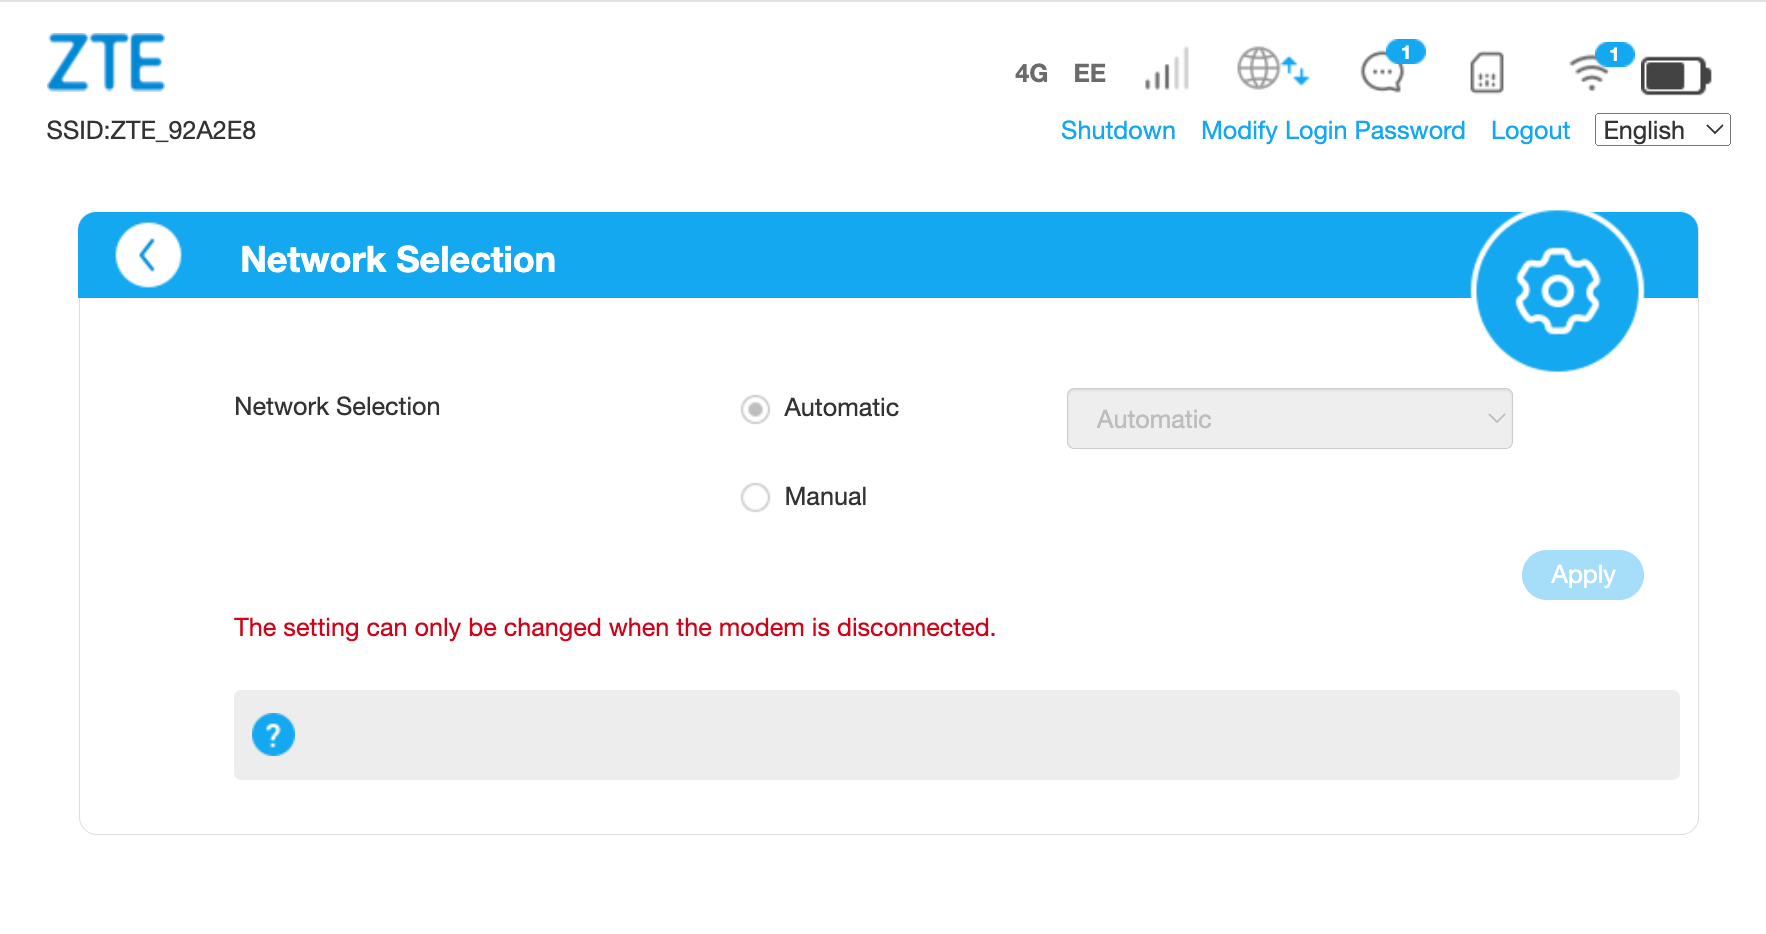
This is a very useful function, especially when roaming. If you head to France or Spain as an example you might find the device automatically logs onto the first network it sees i.e. Orange in France, or Orange in Spain, sometimes there are better or faster alternatives such as Movistar in Spain, so using the manual network selection will allow you to choose the network or signal that works best. It's also useful to remember to change it back to auto from manual instead of leaving it in this state.
NOTE: This is not a mandatory step, but useful for the understanding and future use of this product whilst roaming/travelling.
APN
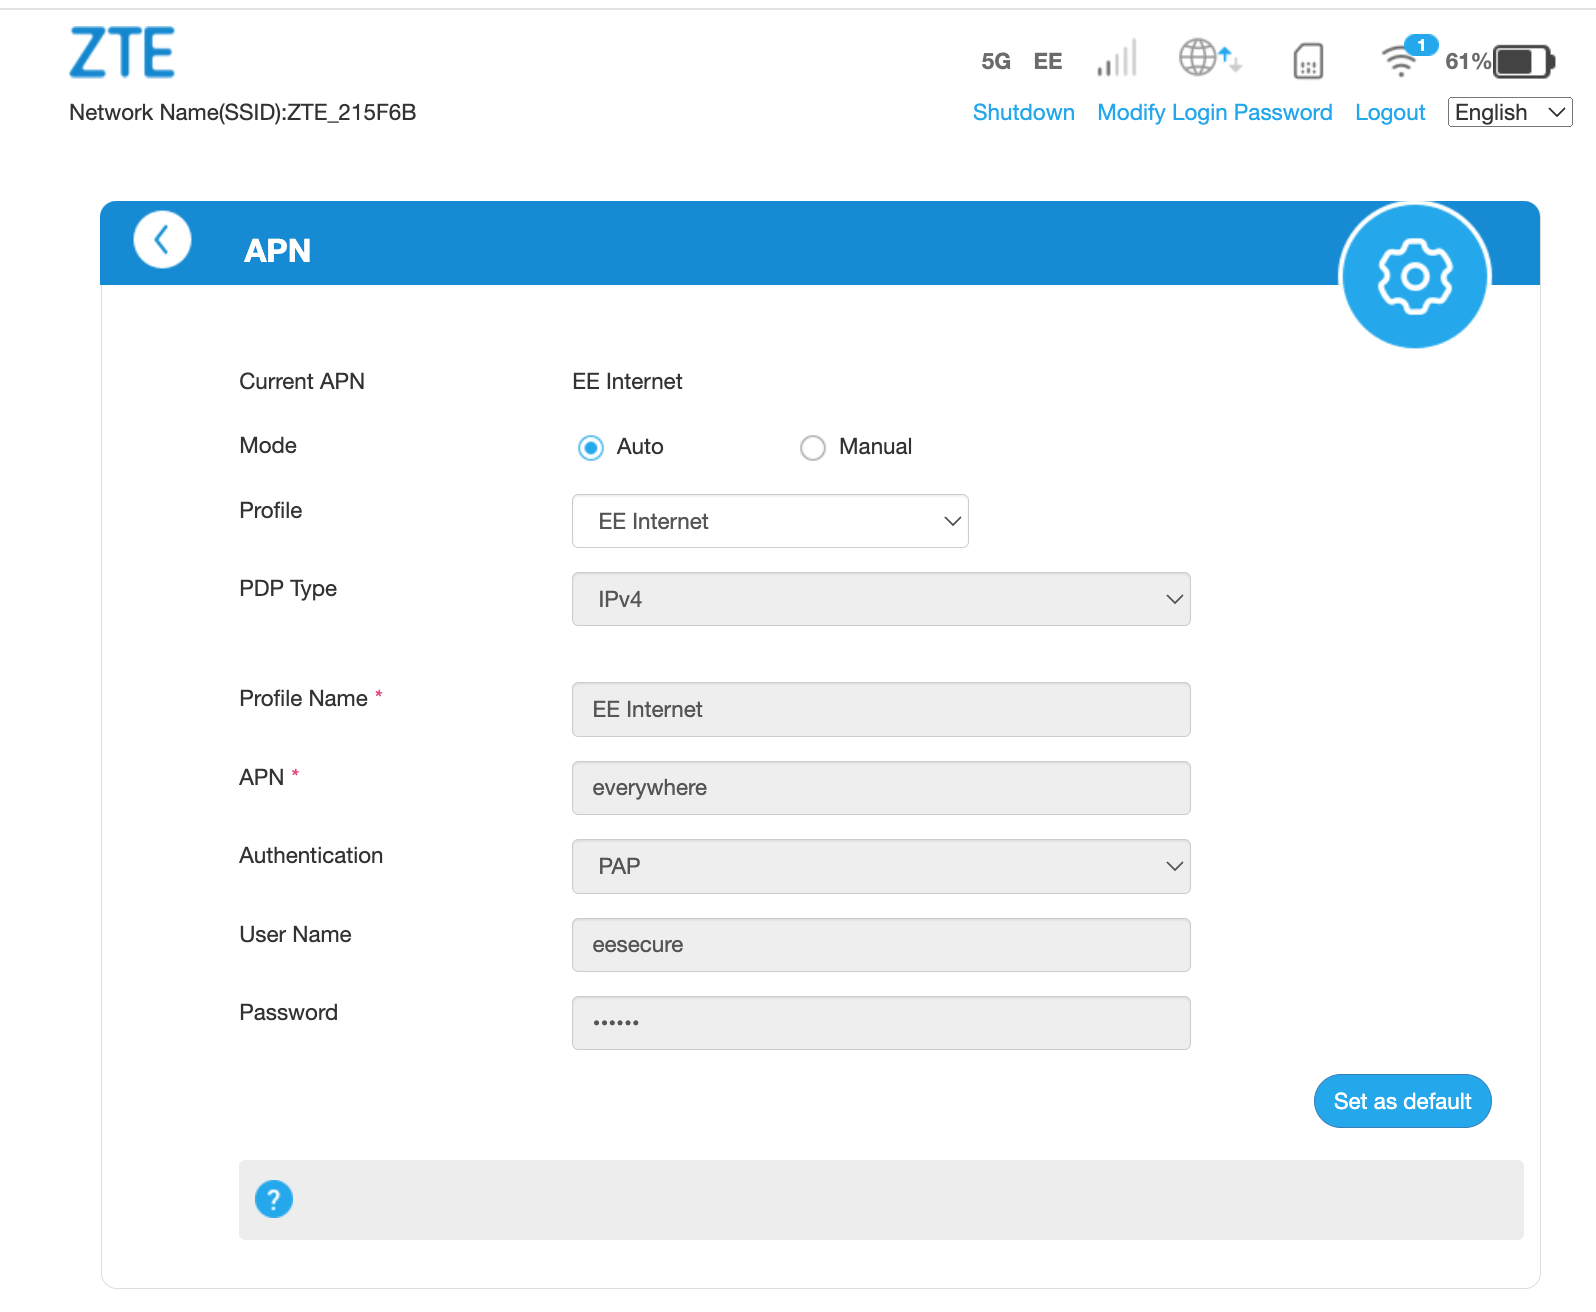
With this device, by default it has APN set to 'Auto' and it has detected the settings automatically with the mandatory ones being listed below.
APN - everywhere
Authentication - PAP
Username - eesecure
Password - secure
If you use multiple SIMs then you can store multiple profiles in the router and swap between them, therefore you might not always use 'auto' settings and would in these cases install the APN's manually. Manual APN's installation screens detailed below.  Press the 'Add New' button to fill out the details, then save or set as default. You will then have a list to pick from should you have more than one group/profile of settings saved.
End of setup.