Disclaimer: IQ Mobile does not sell or support this device. The guide is to help IQ Mobile customers configure 3rd party routers with our SIM cards. If you're using one of these devices with a SIM from another operator you will need to contact them for assistance.
To get started on configuring your new device you need to go through the following steps.
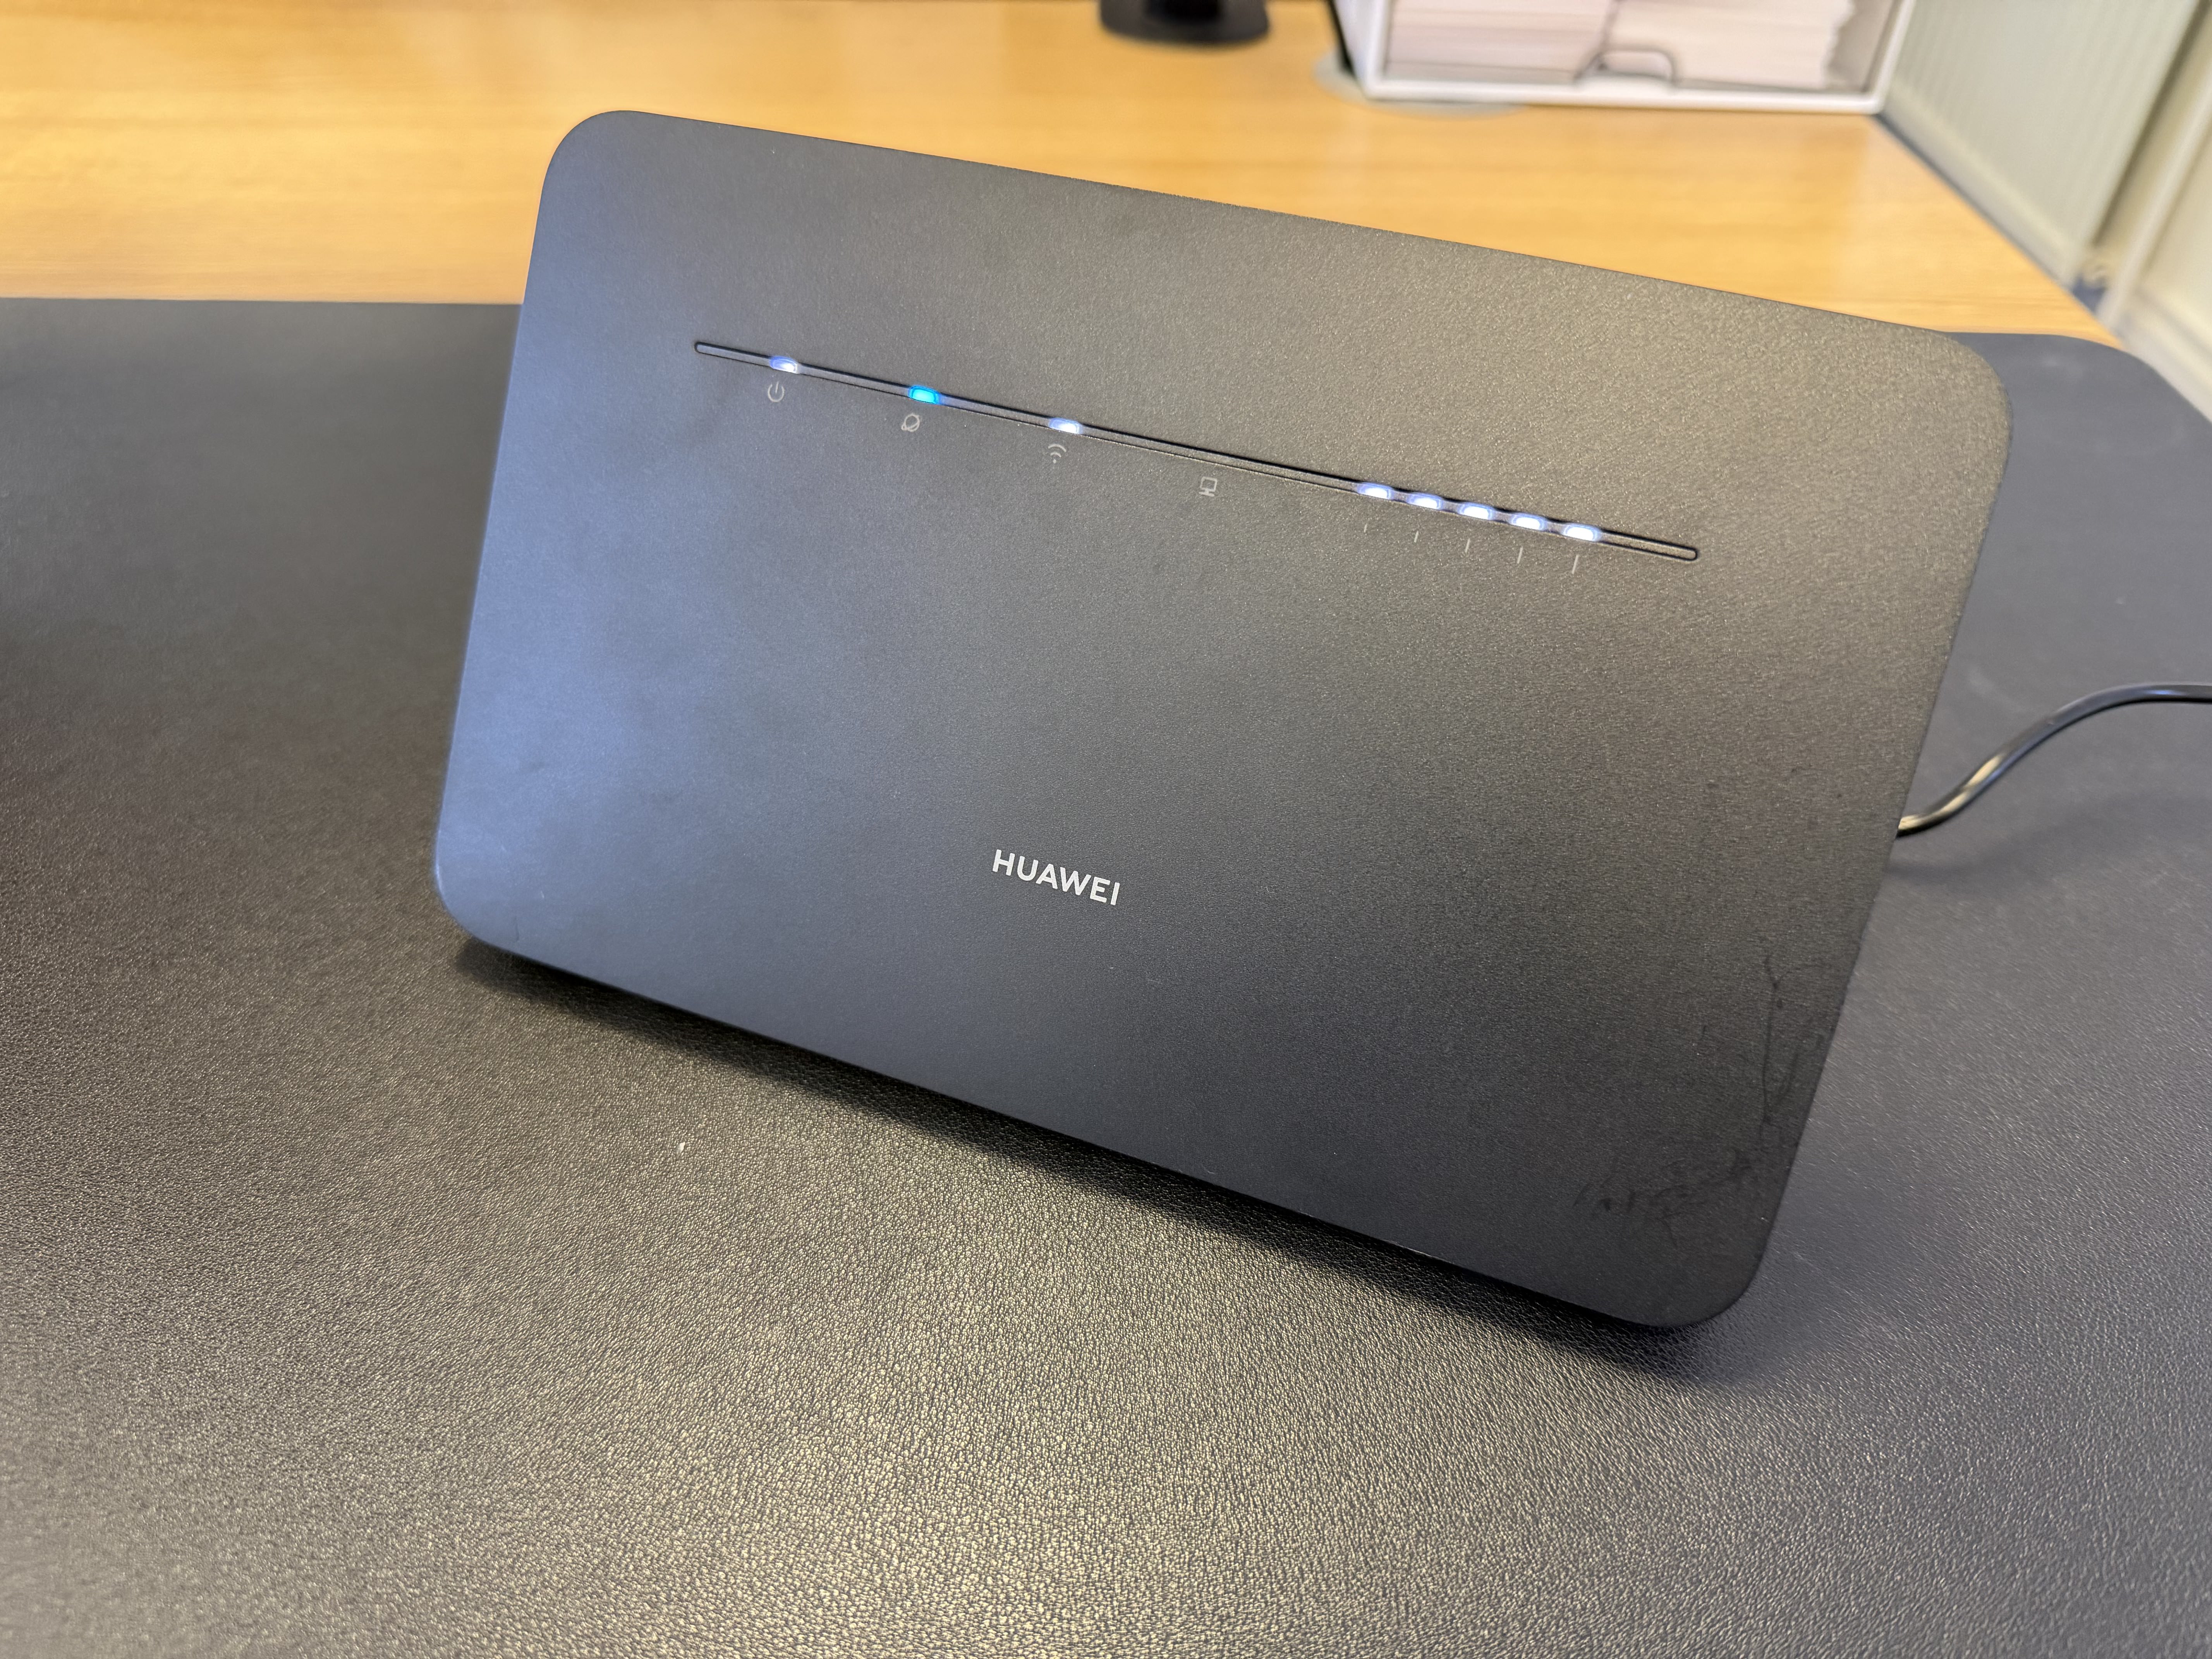
Step 1 - Unboxing
Unbox the device, check all the parts are present and insert the SIM.
 |  |
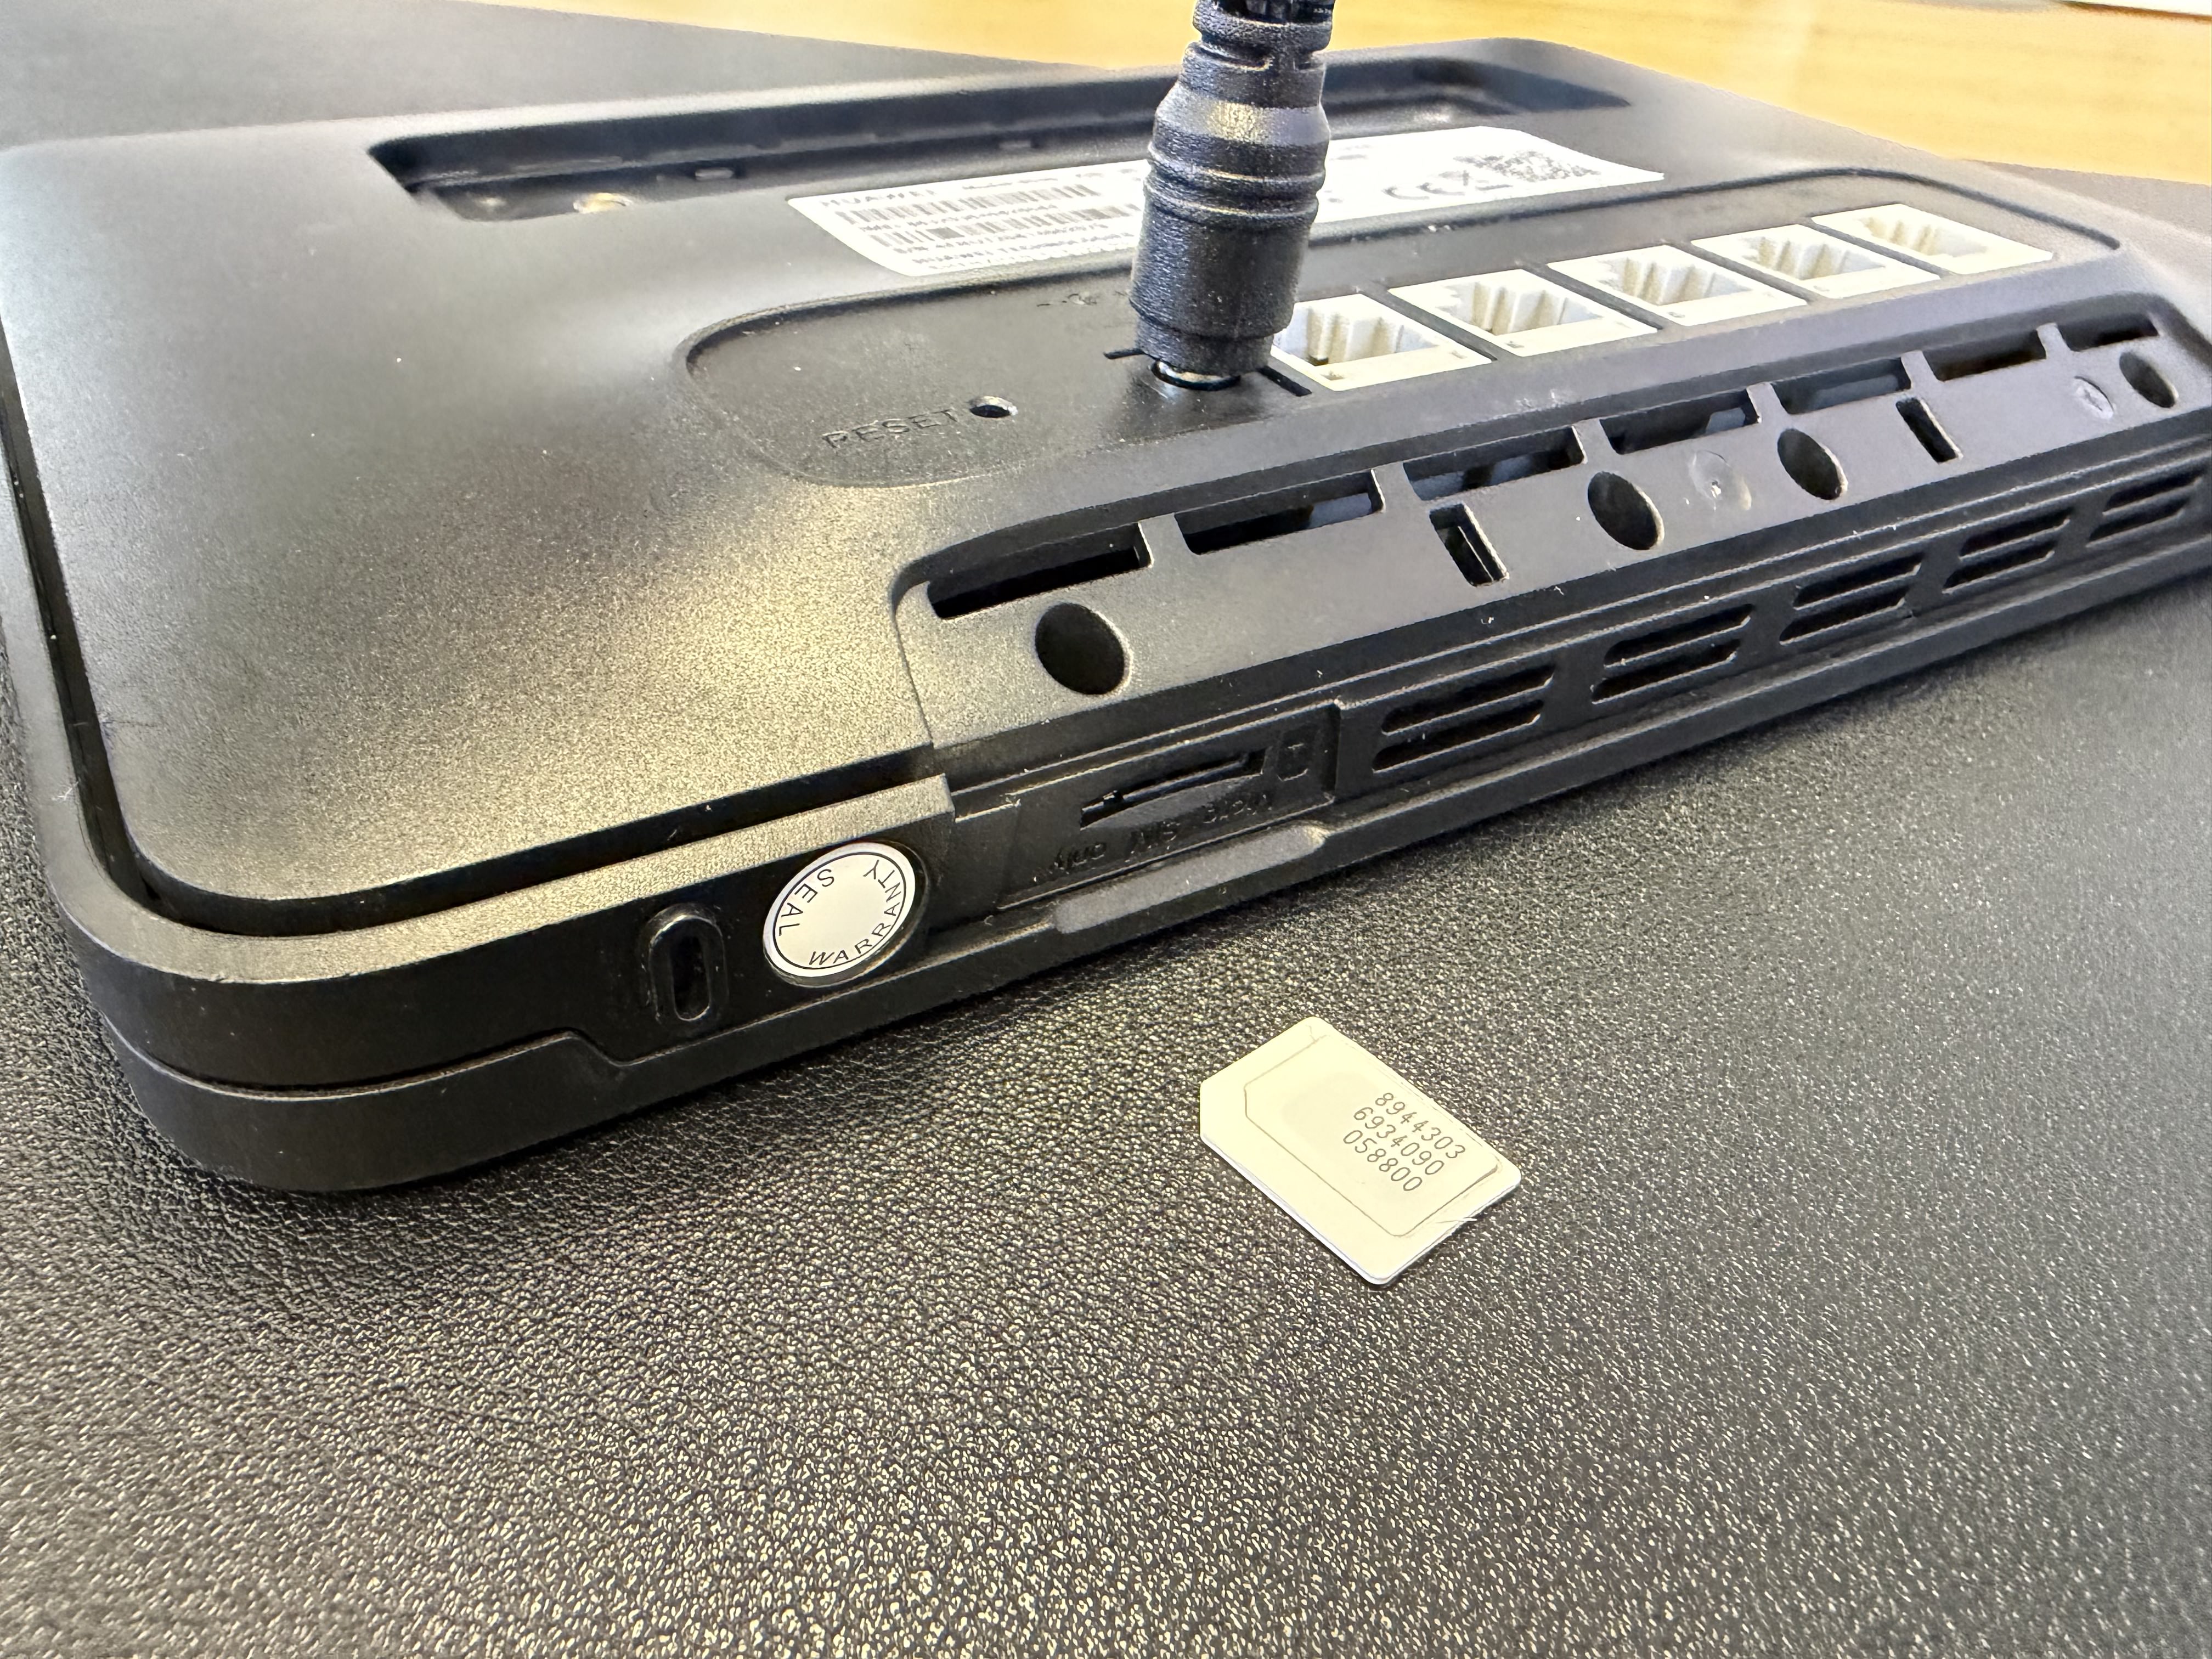 | 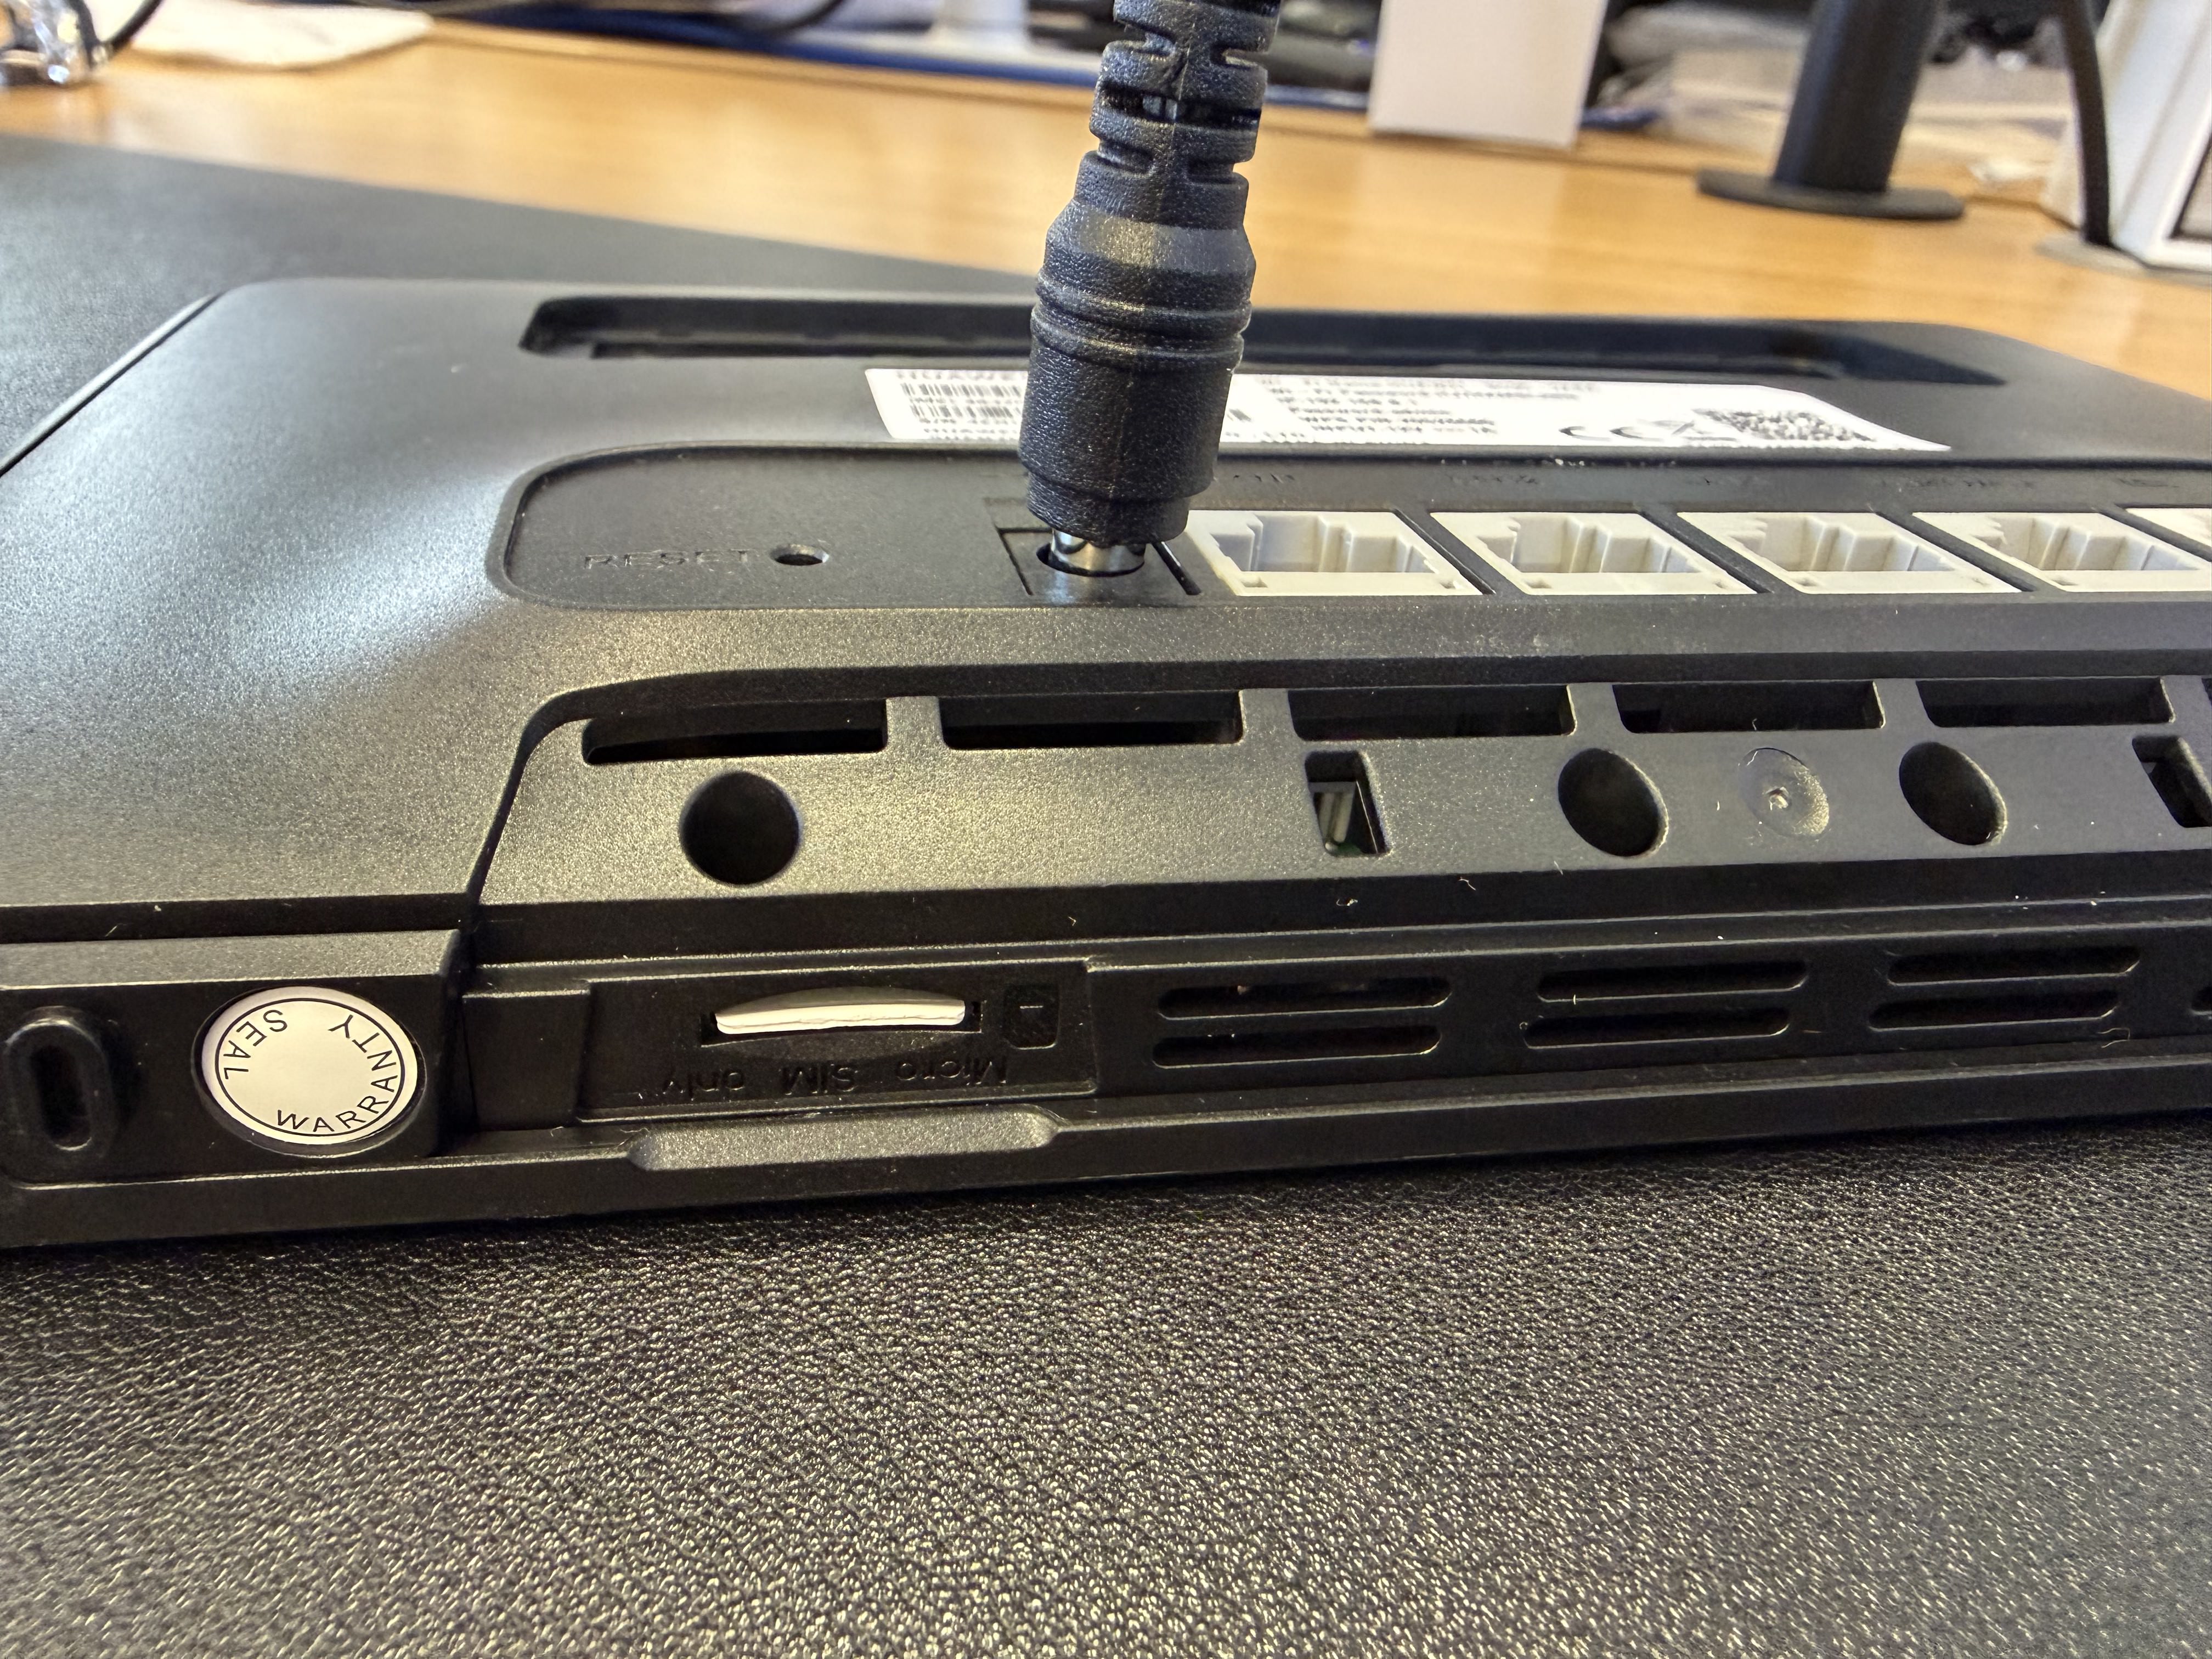 |
You will notice the SIM will only fit one way. The corner is cut off and slides under the metal housing pictured below.
The SIM is a MICRO SIM, the size of SIM for this device which is the middle cut out from the SIMs original housing, just pop it out until it is the middle version and insert it as shown in the image, push it until it clicks into place.
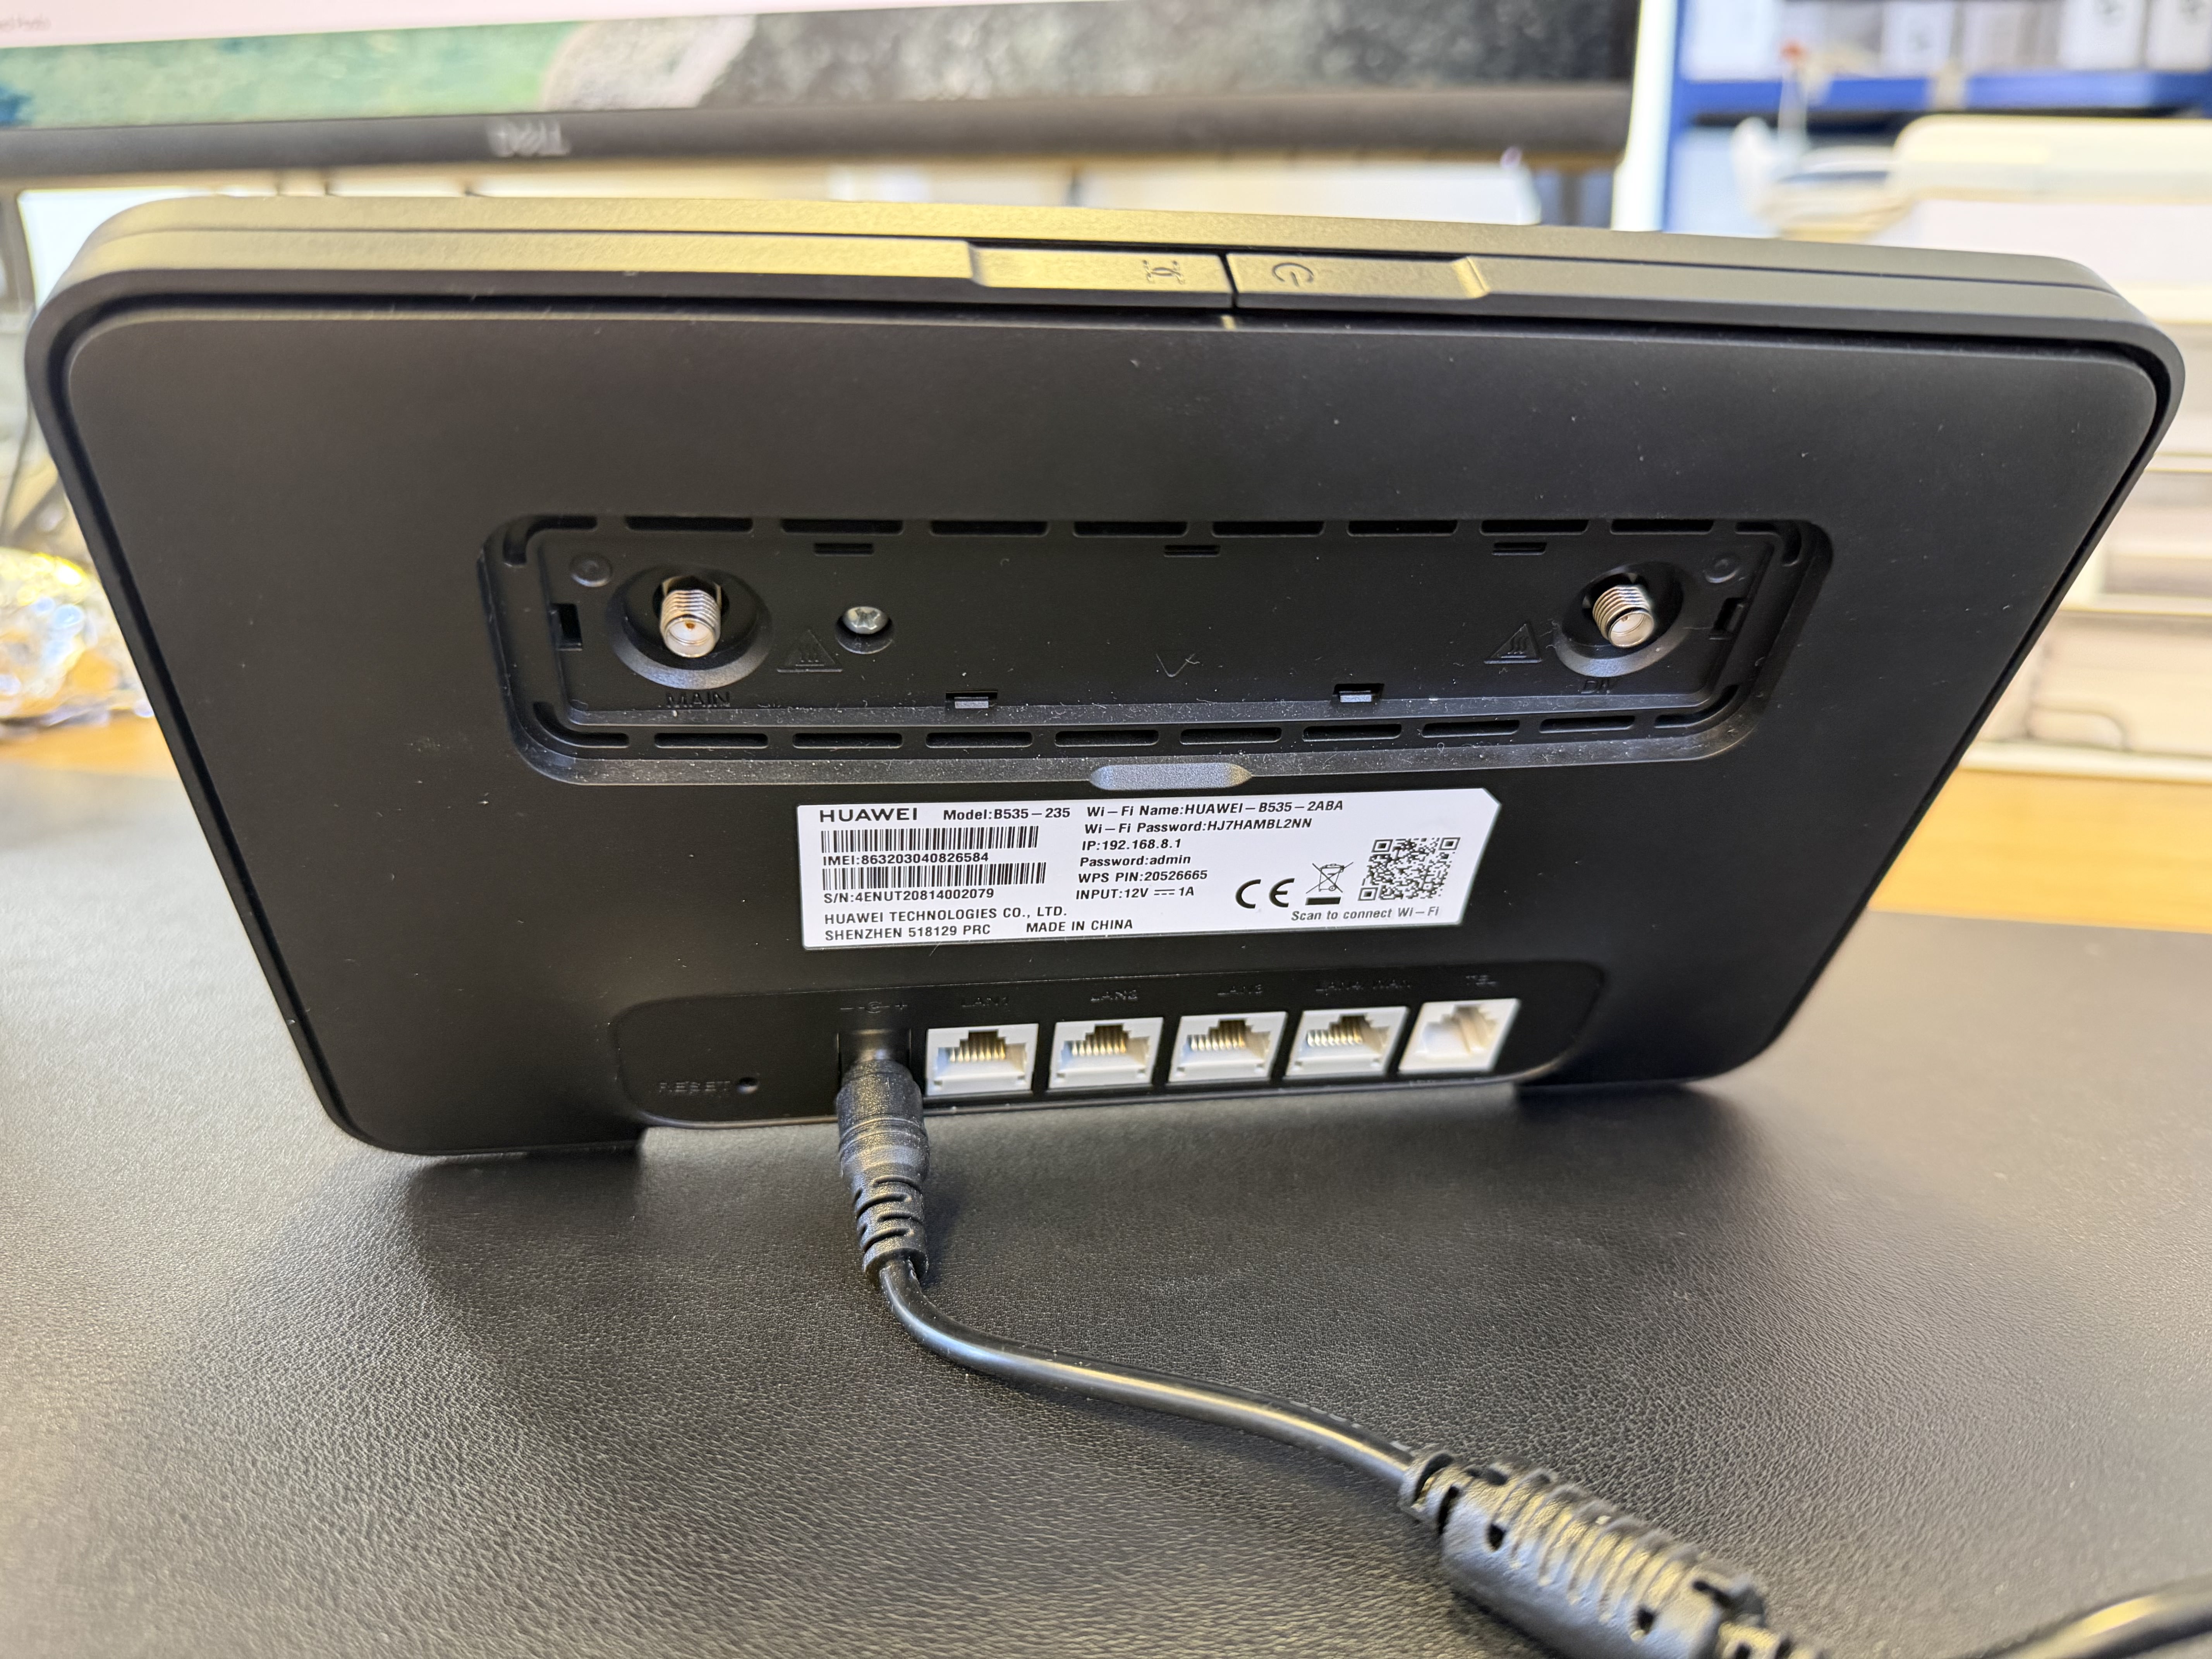
Step 2 - Noting the router detail
Once the SIM is inserted into the device you should put it back together and turn it on:
- Once turned on, please make a note of the information on the sticker on the back, this contains information such as:
The Admin Password
The login IP address
The Wi-fi Password
The Wi-Fi name
This sticker shows four bits of key information which you should make a note of. Note: yours will be different to the one pictured.
Step 3 - Connecting to Wi-Fi
The next step is to switch it on and connect to it's WiFi, This is an important step! Many people try to configure these devices without connecting to it's Wi-Fi.
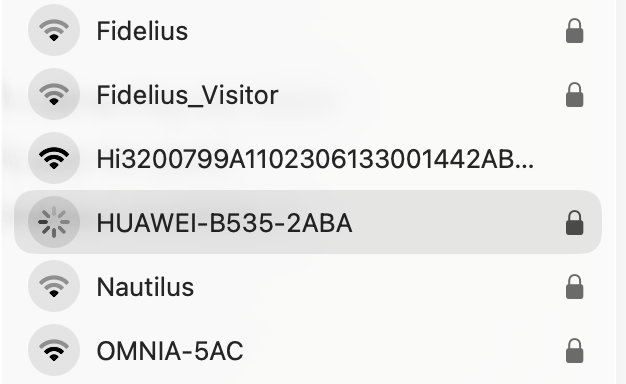 | 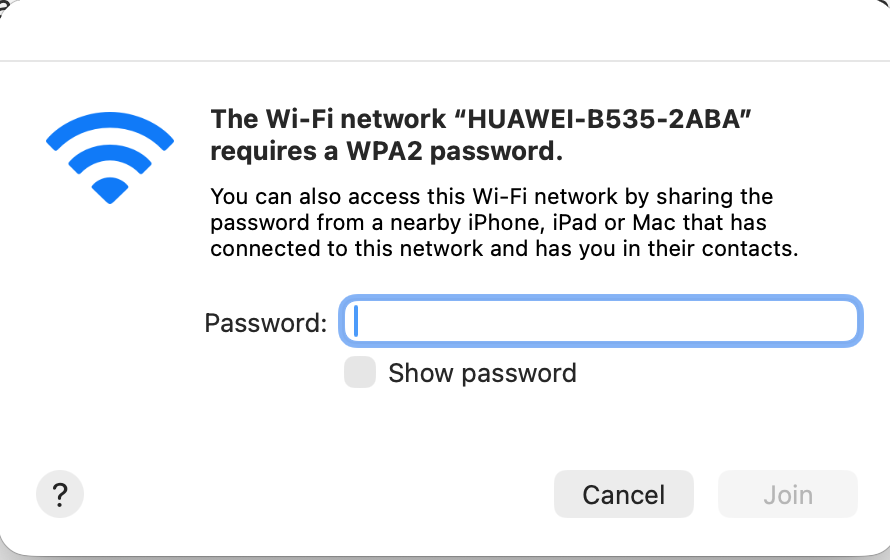 |
Connecting to the Wi-Fi network shouldn't take more than 1 minute. and the information is provided on the sticker previously mentioned. In this case, the router is called HUAWEI-B535-2ABA, so picking the Wi-Fi and putting the printed password in will get you connected to the router.
NOTE: You can do this step from any device, Phones, tablets or Laptops. And we actually prefer doing it from a laptop as the screen is bigger and gives slightly easier control. For the rest of this guide we will be doing it via a laptop.
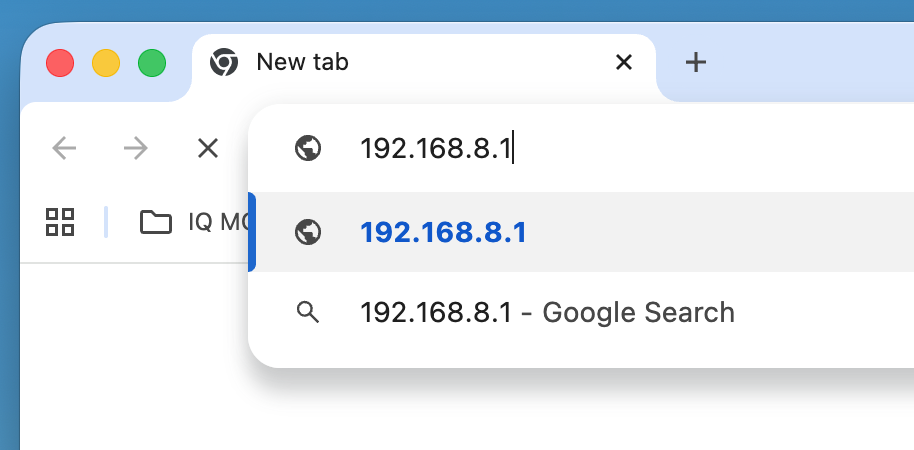
Step 4 - Logging into the router
Accessing the interface to check or enter the settings. From here on out we are doing this on a laptop as the screen is larger and a little more functional. But you can do this from a phone if you don't have a laptop accessible.
- Go to a web browser, it doesn't matter if you are using Safari, Chrome, Firefox or Edge any web browser should be fine. It is imperativre you are connected to it's WiFi, this page will not be reachable or accessible if you're on your home WiFi connection.
- Enter the address as http://192.168.8.1 when it finishes loading it should look like the below.
 | 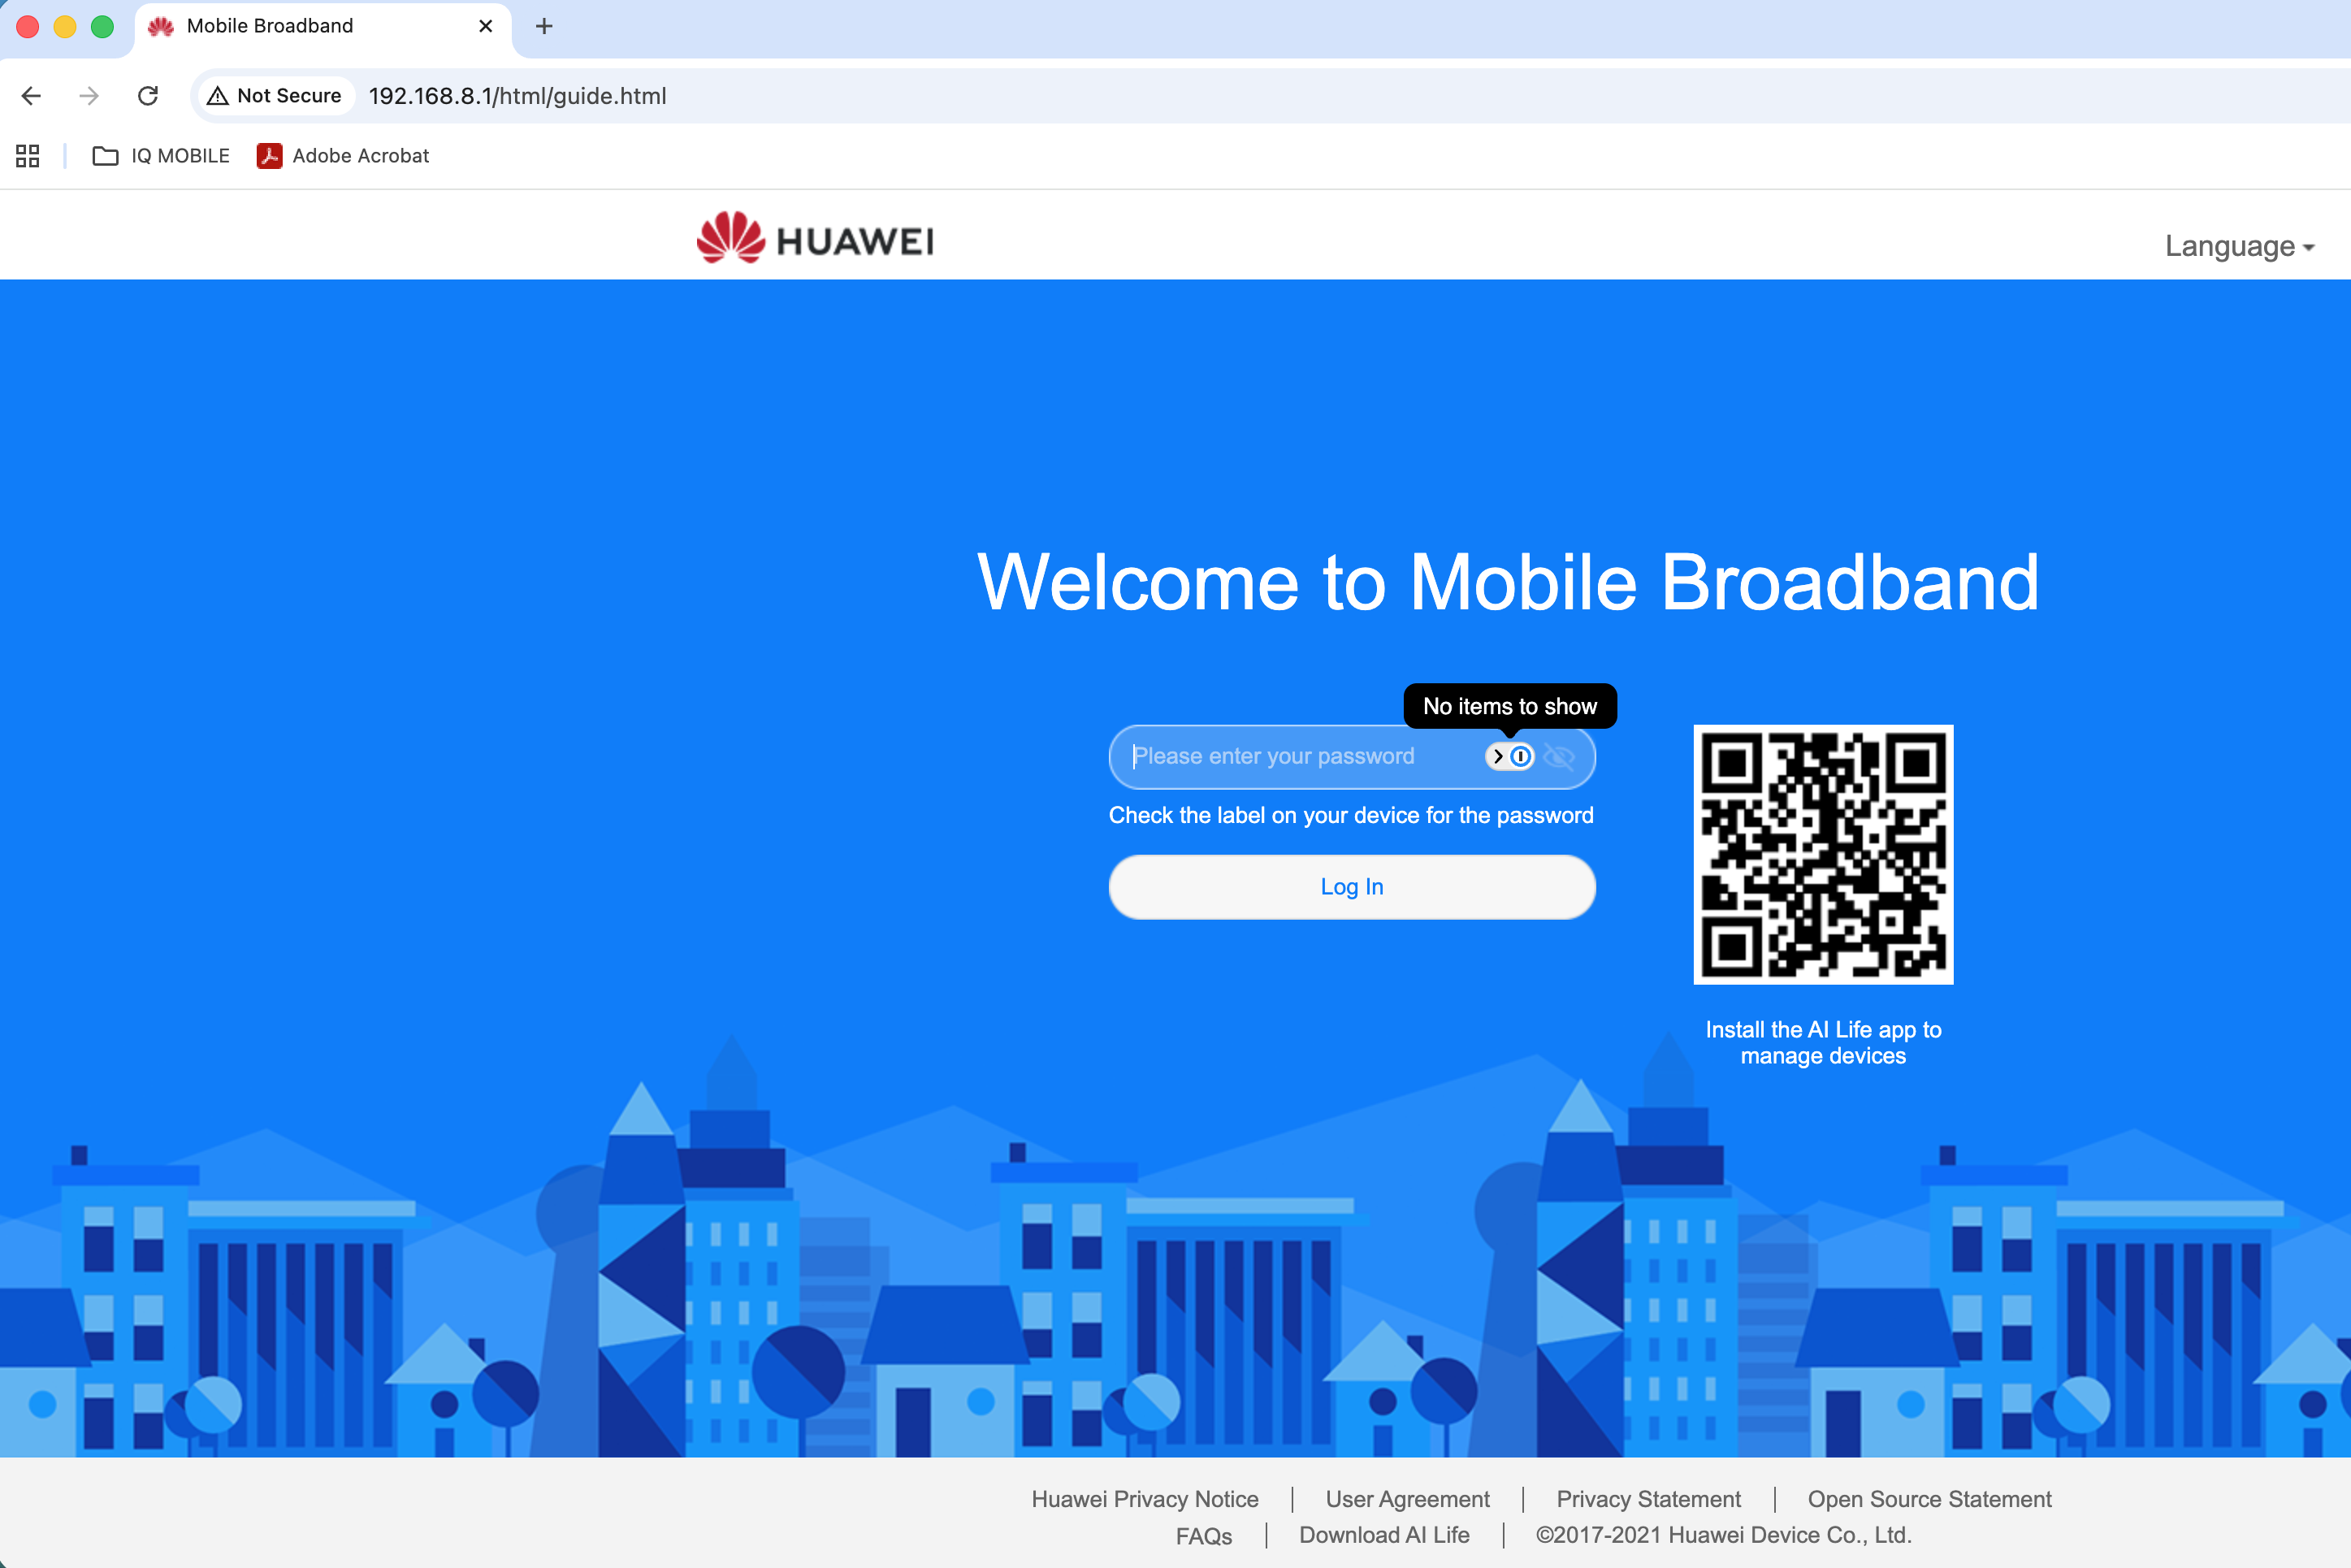 |
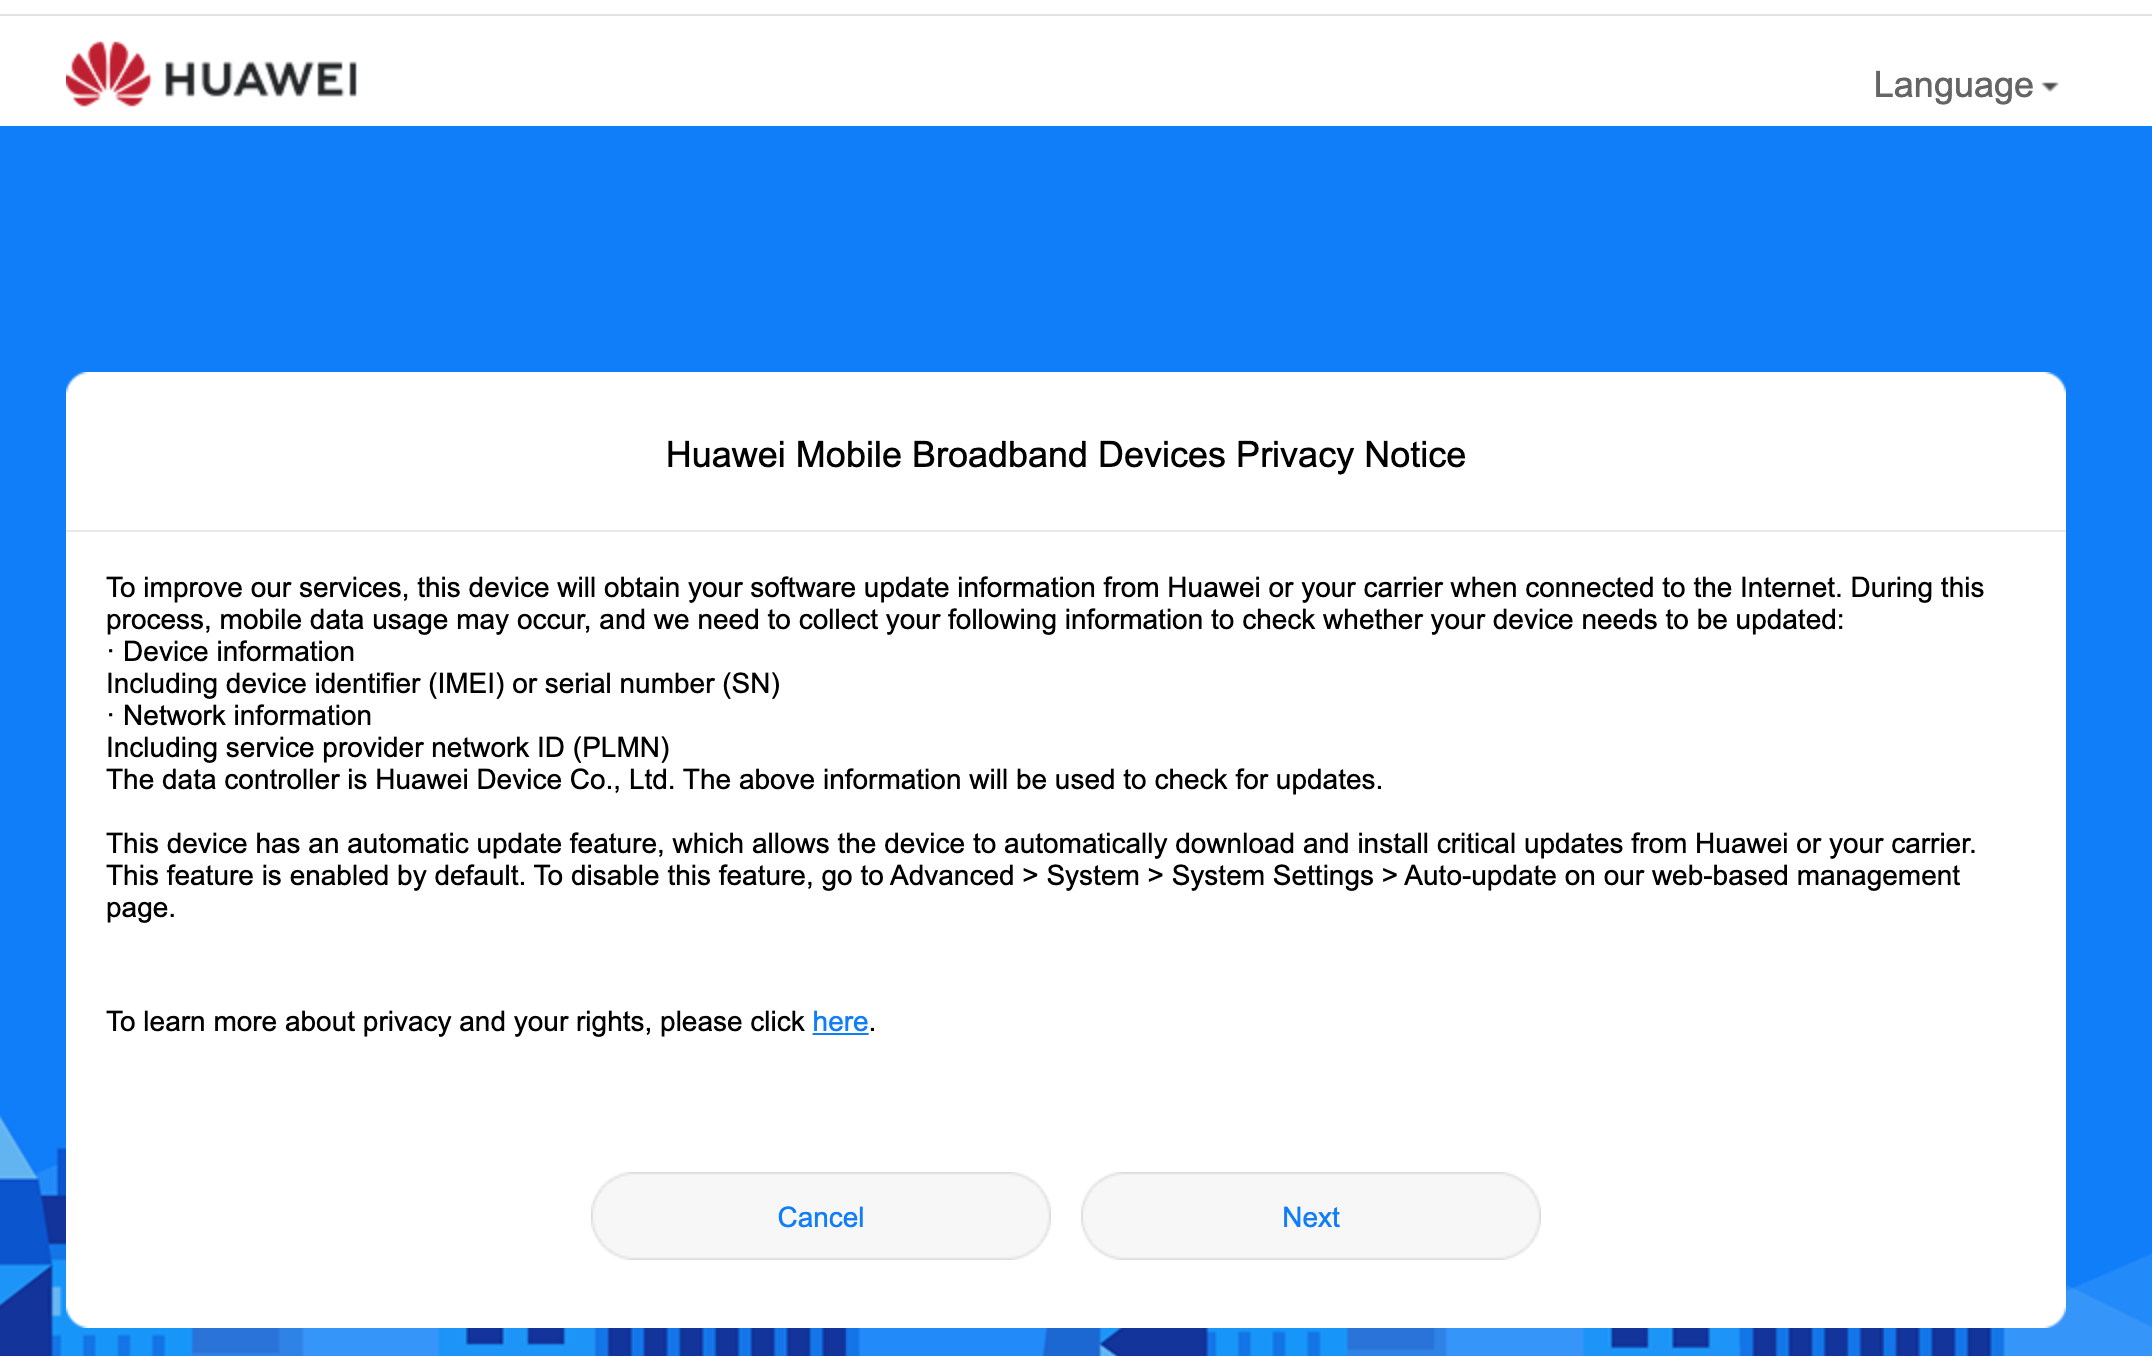
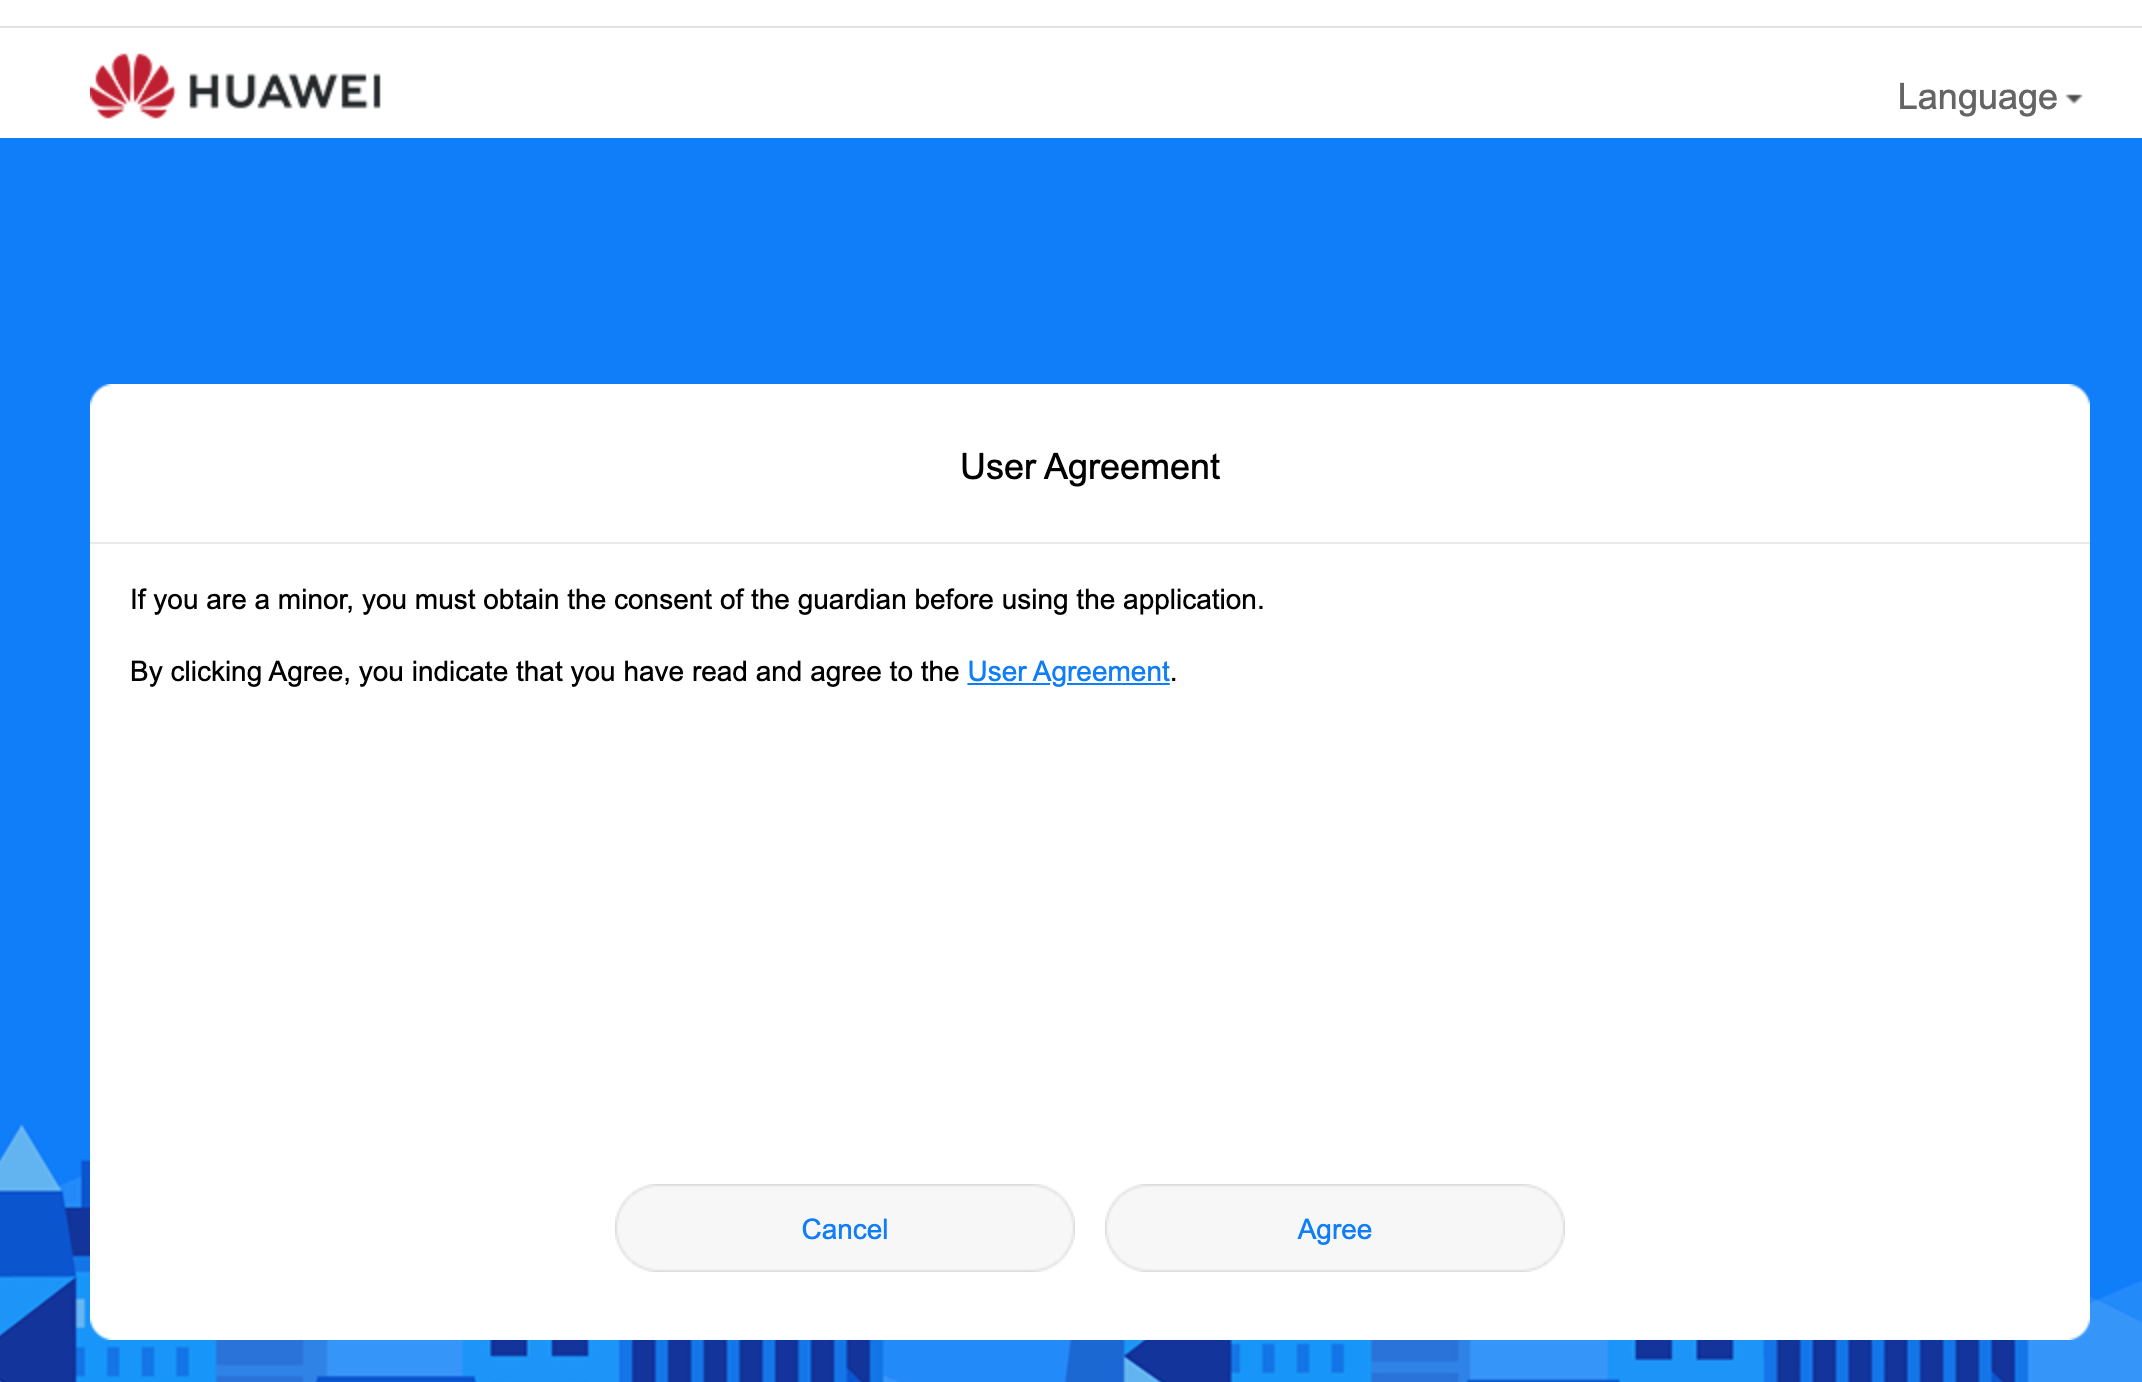
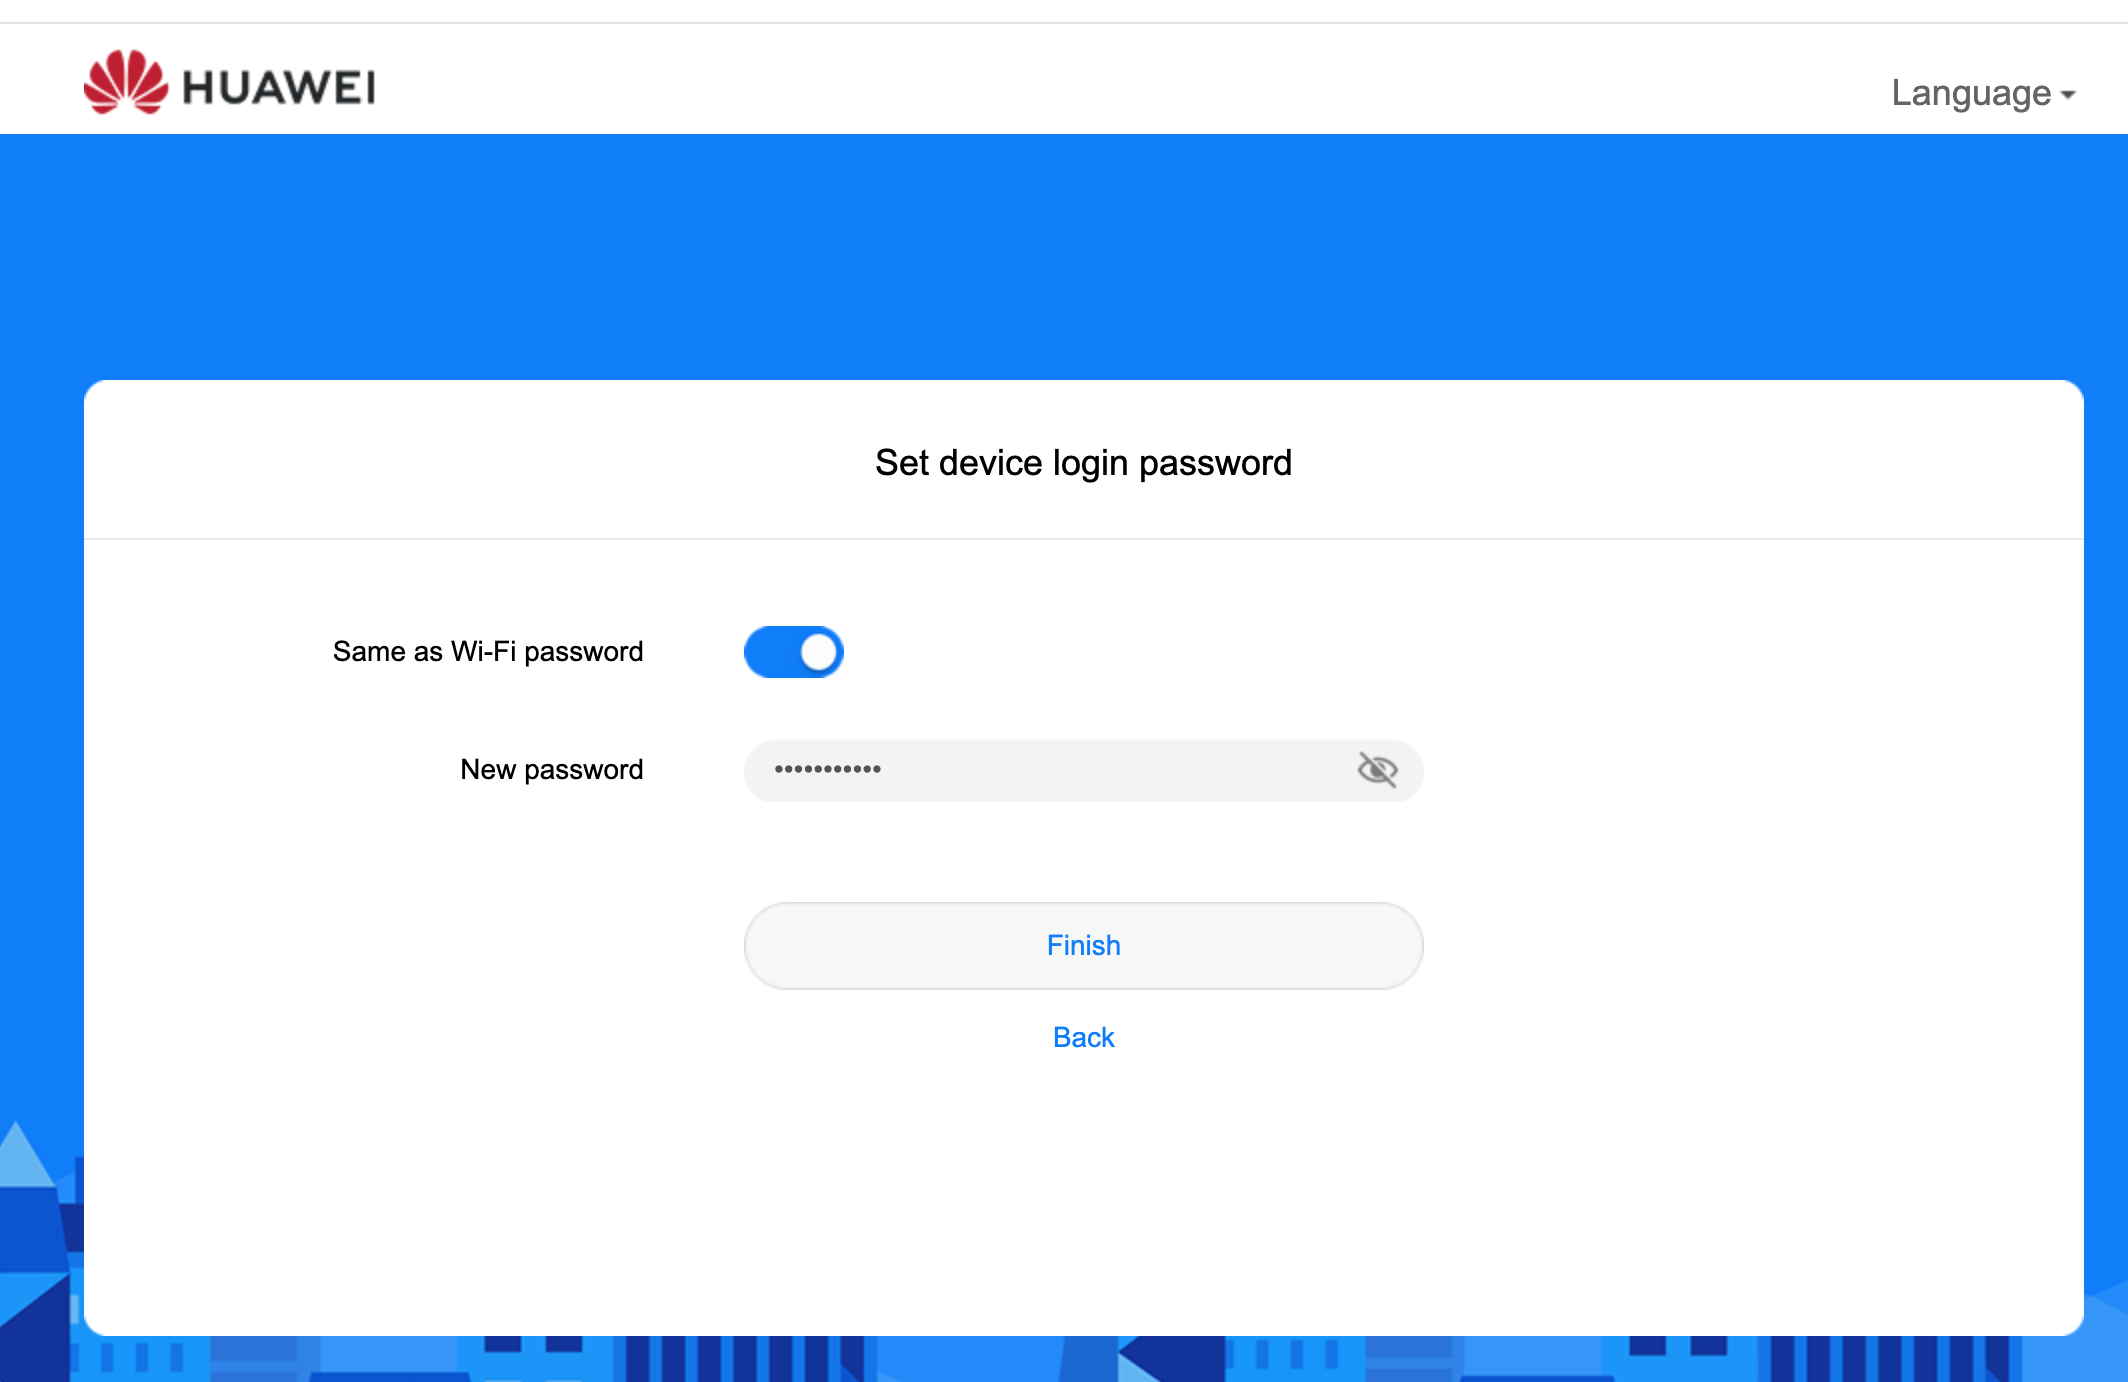
As long as you are connected to it's Wi-Fi as detailed in step 3, then the login screen is accessible by the IP address as shown in the images. The Password is written on the password from the sticker. The following screens show you what happens next where it forces a password change.
 |  |
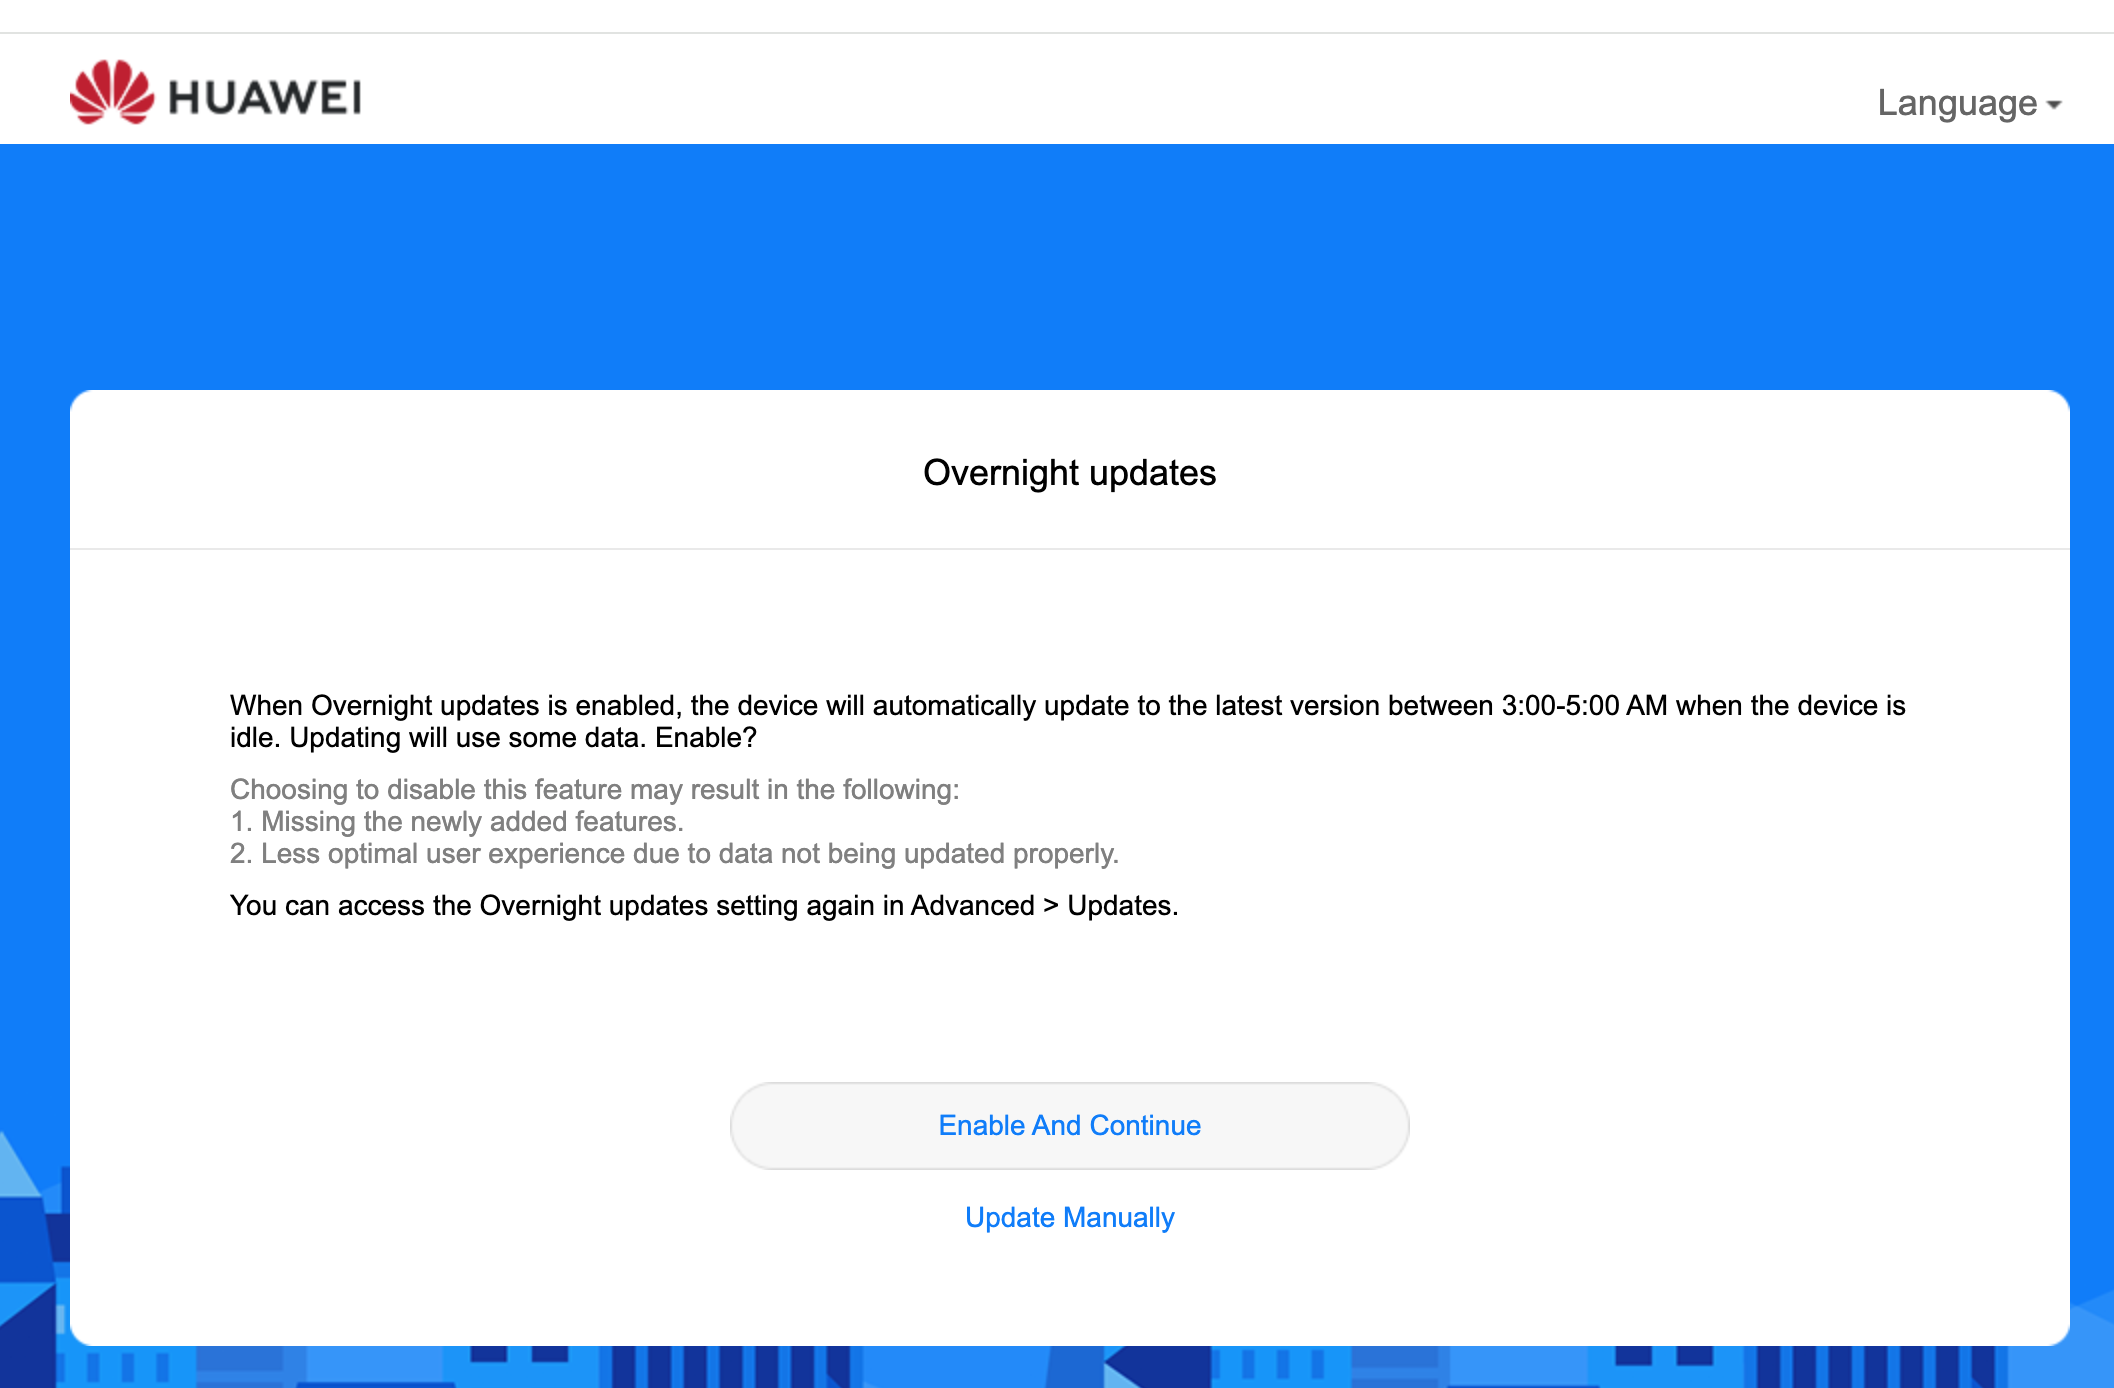 |  |
NOTE: The Overnight updates page will consume data, so this might be worth using the manual option as opposed to 'enable and continue' to avoid it using all of your data while abroad.
The final screen should look like this: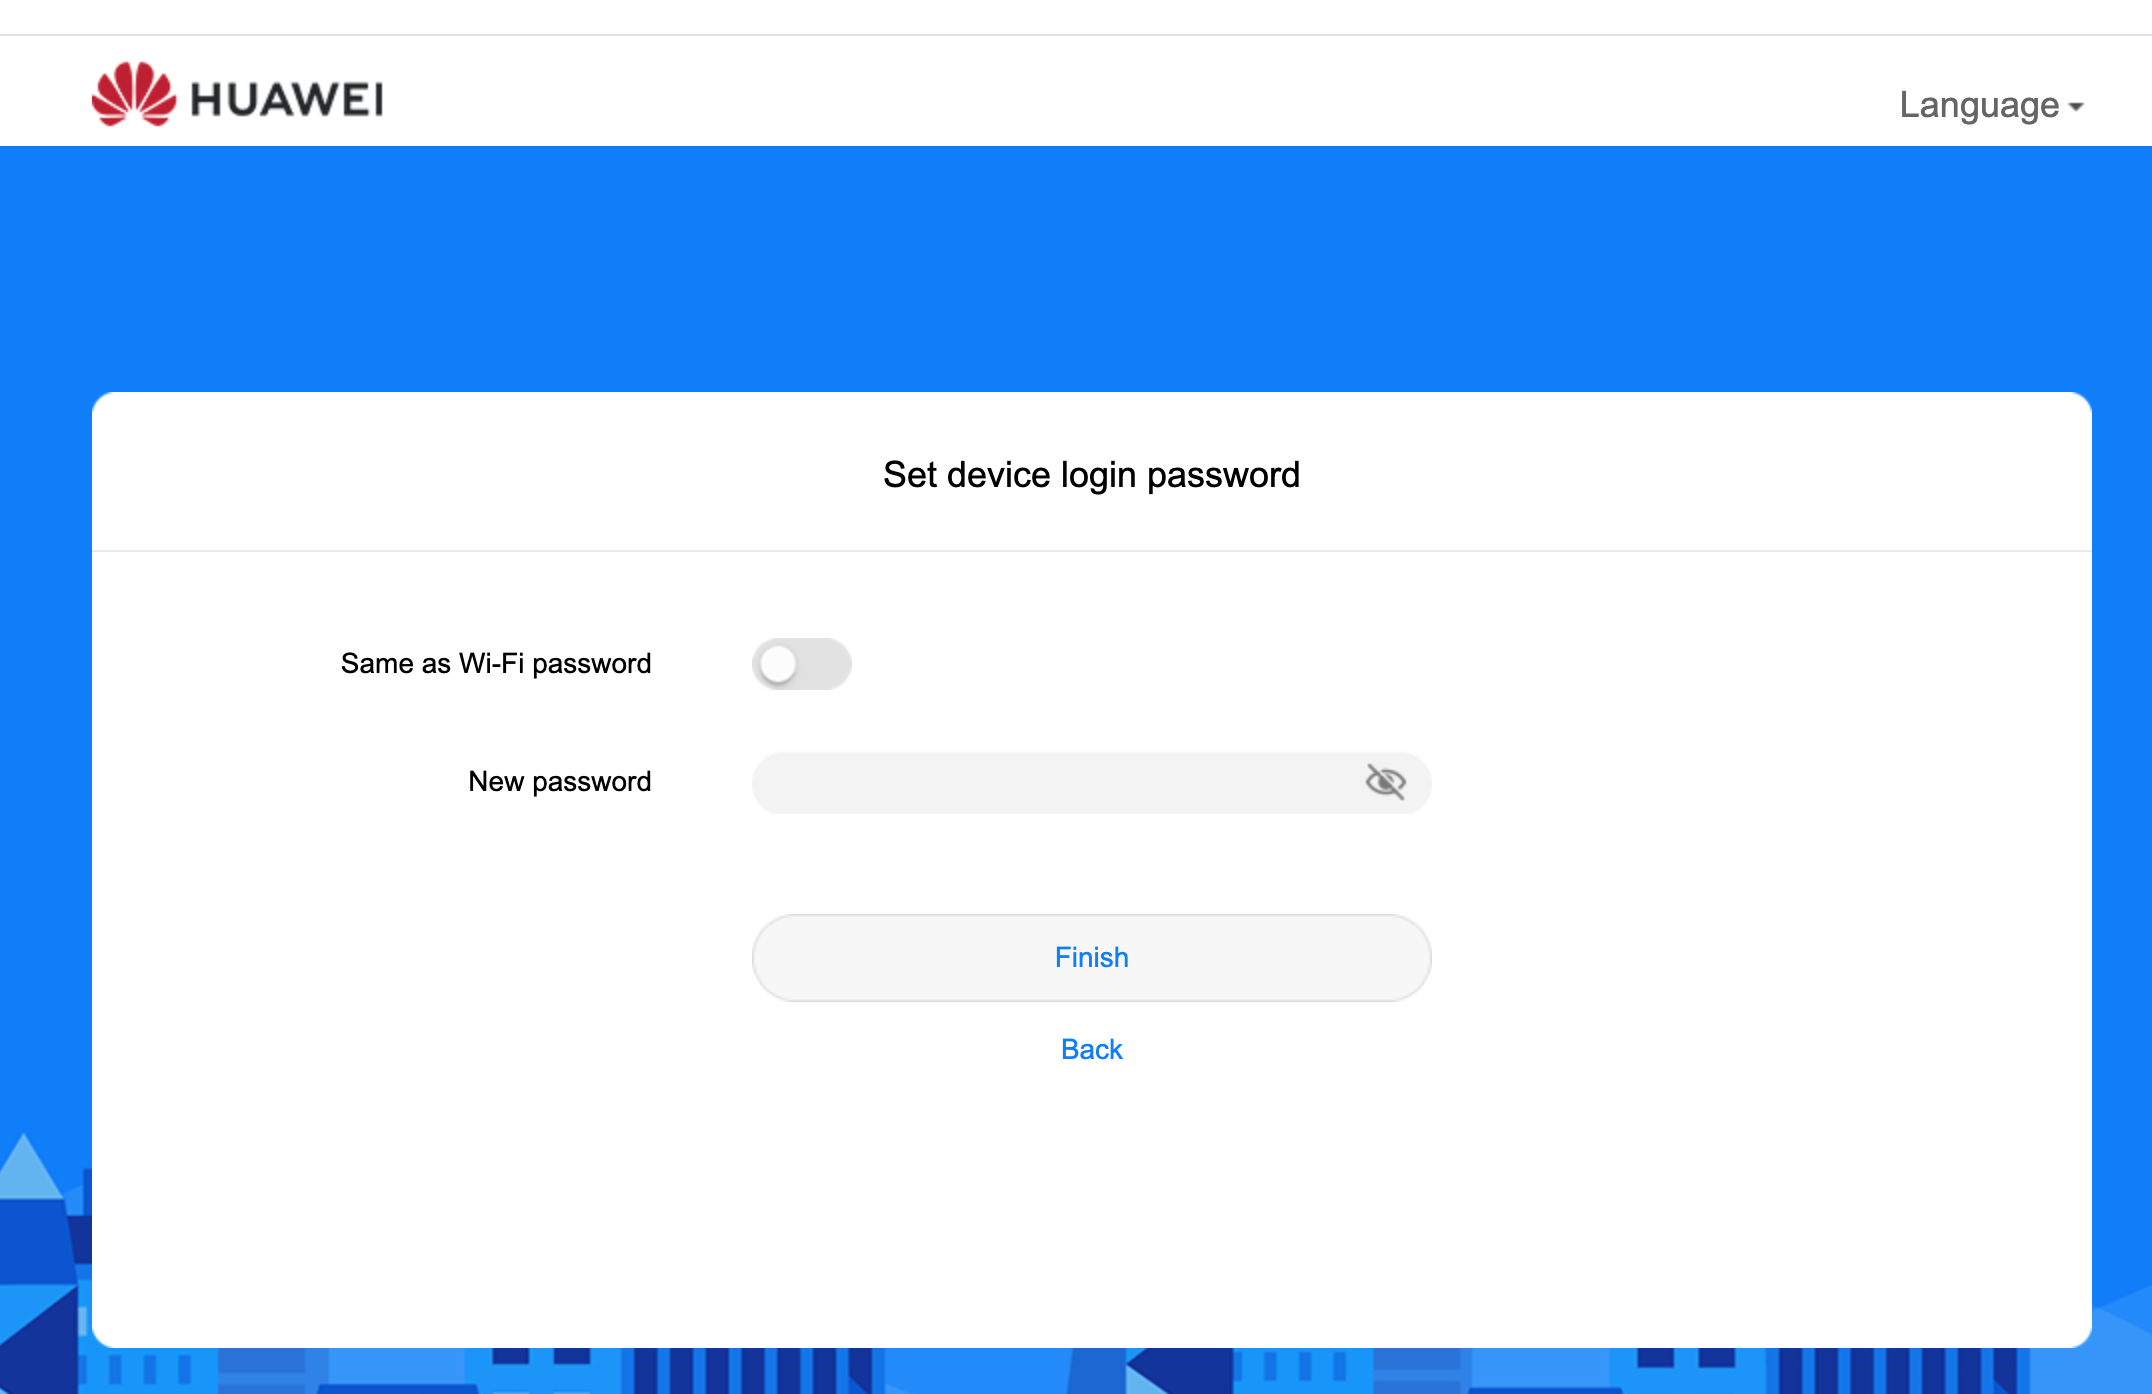
Please note, this changes your LOGIN password from the one on the sticker (ADMIN in this case) to one that you know or choose, so please make a note of it. The option to use the same as the Wi-Fi password keeps it simple, but potentially less secure if you hand the wi-fi password out.
Step 5 - Configuring the router for IQ Mobile
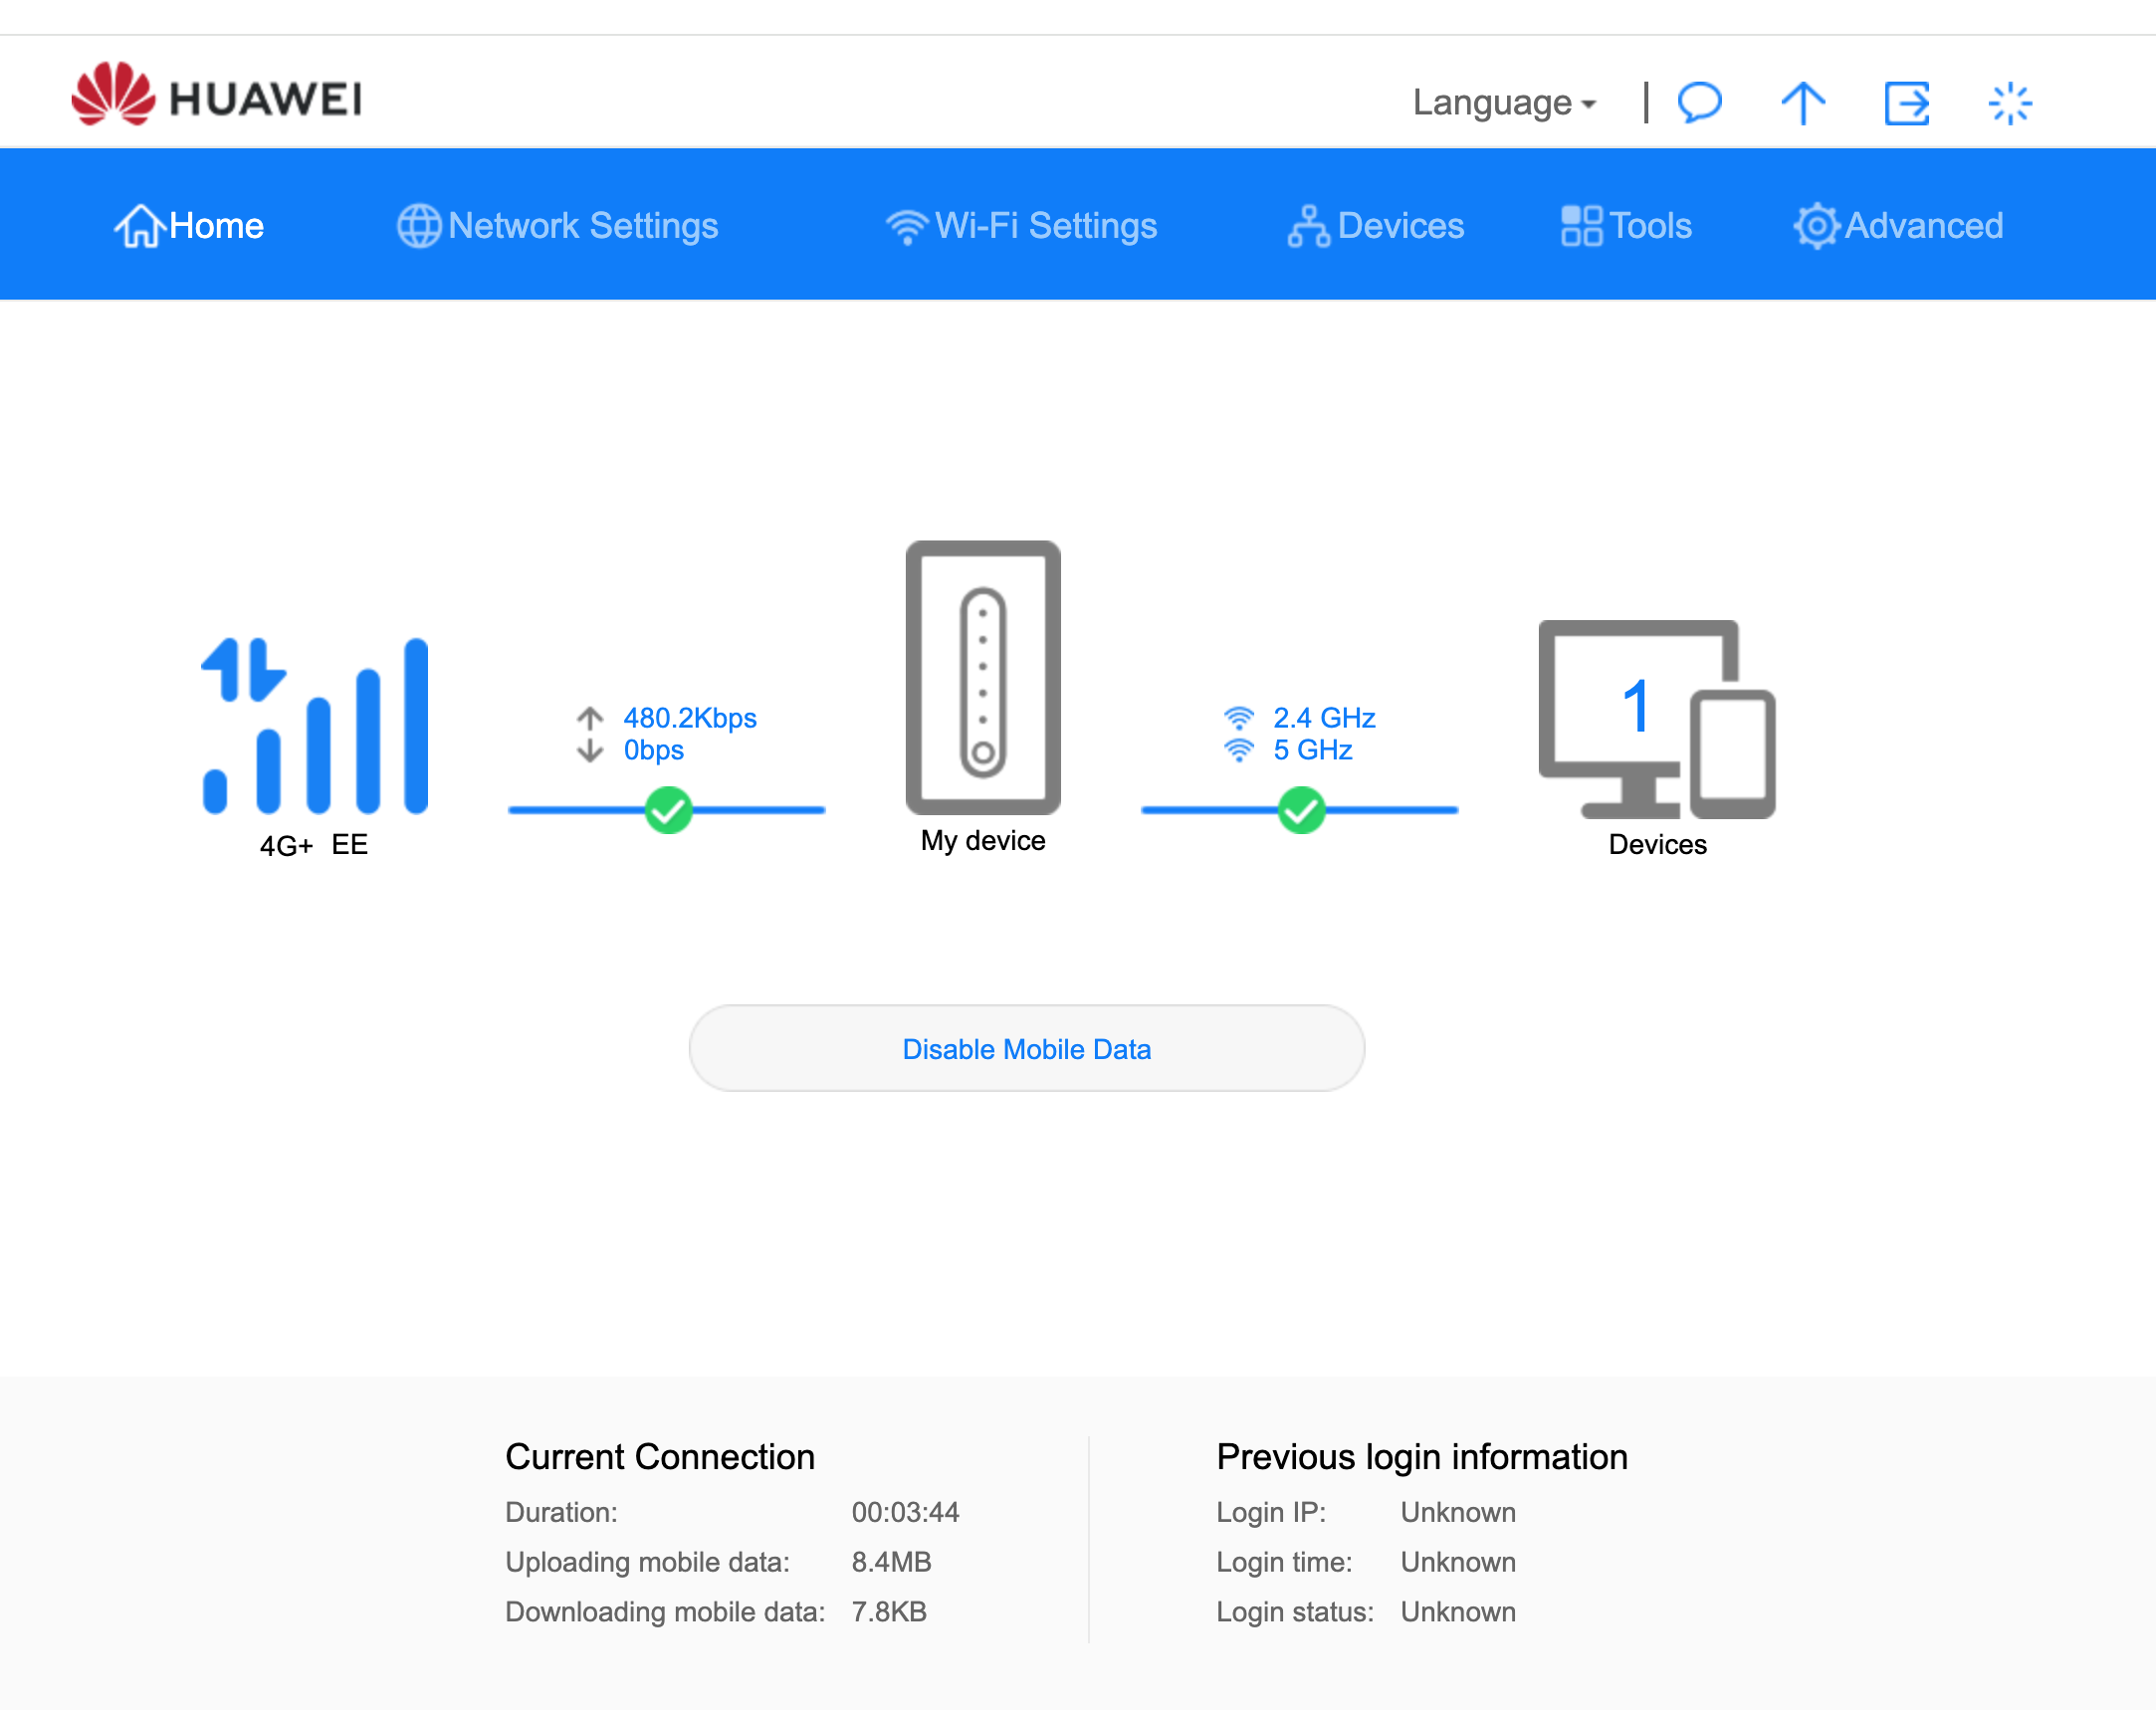
The homescreen looks like this:
The menu of note is the NETWORK SETTINGS menu located at the top navigation bar (next to the Home icon)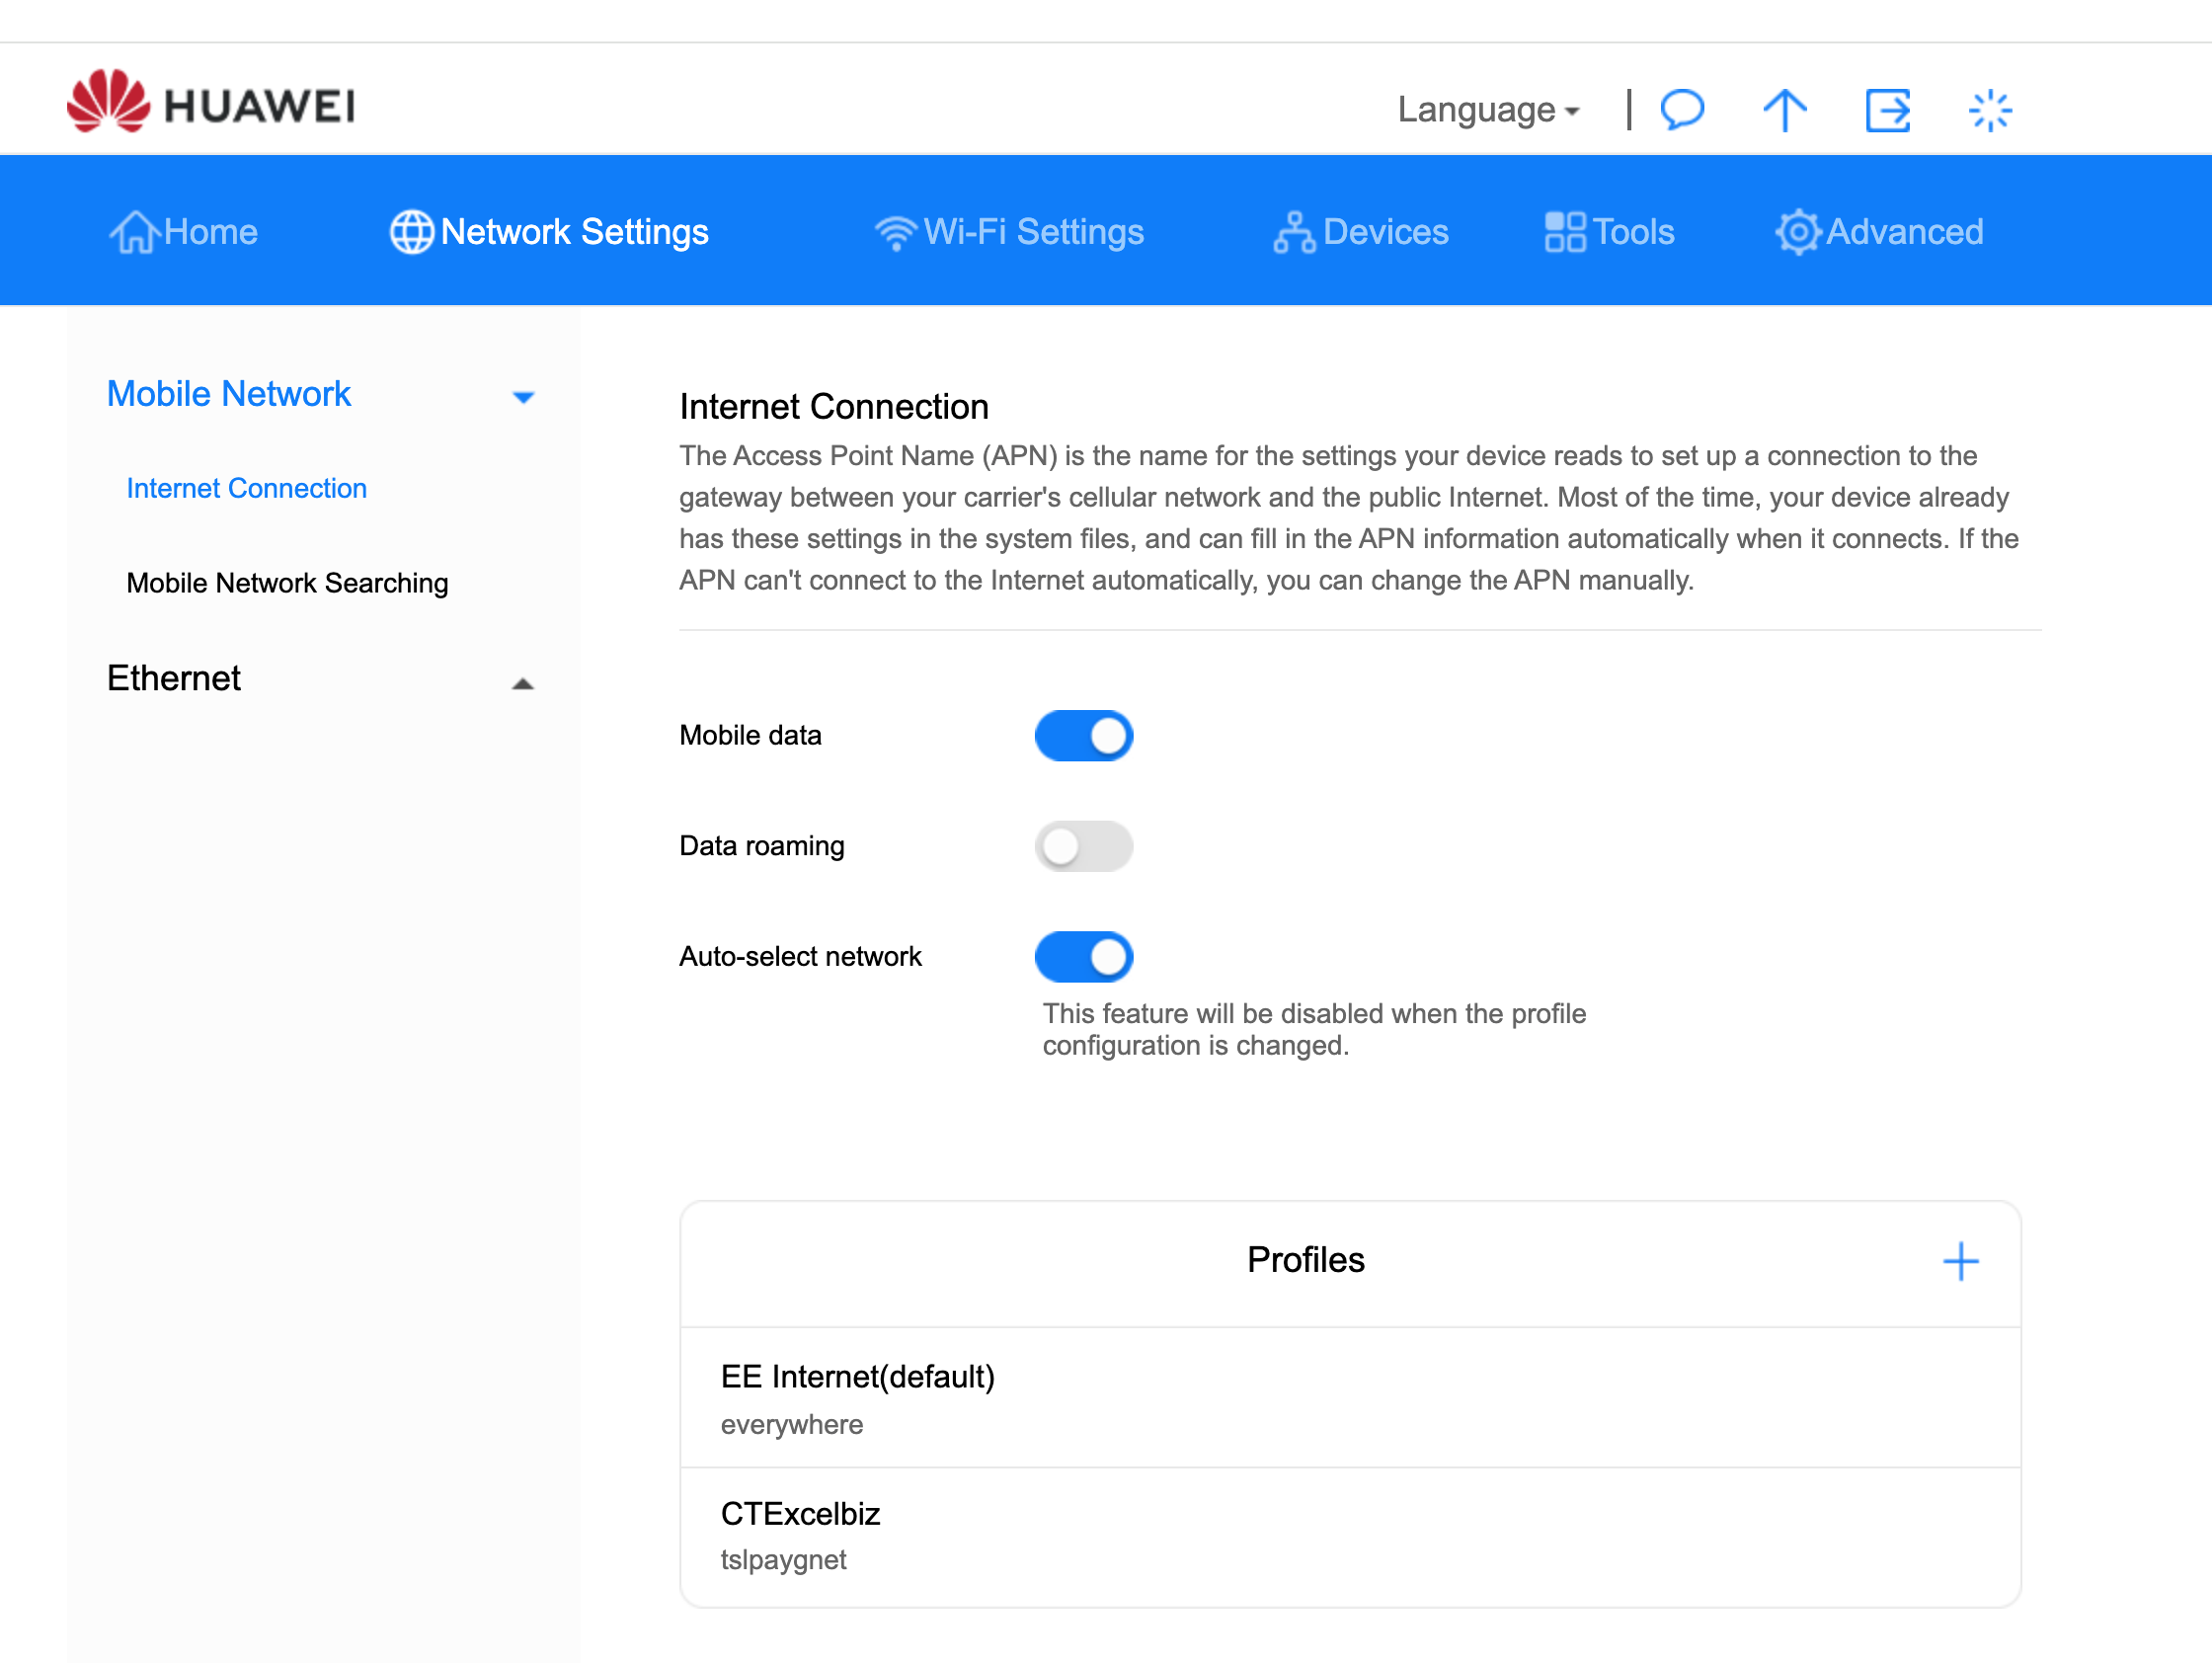
Inside the Network settings, it defaults to the Internet connection menu which is shown above. The important settings are Mobile Data, Data Roaming and the Profiles, All need to be turned on for the SIM to work outside of the UK.
Note: When you turn on data roaming, it indicates a message as shown below, for IQ SIMs this is OK and can be ignored. But for other providers you should check their roaming fees. (Press confirm) 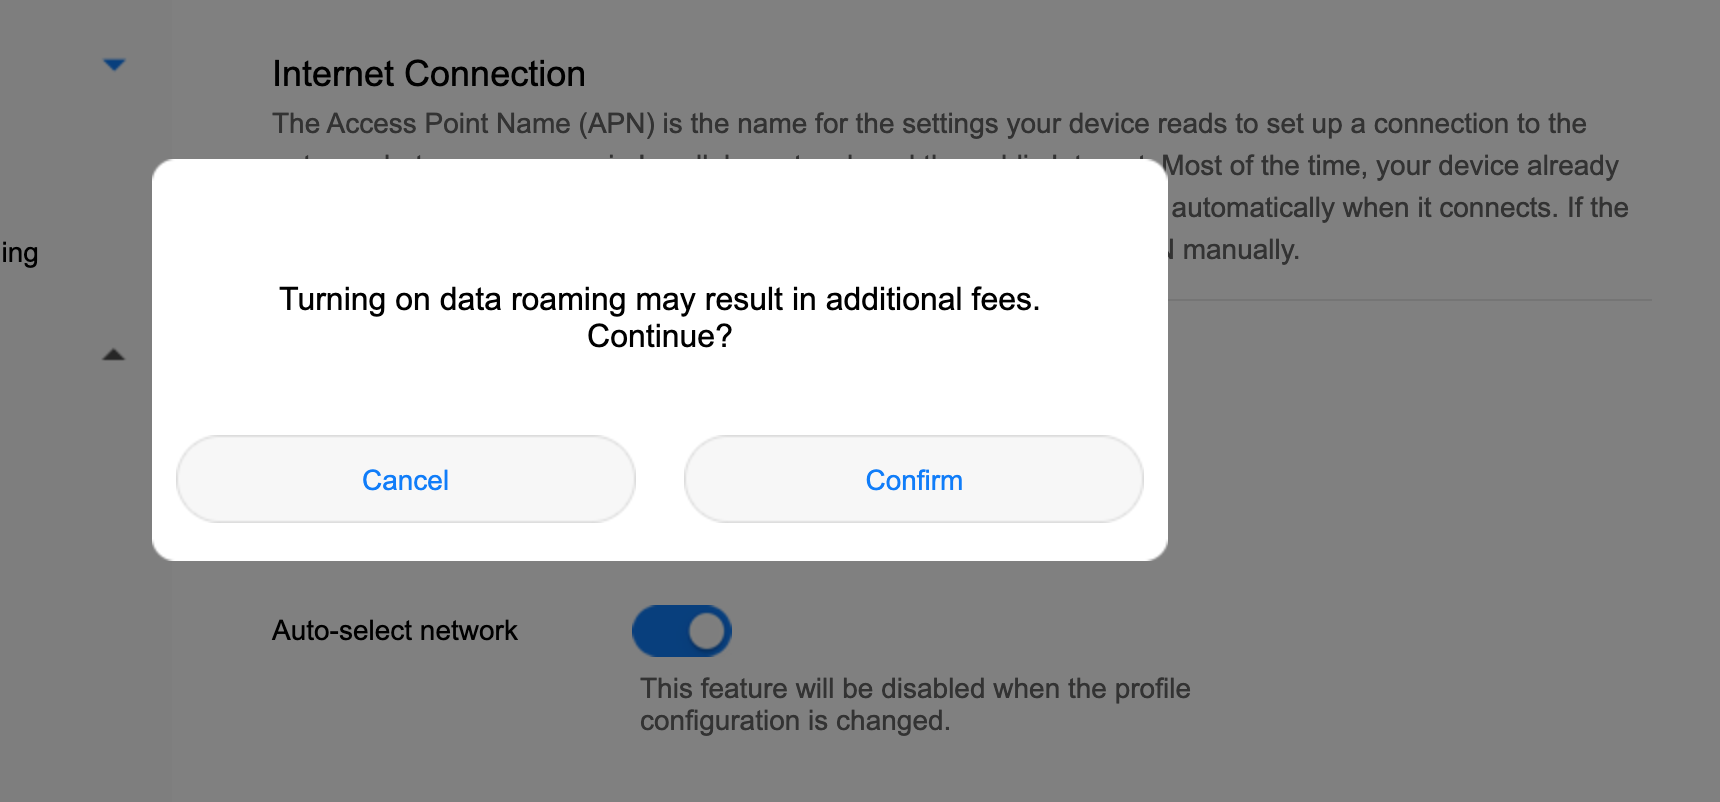
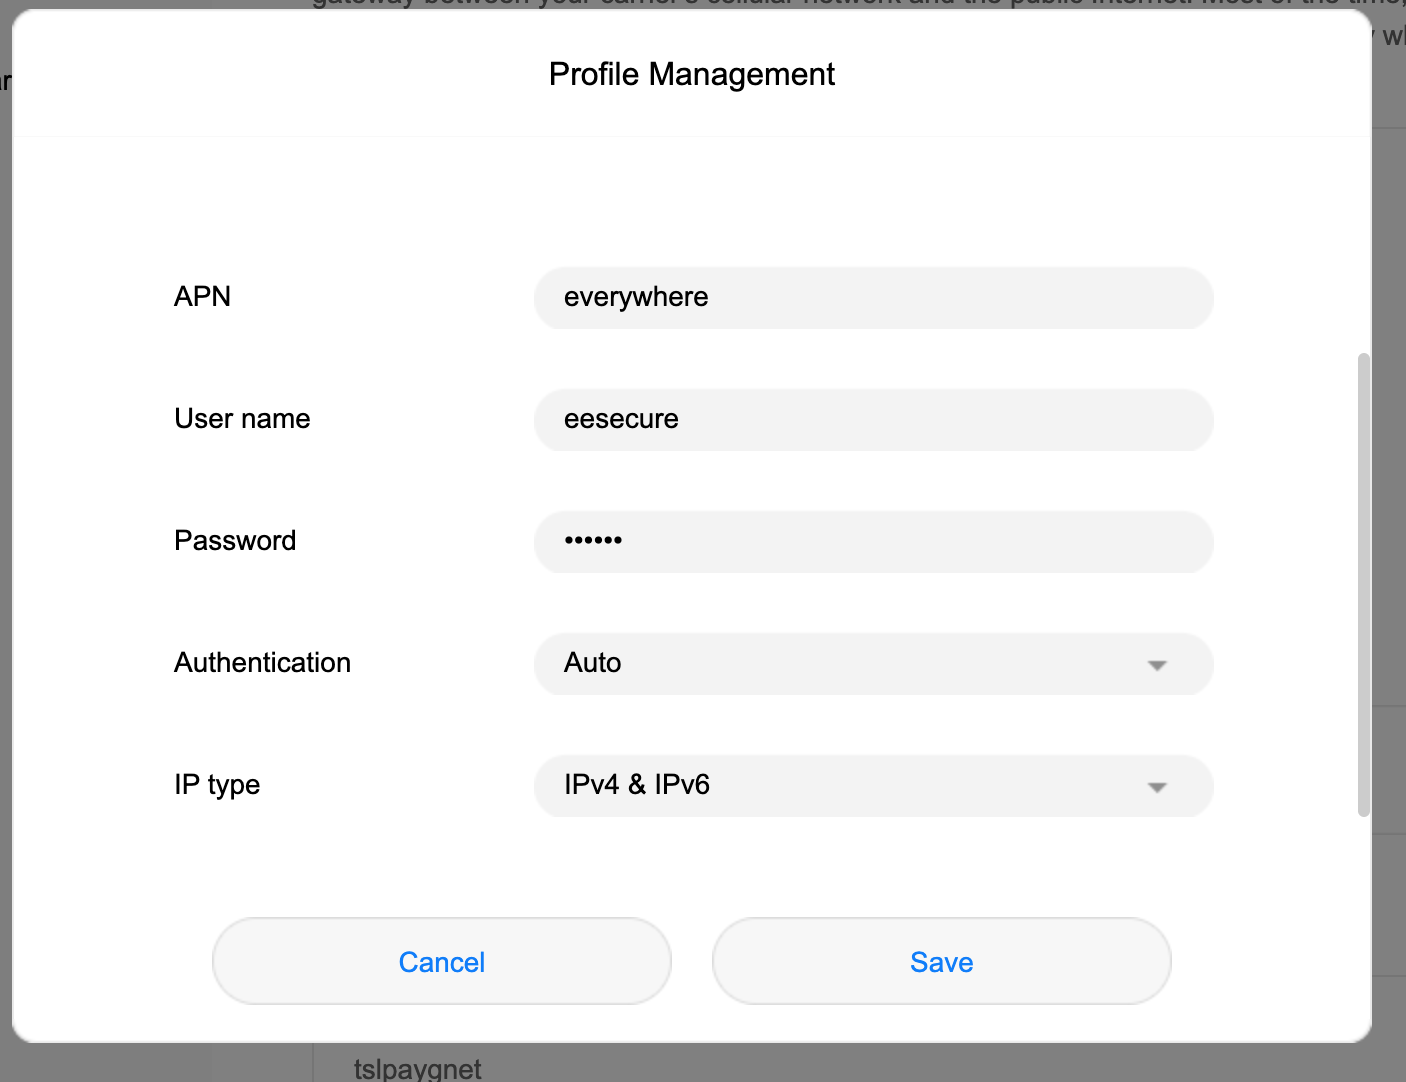
Once done, the Profile is the next thing to check. Our information is written below, and should be entered into the text boxes with the correct labels as shown in the image below.
APN - everywhere
Username - eesecure
Password - secure
Authentication PAP or Chap
This should be all you need to configure the router for an IQ SIM, if you press save and have ticked the SET AS DEFAULT button then the settings will be stored in the router and show up in the profiles menu shown in the previous step.
Step 6 - Manual network Selections
This is not necessary for configuring the router but useful information if you're roaming between countries or locations. Sometimes the routers do not automatically pick up the strongest signal, so forcing it to do a manual network selection is important. 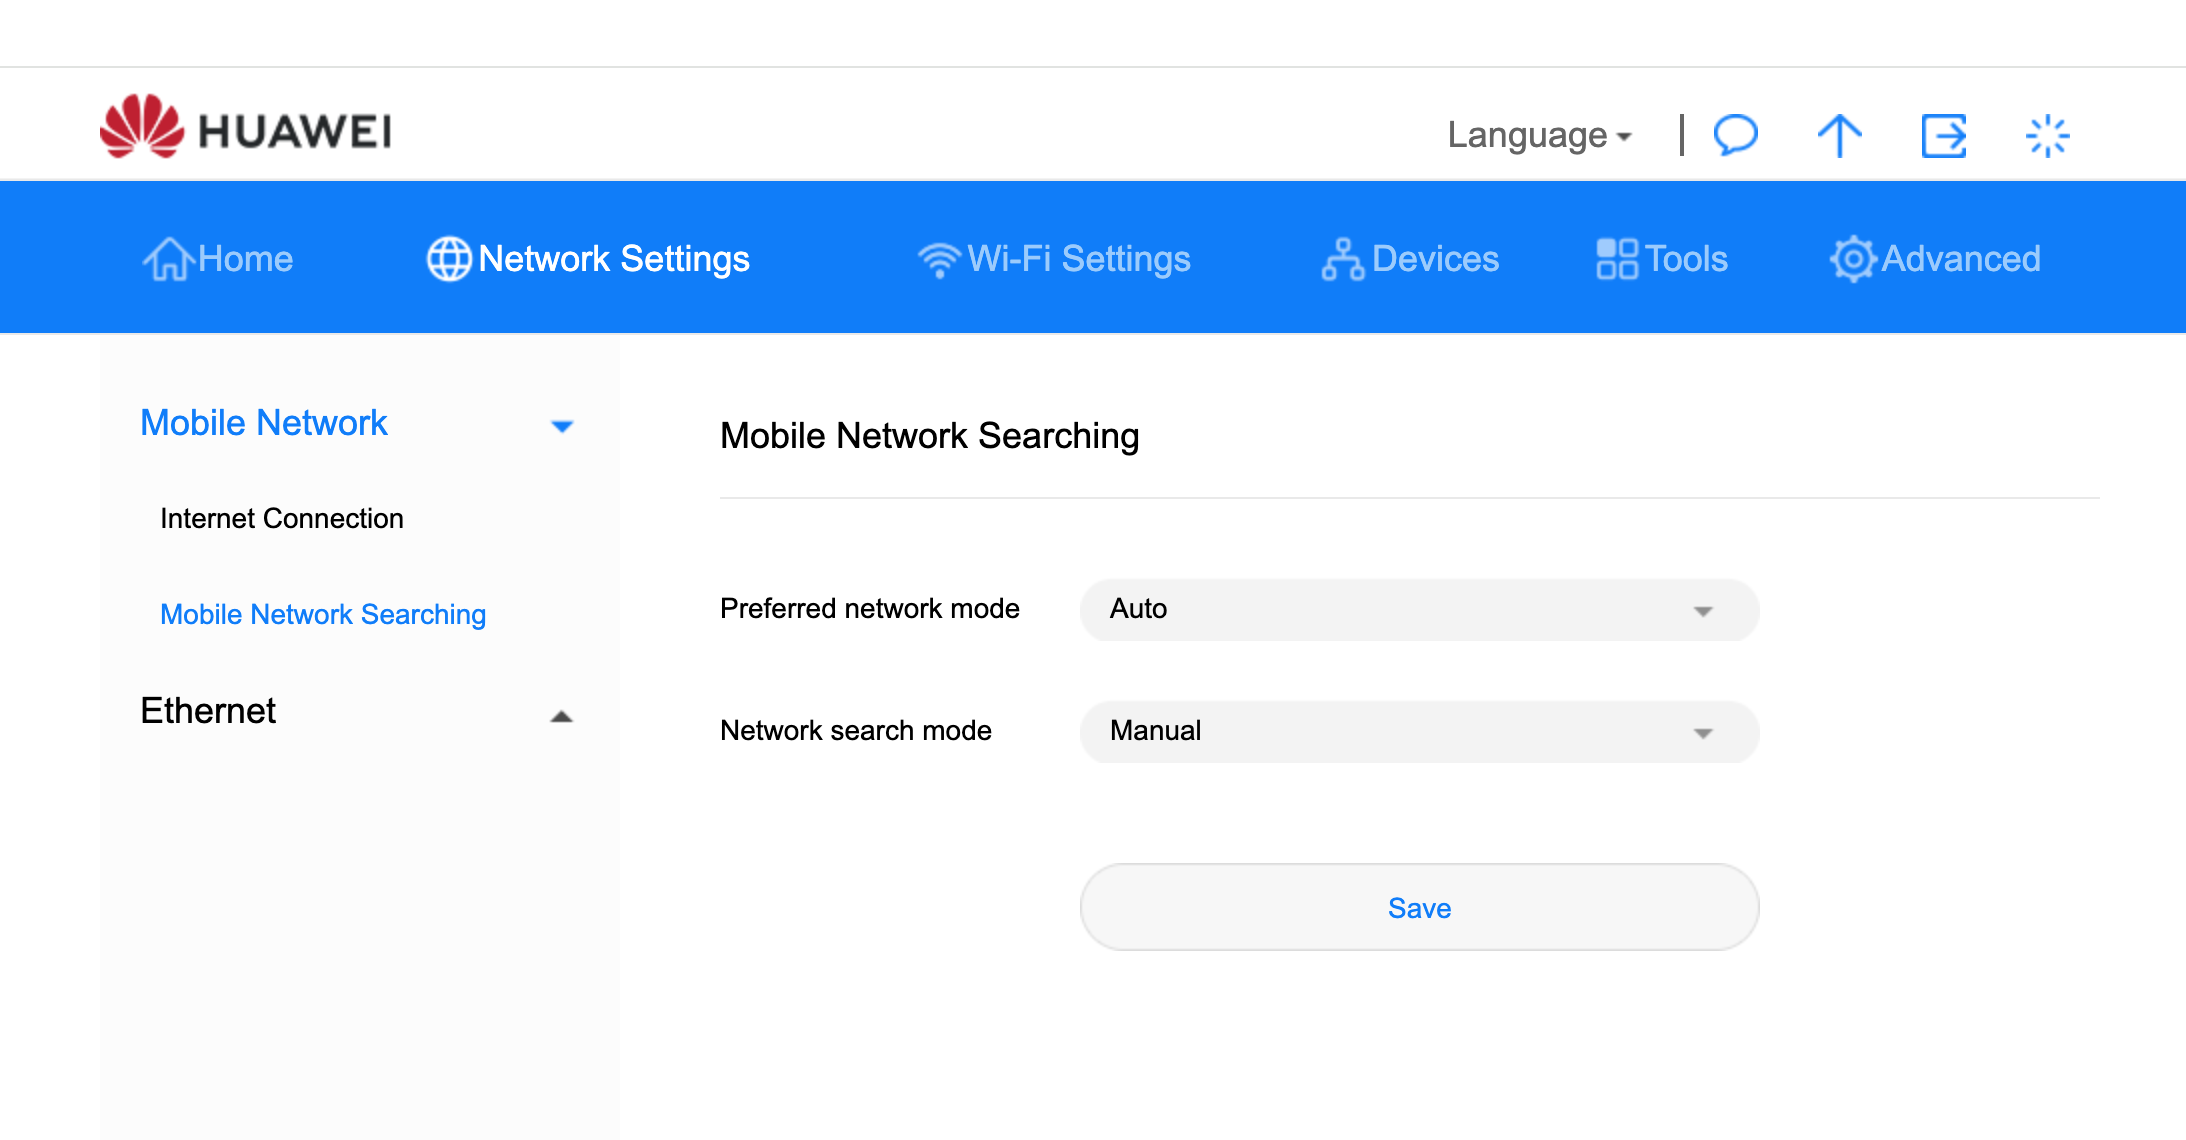
The menu is also located within the Network settings, but under MOBILE NETWORK SEARCHING shown above. If you switch it from automatic to manual then you should be able to pick which signal you're using. For example Orange France versus Bouygues Telecom, or in Spain Movistar to Vodafone etc. 
Once you have finished with all these menus and settings you should reboot the router (turning it off/on) and it should then use the new settings and show upload/download arrows as per the information on the main home screen shown below. Note, please ensure you have signal and Data allowance on your SIM. 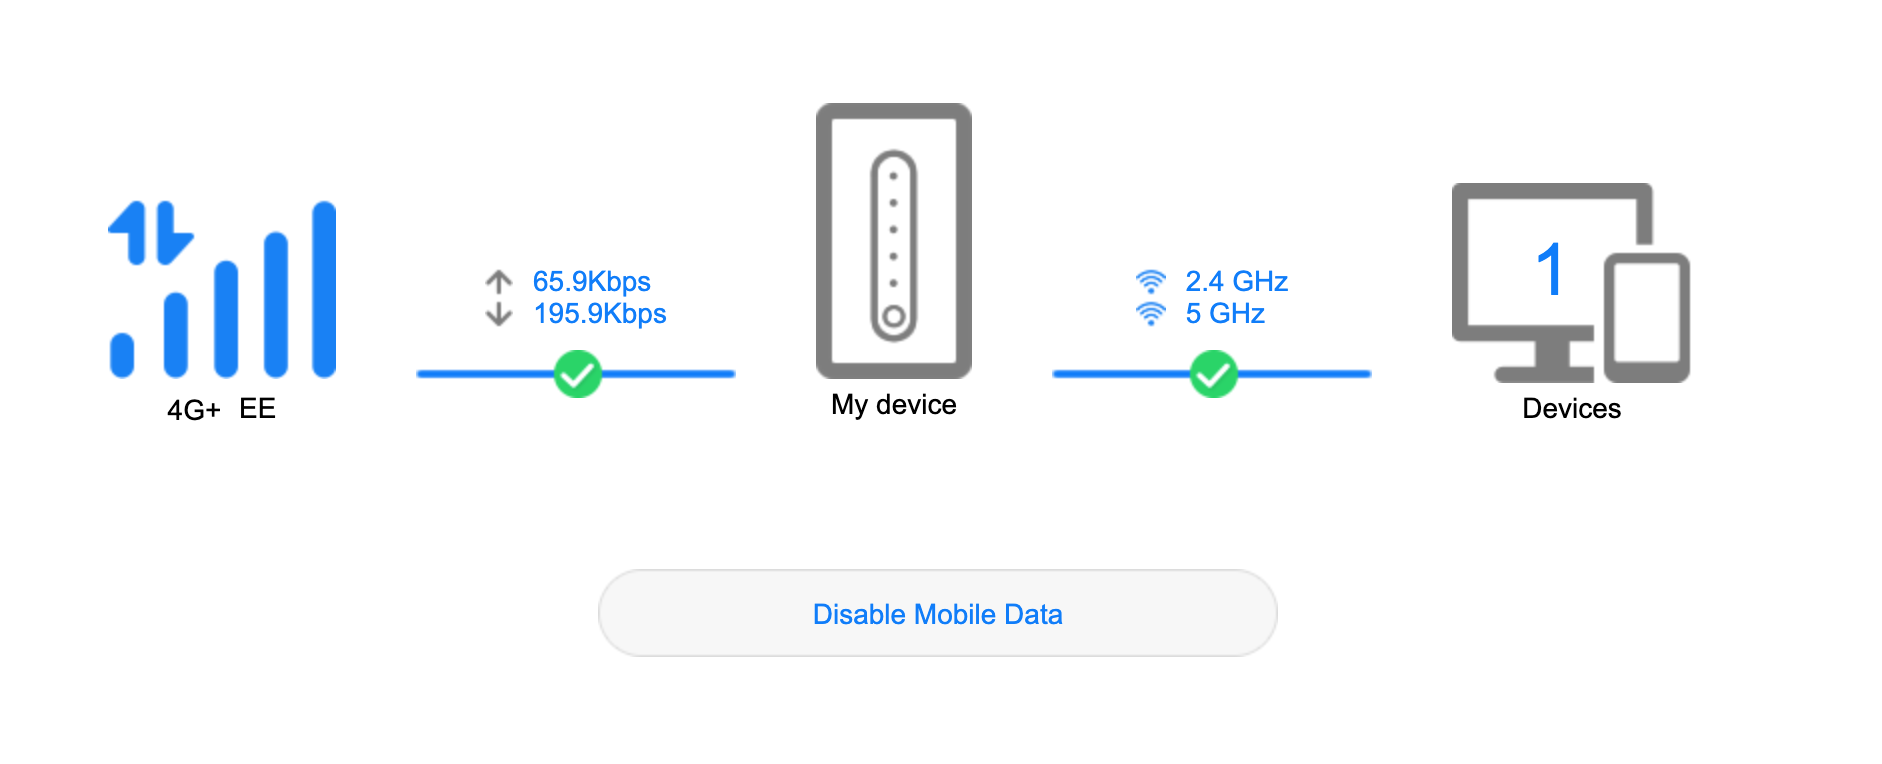
END OF GUIDE